
If you have ever used macOS, then you might be aware of the Spotlight feature. In macOS, Spotlight is the system-wide desktop search feature. Basically, It’s a selection-based search system, that creates an index of all files and Apps on the system. And, In Windows 10, now a similar feature is available as Immersive Search. Windows 10 Immersive Search is a hidden feature, which is available since April 2018 Spring Creators Update. But, still, there isn’t any direct option to activate it. So, let’s take a brief look at this feature, and you will know, how to enable it.
Note: In Windows 10, Spotlight is the name of a different feature. It does download pictures from Bing, and display on your Windows 10 Lock Screen.
What is Immersive Search Feature in Windows 10?.
Well as I mentioned, it is a similar feature to macOS Spotlight. But, If you have never used macOS. Then, here is short information about Immersive Search. Whenever we want to search for something in Windows. Then, we click on the search box on the taskbar. And, a pop-up window does appear in the lower-left corner of your screen. And, this small pop-up window does provide the ability to filter queries, by App, document, web search, folder. Even, it does provide shortcuts to your most-used Windows Apps.
But, sometimes, when you’re middle of the work. And, you want to open a file frequently. Then, It can shift your focus from work. So, to fix this problem, Microsoft created the Immersive Search Feature. After enabling the Immersive Search. When you press either Windows + S key or click on the search icon. A pop-up window will appear in the middle of the screen by default. That will provide you system-wide search feature. The best thing is, you don’t even need to close the Immersive Search Window. When your search gets complete. Just, click once on anywhere on the screen. And, the Window will get disappear.
Though, Immersive search isn’t gonna add some extra features. Basically, the search will now position at the top of the Window, Instead of the bottom left corner. It is just useful to make your workflow better. Also, now with few tweaks, you can make corner rounded of the Immersive Search Window.
Enable Windows 10 Immersive Search Feature.
IMPORTANT: I have tested the Immersive Search feature in Windows 10 version 1809. So, Make sure, you’re using Version 1809 or higher. You can check your Windows version with “winver” command in CMD. Also, at the time of writing the article, the current version of Windows 10 is 1903. In Which, Microsoft has separated Cortana and Windows Search.
Step 1: To Enable Windows 10 Immersive Search, you have to create and modify a few registry settings. So, first, do open Registry Editor in Windows 10.
Press Windows + R key simultaneously. Type ‘Regedit’ in the Run window, and press the enter key. UAC window will appear, click on Yes.
Step 2: After opening Registry Editor, It’s time to create a backup of the system registry. This step is not necessary if you do follow all the steps carefully. But still, It’s always good to have a backup.
To create a backup of the system registry, click on File > Export. Now, specify the location to store the backup. Enter the file name of the backup and then click on save. That’s it, the process will take a few minutes only.
Step 3: Copy and then paste the following path in Registry Editor Address Bar. And, Press Enter.
Computer\HKEY_CURRENT_USER\Software\Microsoft\Windows\CurrentVersion\Search
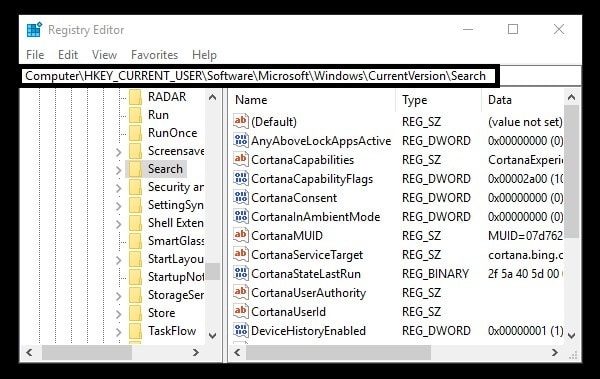
Step 4: From the left pane, click on Search Folder. After that, Right-Click on the vacant area of the registry editor window in right side. Point the mouse on ‘new’ and then click on ‘DWORD (32-bit) Value’.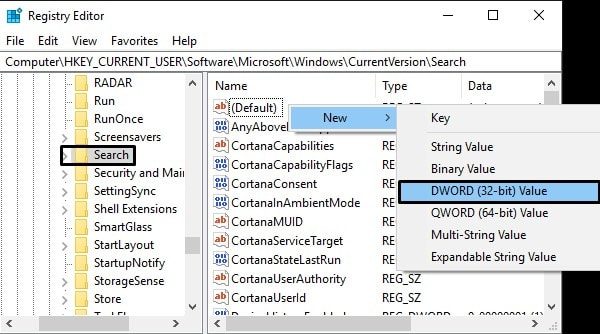
Step 5: New registry entry will get created. Name it as ImmersiveSearch.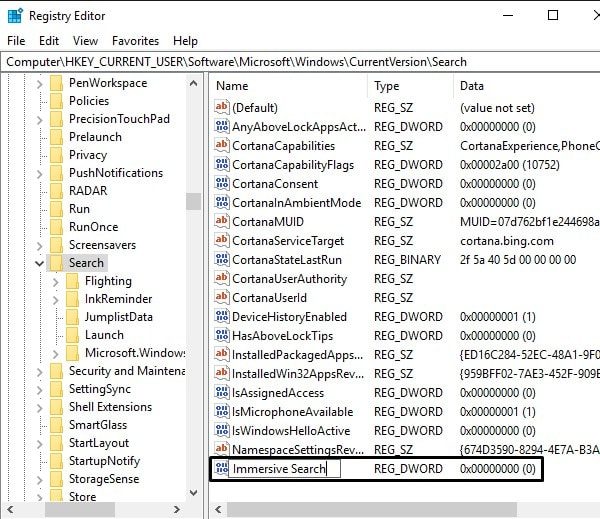
Step 6: After that, double click on ImmersiveSearch Registry Entry. And, then enter 1 in value data, click on ok.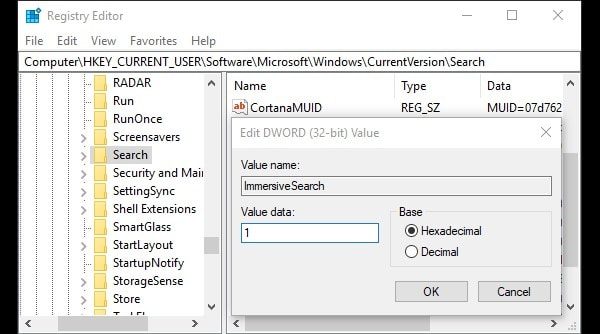
Step: 7 From the left pane, double click on the ‘Search’ folder to expand. Right-Click on Flighting, take mouse pointer on new and then click on the key.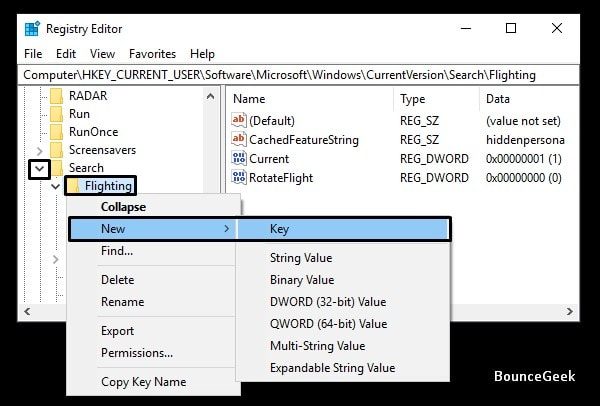
Name the newly created folder as Override.
Step: 8 Click on the Override folder, and on the right-side, right-click and create a new ‘DWORD (32-bit Value)’ entry. And, name it as ImmersiveSearchFull.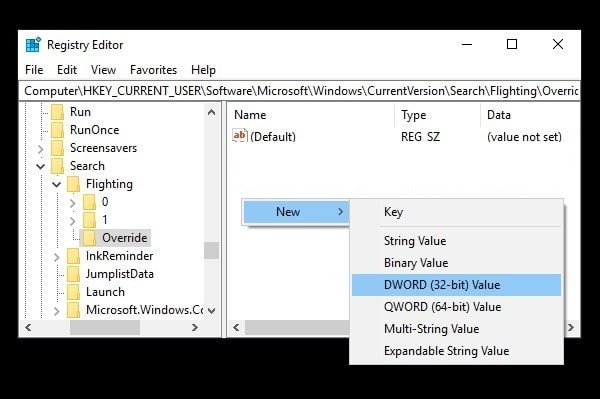

Step: 9 Double-click on ImmersiveSearchFull registry and then enter 1 in value data. Click on Ok.
Step: 10 After that, create one more DWORD (32-bit) Value registry in the same folder. And, name it as CenterScreenRoundedCornerRadius.
After that, double click on CenterScreenRoundedCornerRadius and then enter 9 in value data. Click on ok.
That’s it. now open the file menu and then click on exit.
Your full search bar will now get hide. Still, you will able to see the Cortana icon. Click on it to open Windows 10 Immersive Search. Or, press Windows + S hotkey.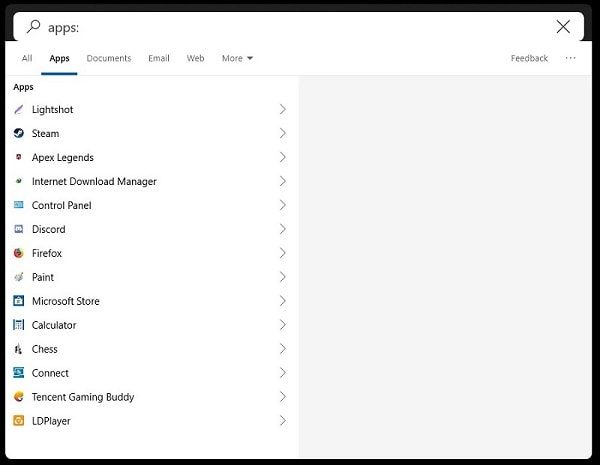
Enable Immersive Search Bar Only.
If you don’t like the full window of Immersive Search. Then, you can just enable a floating search bar. Though, it will convert into a full-fledged Immersive Search box when you search for anything. To do that, you just need to modify the registry created by you. (ImmersiveSearchFull)
1. Open Registry Editor, and open the following path in it.
Computer\HKEY_CURRENT_USER\Software\Microsoft\Windows\CurrentVersion\Search\Flighting\Override2. Double click on ImmersiveSearchFull registry key. Enter 0 in Value Data. And, then click on ok.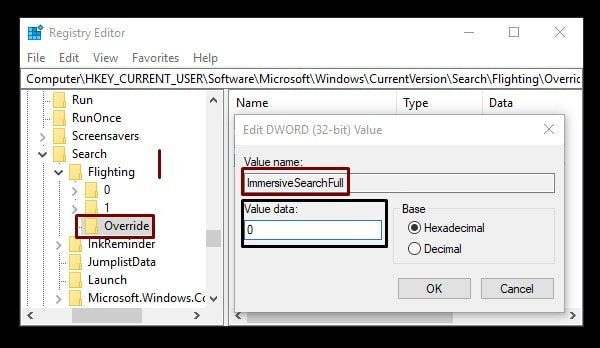
That’s it. Open the Windows 10 Immersive Search you will see changes immediately.