Device Drivers are the most important part of a Computer System. It does control a particular type of device that is attached to a Computer. An operating system also comes with many Generic Device Drivers. This means if you don’t install a required driver for connected hardware. Then, Windows automatically does install a generic driver for it. It helps devices to get work basic functionality. But, recently after Windows 10 update, many users are reporting the Generic PnP Monitor issue. This means, their monitor isn’t being recognized by Windows. Even, many Windows 11 users also experience the same after upgrading to Windows.
Undoubtedly, It is a monitor driver issue. But, we also can’t deny that it could be a hardware or cable-related issue. For some users, the device manager is showing Generic Non-PnP Monitor. Well, no need to worry. This problem can be fixed by trying out certain methods. Simply, do follow each solution mentioned in this article, one by one, until this monitor driver issue gets fixed.
What is a Generic PnP Monitor?
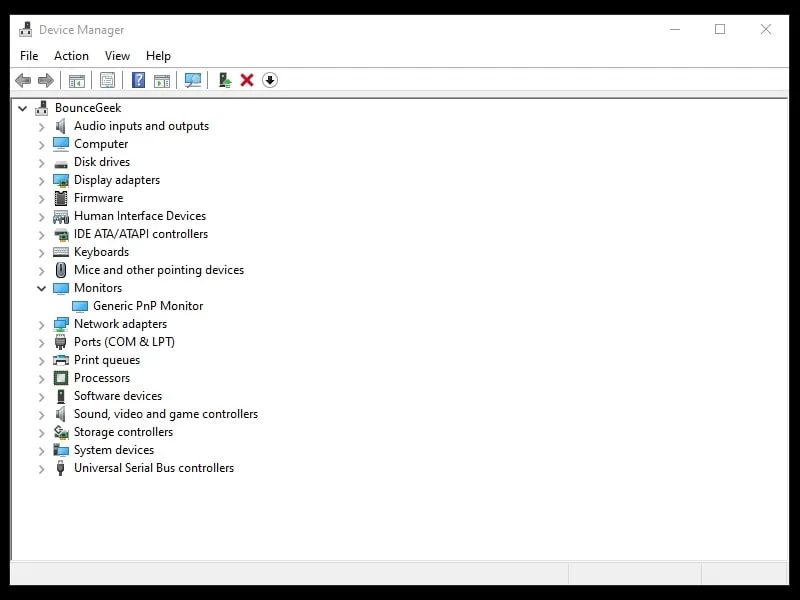
In Windows, PnP stands for Plug and Play. When you plug a PnP monitor into Windows, it starts working without having to install a specific driver. And, when the device manager shows Generic PnP Monitor, that means: Windows has installed a basic monitor driver, in the absence of the required monitor driver. A generic monitor driver provides basic functionality to the monitor.
But, with the generic monitor driver, you cannot customize display settings. You cannot set the best resolution and highest possible refresh rate. For that, you have to install the required monitor driver.
How to Fix Generic PnP Monitor Issue
Note: If you have already tried to install a monitor driver using the device manager. Then, check solution 4. I have mentioned in it how you can generate a monitor driver file and install it.
Solution 1: Reconnect Monitor, and Change Monitor Display Cable
Before moving towards some advanced solutions, let’s try some basic solutions. If you’re a desktop user or using an external display on your laptop, then this method might help you. Also, this solution will work for those, who’re facing this issue after a Windows update.
Step 1. Do completely turn off your computer. Even, remove the power cord.
Step 2. Now, unplug the video cable from the CPU. (HDMI/VGA/DVI Cable.)
Tip: If you’re using VGA Cable connect the Monitor to the CPU. Then, do use a “VGA to HDMI Converter“. And, connect the HDMI cable to the HDMI port. And, if you’re using a dedicated graphics card on your PC. Then, connect the video cable to the graphics card port, not to the motherboard display port.
Step 3. After 10 minutes, plug the video cable back in. And, turn on your PC.
Open Device Manager and find out connected monitor name is appearing in the monitor’s section or not.
Solution 2: Install Monitor Driver from Windows Optional Updates
Install Monitor Driver from Windows Optional Updates.
If you’ve recently built a PC, and using the latest Monitor with it. Then, you can easily get driver updates for it from Windows Updates. Yes, Windows has a hidden section to update monitor and chipset drivers. Windows 10/11 comes with an optional updates section in the settings app. From there, you can find a driver for your monitor. And, this will replace Generic PnP Monitor with your Monitor name.
1. Press Windows + I key in Windows 11 to open the Settings App.
2. Click on Windows Updates from the left pane.
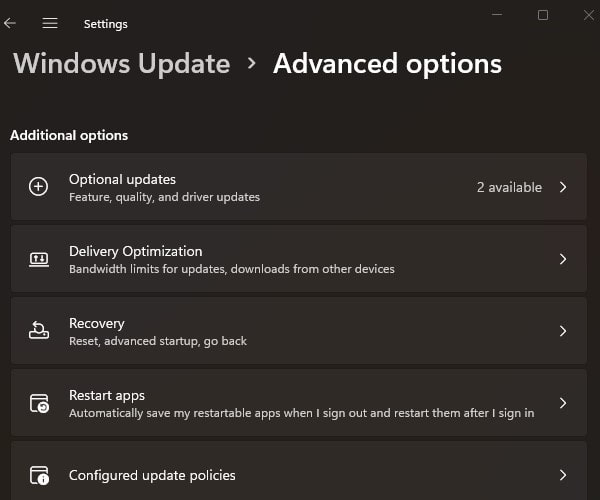
3. Now, click on Advanced Options. Now, in Additional Options, you will see “Optional Updates”.
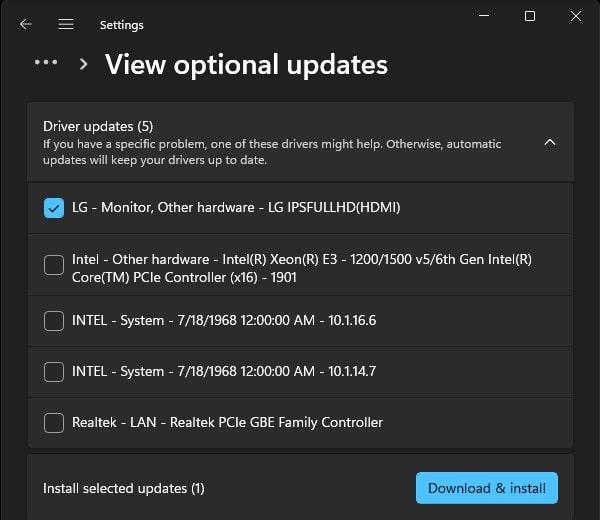
4. Click on Driver Update. Here, you will find your monitor driver. Select the driver from the list, and click on “Download & Install”.
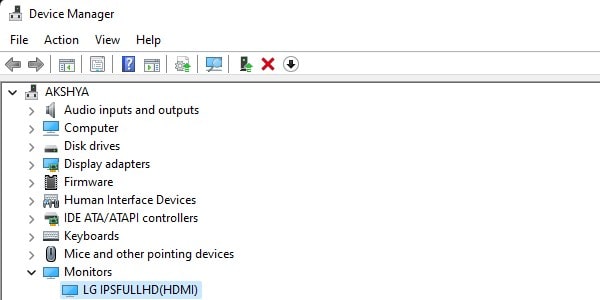
5. Once, the driver gets installed, open the device manager, and you will see your monitor name.
Solution 3: Uninstall Generic Monitor Driver
If after reconnecting the monitor or changing the display cable, if still issue not resolved. Then, you can try uninstalling the Generic Monitor Driver.
Is it safe to uninstall the generic PnP monitor driver?
You must be thinking if I uninstall the generic driver, will I lose the monitor display? The answer is no, your monitor display will not stop working. Windows will revert to either a standard driver or the same default driver that was used during the original installation of the OS. In other words, Windows will recognize it as new connected hardware and it will install the drivers automatically. Do follow the following steps:
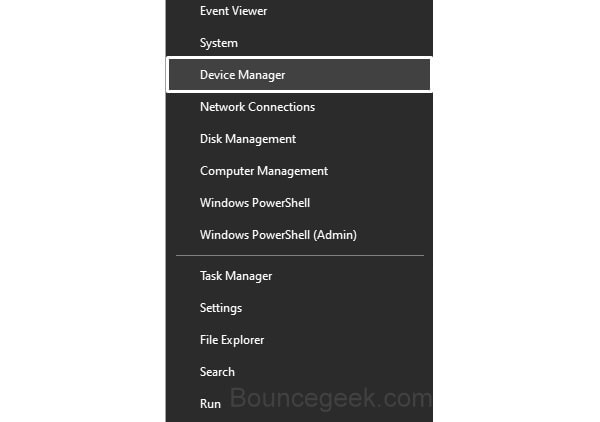
Step 1. Right-Click on the start button, and from the WinX Menu, click on Device Manager to open.
Step 2. Expand Monitors in Device Manager. Now, do right-click on Generic PnP Monitor, and then click on Uninstall device.
A warning now will appear, click on Uninstall.
Step 3. Now, click on the “Scan for hardware changes” option.
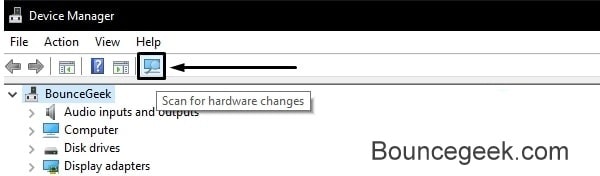
Hopefully, now Windows will now recognize the monitor and will install the real monitor driver, instead of Generic. Though, If it doesn’t work for you, then try the next method.
Solution 4: Update Monitor Driver
If the computer is not able to identify the monitor. And, if it keeps installing Generic PnP Driver, even after uninstalling. Then, the best thing you can do is, install Monitor Driver. There are two ways to update or install Monitor Driver in Windows 10/Windows 11. Either you can update using Device Manager. But, that method does not work in most cases. So, you can download Monitor Driver from the Manufacturer’s site. And, can install it manually.
Though, If you have already installed Monitor Driver manually. But still, the device manager is showing Generic Driver. Then, check our next solution, in which we have used Monitor Asset Manager. Because even I resolved this issue by using that method.
Find and Download Monitor Driver
Most Monitor manufacturer companies provide a driver CD with their product. But, If your monitor is Plug and Play compatible, then there won’t be any driver CD. Even, you don’t need to install any separate driver. You can just install the latest graphics driver.
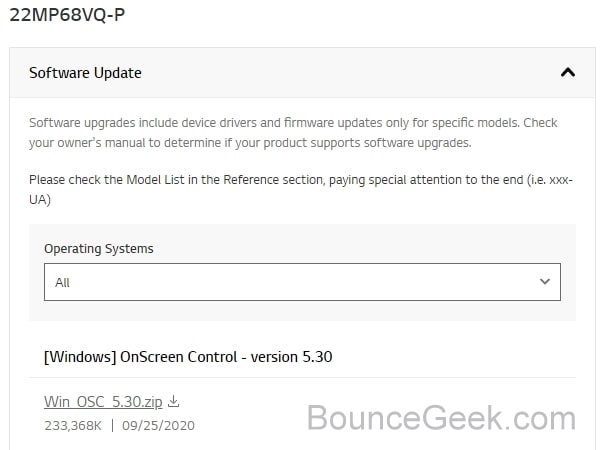
Step 1. To find out if there is a monitor driver available or not. Go to your manufacturer’s website’s software, firmware, or driver download webpage. And, search for your Monitor model number. And, hopefully, you will get the driver download link.
Important: If the problem is with a laptop, then you can go to the laptop manufacturer site and from your laptop support page. You will get all the required driver’s download links. To install all display-related drivers.
In my case, I am using LG 22MP68VQ Monitor. And, LG provides an OnScreen Control software for it. That helps to manage the Monitor refresh rate, brightness, and everything else.
Step 2. If the monitor driver file is in .exe format. Then, you can directly run it and install it on your PC or laptop. But, if it is an INF file, then you can use the device manager to update it.
Update Monitors Driver using Device Manager
Step 1. Open Device Manager.
Press Windows + X keyboard shortcut.
Click on Device Manager.
Step 2. In Device Manager, click on monitors to expand.
Step 3. Right-click on Generic PnP Monitor driver and then click on Update driver.
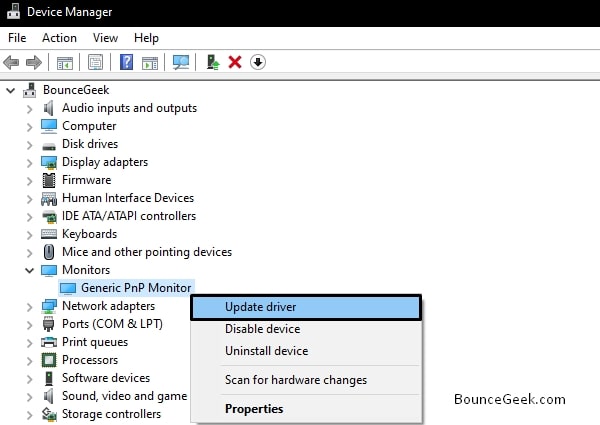
Next, click on “Search automatically for drivers”.
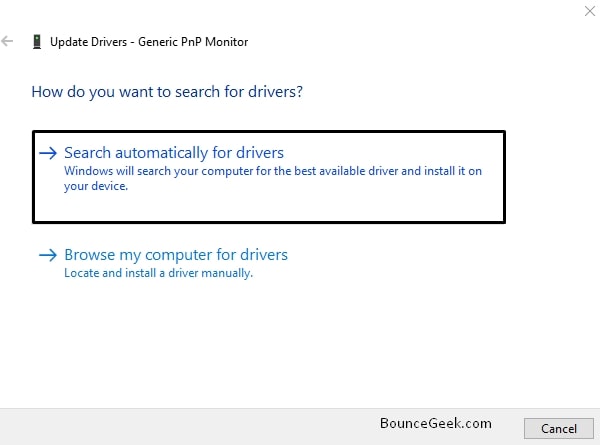
Windows will now find the latest driver for your monitor and install it on your system.
Though, If Windows says “The best drivers for your device are already installed”. In that case, follow this: (Though, this will only work, if your monitor name was appearing before. But, after the Windows update, the Generic driver got installed.)
Step 1. Again open the Driver Update window of the Generic Monitor Driver. And, this time, click on Browse my computer for drivers.
Step 2. Click on Let me pick from a list of device drivers on my computer.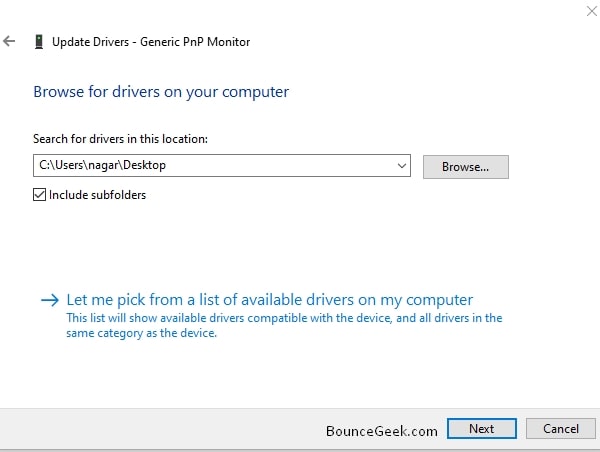
Note: If you have a driver file, then select by clicking on the “Have Disk” option and then click on Next to install.
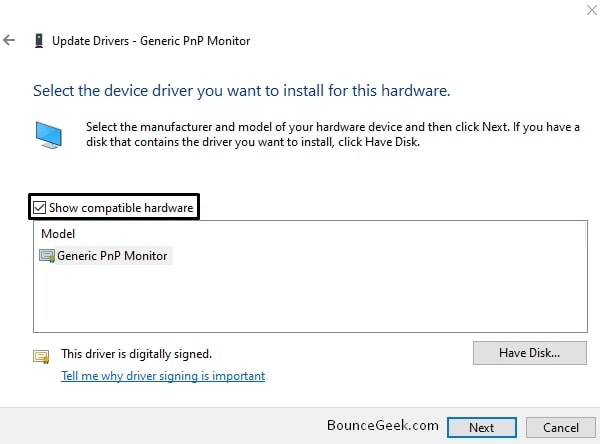
Step 3. Mark the “Show compatible hardware” option. And, If your monitor driver appears in the list, then select it and install it.
Well, If this doesn’t work, then you can try our next method. That will definitely work.
Solution 5: Create a Driver File using Monitor Asset Manager
Change the Startup Settings in Windows
Before installing the monitor driver, first, you need to disable driver signature enforcement from Startup Settings. Else, during installation, you will get an error “Windows encountered a problem installing the drivers for your device. The third-party INF does not contain digital signature information”. Because, we are going to create a driver file for the monitor, which will not digitally be signed.
Disable driver signature enforcement
Step 1. In Windows, Click on the start, then click on the power. Now, press and hold the Shift key and click the Restart button.
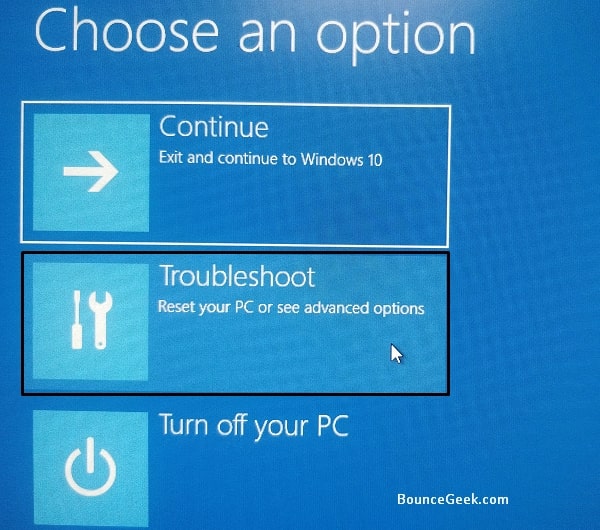
Step 2. Wait for a few seconds, a new window will appear to ask you to select an option.
Click on Troubleshoot.
Step 3. Now, click on Advanced options > Startup Settings.
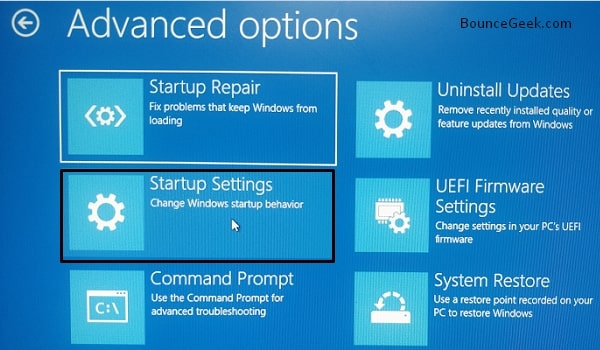
Click on “Restart”.
Step 4. Now, Windows’s Startup Settings will appear, now, to disable driver signature enforcement. Do press the F7 key.

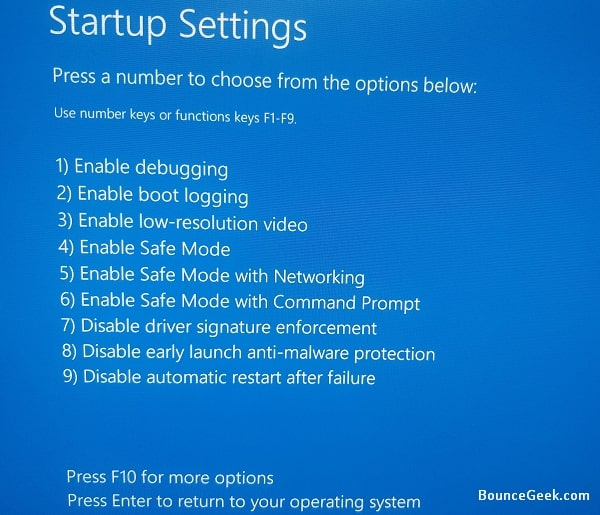
That’s it, Computer will now restart. And, now you can install any unsigned drivers.
Create INF File
INF File or as known as a setup information file is a plain-text file used by Microsoft Windows. It is most commonly used for installing device drivers for hardware components. So, we are going to create a monitor INF file. And, after that, we will install it from the device manager. And, that will fix the Generic PnP monitor problem.
Download: Monitor Asset Manager.
Monitor Asset Manager is a PnP monitor information utility. It shows detailed technical information about the target display device and its capabilities. And, with that, you can create a Monitor Driver (INF) File.
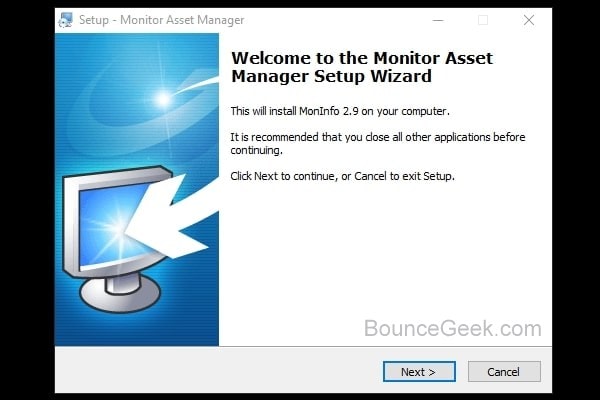
Step 1. First, download and install Monitor Asset Manager on your Windows PC.
Step 2. Open the MAM utility, and it will show you complete display information.
If it doesn’t click on view > refresh.
As you can see in the screenshot, it is showing the correct information about my monitor, instead of the Generic PnP Monitor. So, I can continue this process.
Step 3. You will notice a Display ID section. Here, you will notice multiple display ID entries. On my PC, it is showing Real-time information about my connected monitor. So, I am selecting it to create an INF file. Though, you can create an INF file from the Registry Active display ID also.
Click on File > Create INF.
Select Desktop and Click on Save.
Install Monitor Driver
Step 1. Right-Click on the Start button and then click on “Device Manager”.
Step 2. Expand Monitors Section, now, right-click on Generic PnP monitor. And, then click on Update driver.
Click on Browse my computers for Drivers.
Step 3. Next, click on Let me pick from available drivers on my computer.
Step 4. Now, Click on Have Disk.
From the “Install from Disk” window, click on Browse. And, do select monitor.inf file from the desktop. Which you have created using Monitor Asset Manager. And, after that, click on ok.
Click on Next.
Step 5. A Windows Security Warning will now appear. Click on “Install the driver software anyway”.
That’s it, you will now get a message, that “Windows has successfully updated your drivers”.
And, now instead of Generic PnP or Non-PnP Monitor, the name of your Monitor will appear. So this was the way to update Monitor Driver.
Solution 6: Update Display Adapter Driver
If you’re using a dedicated NVIDIA Graphics Card on your PC. And, your monitor is also connected to it. Then, you can update the Graphics Card Driver instead of the Monitor. Graphics Card software will help you to manage your monitor settings. For instance, I can change resolution, set up multiple displays, and change the refresh rate, all is possible with the NVIDIA Control Panel. So, do the open device manager, and find out your Graphics Card information. And, download and install its driver from the manufacturer’s site. If you’re using a laptop then you might have to update both integrated and dedicated graphics card drivers.
Solution 7: Run SFC Scan
If you think driver files got corrupted due to some reason. Then, you can run the system file checker tool in Windows. It will work as an automatic troubleshooter. SFC Scan is designed to scan for corrupted system files. As you know drivers are also part of the system. System File Checker utility also repairs files automatically. So, if nothing works, you can give it a try.
Step 1. Click on the start button, and search for CMD. And, then click on “Run as administrator”. You can also use Windows PowerShell
Step 2. In Command Prompt, type the following command to run SFC Scan.
sfc /scannow
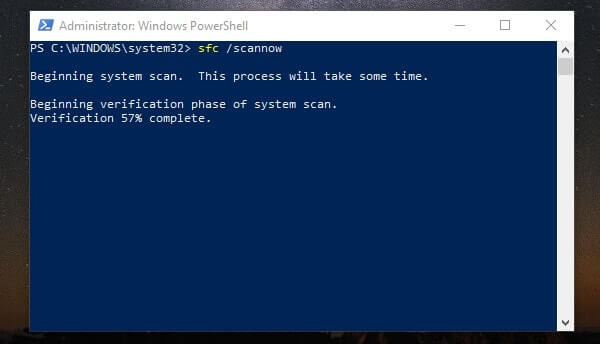
Wait for the SFC scan to get complete, don’t interrupt the process.
I hope you’re able to fix the Generic PnP Monitor issue on your PC or Laptop. If you have any queries related to this Windows 10/Windows 11 problem, you can leave a comment. Moreover, you can also overclock monitor refresh rate.