
Undoubtedly, SSDs have now overtaken HDDs. Mainly, Windows users have switched to SSD to make their Old Laptops faster. Because SSDs does perform significantly better than HDDs. But, if you’re using SSD on your Windows PC or Laptop for quite a long time. Then, you should consider checking SSD Health. Because over-time SSD health starts decreasing and you will begin to experience major performance issues. Like Hard Disks, Solid-state drives are also prone to physical damage and data corruption.
Well no worries, in this article you will find multiple ways to check SSD health on Windows 11. And, you will also find some solutions to Fix your SSD’s health and performance.
What is SSD Health?
SSD Health is just a term used to find whether SSD is working at its full potential or not. And, SSD Health is completly different from Battery Health. Because, SSD Health can be improved, but battery health cannot be. SSD Health Check is used to identify issues like SSD Damage and Data corruption. SSD Health starts decreasing when you use 80% of its storage capacity over time. And, you will start seeing a decrease in Windows Performance.
By checking SSD Health you can detect if there are any bad sectors. And, it will also show you the overall health state of your SSD – whether it’s good or bad. Yes, like HDD, your SSD also can be physically damaged due to short circuits in the CPU. Or, due to Water.
Checking overall SSD Health isn’t enough. You should also check your SSD Read/Write Speed. So that, you can determine whether the given SSD transfer speed by the manufacturer is accurate and functional. If you experience very slow data transfer speed, that means your SSD Health is Bad.
Check SSD Health on Windows 11 PC
Note: To keep SSD Healthy do create partitions of it, as per SSD Size. Too many partitions also can make SSD drive unhealthy. You can read my article to create a new SSD Partition on Windows 11.
Method 1: Use Terminal to Check SSD Health
Windows 11 comes with a built-in command line tool to check Solid State Drive Health. It is known as S.M.A.R.T. (Self-Monitoring, Analysis, and Reporting Technology). SMART technology is designed to predict SSD and HDD failure. You can run the command either Command Prompt or Terminal.
1. Right-Click on the Windows Icon and after that click on “Terminal (Admin).
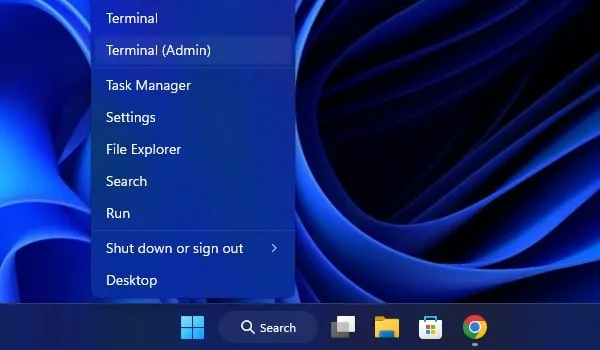
UAC Window will appear, click on Yes.
2. Now in Windows Terminal do type the following command and Press Enter.
WMIC
3. Once, WMIC Interface gets opened, do type the following command, and press enter key.
diskdrive get status
4. You will now see the status of all drives connected. Since I am using SSD and HDD together. That’s why it’s showing OK two times.
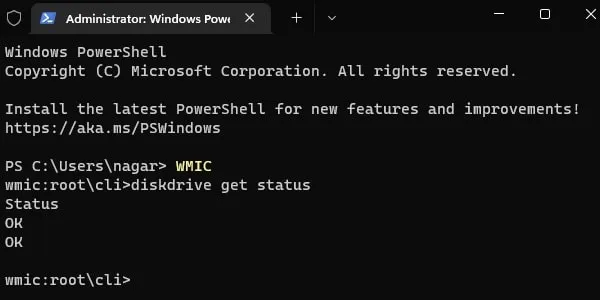
OK – It means your SSD is healthy and it is working at its full potential.
Pred Fail (aka Prediction Failure) – It means your SSD is unhealthy. And, you might experience SSD failure anytime soon. I
If your SSD or Hard Drive shows Pred Fail, and you have lost some important data. Then, you can recover files from Hard Drive using Remo data recovery software.
Note: If you see “Pred Fail” status then do backup all your important data. And, after that format your SSD. Or, transfer data to a new SSD Drive.
Method 2: Install Crystal Disk Info Application
If you are not able to run the command to check your Solid State Drive Health. Then, you can use the CrystalDiskInfo application to check the exact health percentage of your SSD. It is an MIT-licensed S.M.A.R.T. utility. That reads and monitors all types of SSD and HDD status. Apart from normal HDD and SSD, it also does support NVMe drives.
1. First, download the latest version of CrystalDiskInfo from its official website.
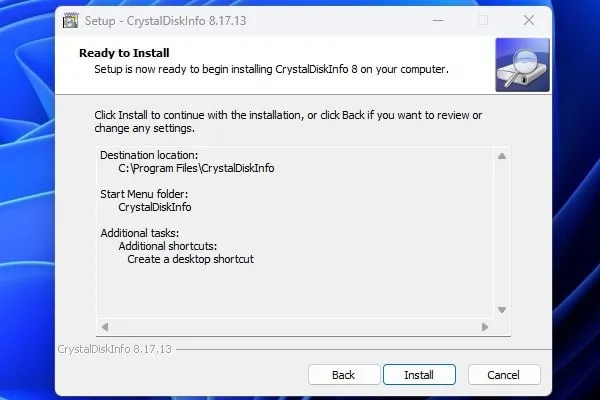
2. Once the setup file gets downloaded, do run it as administrator. UAC window might appear, click on Yes.
3. CrystalDiskInfo Setup wizard will get open, do follow the instructions that appear on the screen and install it.
4. Once App gets installed launch it. And, it will immediately show you SSD Health Status.
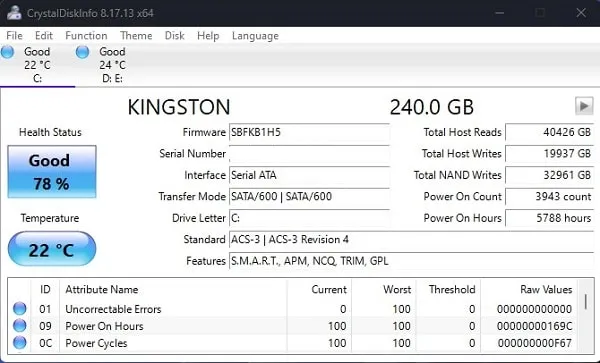
5. If multiple drives are connected to Computer. Then, below the menu bar, you will see the option to switch drives.
Although, the app only shows the health percentage for SSD Drive only. For HDD, you will only see health status. Apart from drive health it also shows so much useful information about your drives.
Method 3: Use the dedicated SSD Manager App
If Crystal Disk Info App isn’t showing you the required information about your SSD. Then, you can use the SSD Manager App provided by your SSD manufacturer. Yes, every SSD Manufacturer offers a dedicated app to monitor and manage SSD drives.
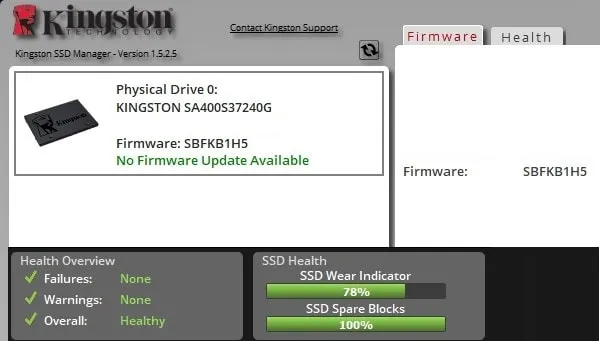
Kingston SSD
Like, For Kingston Drive, there is a Kingston SSD Manager App available. Which does show overall health and allows you to update SSD Firmware. Even, it also shows the SSD Wear Indicator, which displays the remaining write endurance of the drive.
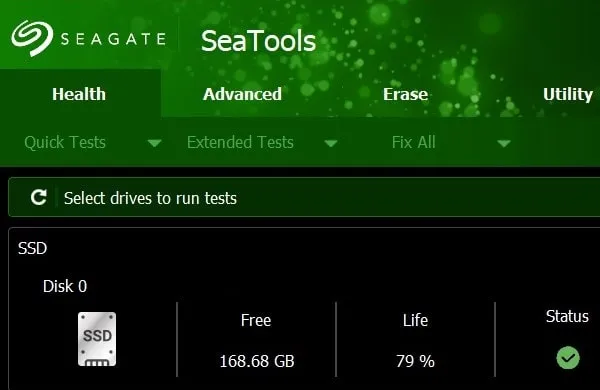
Seagate SSD
Similarly, for Seagate SSD/HDD, there is a SeaTools app available. It allows you to perform Short Self Test and read/write tests on Seagate Drives. It also used S.M.A.R.T. indicators to extract drive information.
So, first do find out your SSD Manufacturer details and then you can download the SSD manager software for it.
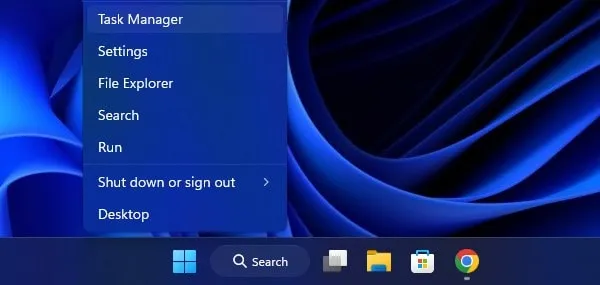
1. Right-Click on Start Button and after that click on Task Manager.

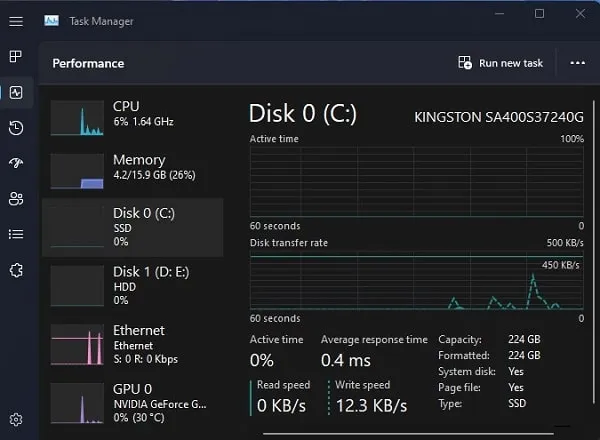
2. From the left pane, click on the Performance tab.
3. After that, select disk and you will see the disk name. If instead of disk name, you see model number then do search it on the internet. And, you will find your SSD/HDD manufacturer.
4. Yes, you can also use the CPU-Z app to get more information about your disk. And, once you find the disk manufacturer’s name then you can download App to manage SSD.
Defragment and Optimize SSD Drives
In the latest Windows 11, you can optimize the drive to run your computer efficiently. Even, Windows will tell you when a drive needs optimization. Optimization basically does improve read/write speed and windows will boot faster. Also, you will see a little bit of improvement in SSD Health.
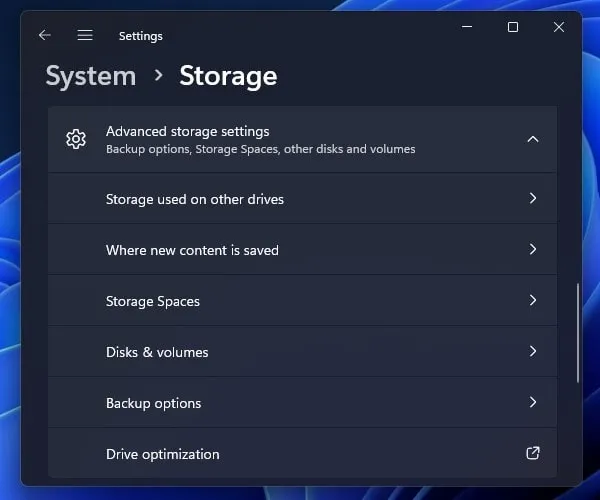
1. Press Windows + I key to open Windows 11 Settings App.
2. Click on Storage.
3. Now, click on Advanced storage settings > Drive optimization.
4. Optimize Drives window will appear, do select your SSD Drive and click on Optimize.
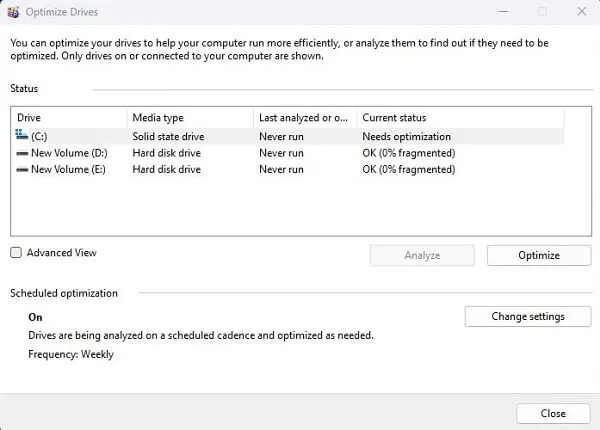
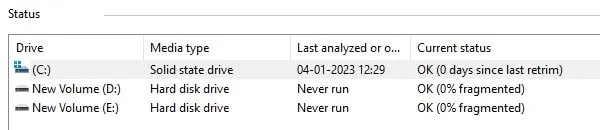
5. Once, Optimization gets completed, you will see “OK” in the current status.
You can also enable auto-optimization. Click on Change Settings. And, after that, select your optimization preference and click on OK.
Insightful Advice from Hamid Imtiaz, CTO at Remo Software
“For a comprehensive SSD health check on Windows 11, utilize your SSD manufacturer’s dedicated optimization and update utilities. These tools, available on the manufacturer’s official website under the ‘Support’ or ‘Download’ sections, offer detailed health insights, quick and deep tests, and firmware updates. Whether you own a Crucial, Seagate, Samsung, or another brand of SSD, these utilities provide a more thorough examination, ensuring your SSD remains in peak condition.”
Conclusion.
Okay, so that’s how you can Check SSD Health on Windows 11 PC. And can optimize your SSD Drive for better performance. To make SSD drive healthy, you have to make sure of these things. Keep monitoring SSD Temperature and make sure it doesn’t get too hot or cold. Do not store data in the full capacity of SSD. Also, avoid physical damage, and don’t unnecessarily dissemble your CPU and laptop parts. Moreover, make sure your SSD Firmware is up-to-date.