Do you want to create a new drive on Windows 11? Then, this article will help you to create a new hard drive or SSD partition on Windows 11.
If you have a larger disk then it’s better to create a partition to manage data on your Windows 11 PC. When you build a new PC or attach a new SSD/HDD, you will find only a single partition. In which you do install Windows. You should never store your personal data in a Windows drive. Because you can lose data during a clean installation of Windows OS. That’s why it’s important to create multiple partitions when you have a larger disk with enough free space.
Why should you create Partitions of Hard Drive or SSD?
- Creating a new HDD or SSD partition can be helpful when you want to dual-boot Windows.
- If the C drive is taking up the entire space of your SSD. Then also, you can create a new drive from C drive to store your data in a separate drive.
- It prevents data loss during Windows Installation.
- Storing all data and programs in C drive can slow down your Windows. That’s why partition is important.
- If you’re a Gamer, then you should create a separate drive for your Games.
- You can put labels on partitions to manage your data. (Like, Games, Movies, TV Shows, Personal Files.)
How many HDD or SSD Partitions you should have?
It completely depends on Hard Disk and SSD Size. If you’re using SSD for Windows and HDD for storing data. Then, do create partitions on Hard Disk only.
If you have a 2TB hard drive, then you can create four partitions of 500GB. Similarly, if you have a 1 TB hard drive, then you can create 3 partitions of approx 330 GB. But, if you have a small SSD 128 or 256GB, then don’t create partitions. Don’t forget to give at least 100-200 GB space to C Drive.
Use Disk Management to Create an SSD Partition on Windows 11
In Windows 11, almost all old Windows Apps get updated including Notepad, File Explorer, and Task Manager. But still, the Disk Management app is still the same. Yes, you can use a third-party app to create a new drive on Windows 11. But, the Disk Management app is still quite powerful and easy to use. With it, you can create, shrink and resize partitions.
Shrink an SSD or Hard Drive on Windows 11
1. Right-Click on Windows 11 icon and then click on Disk Management.
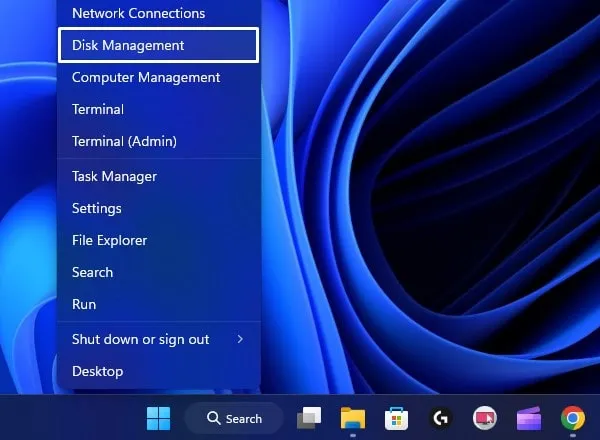
2. Disk Management app will get open. You will now see all installed disks on your Computer.
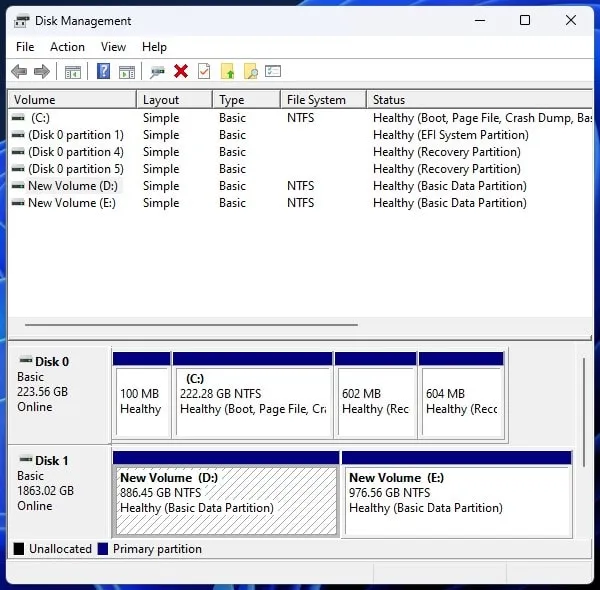
As you can see currently, there are two disks attached to my PC. Disk 0 is SSD and Disk 1 is HDD. So, I am going to create a new drive from HDD. Because it has enough space.
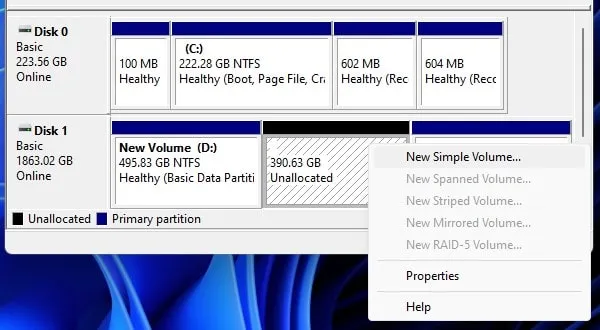
3. Right-click on the “Healthy(Basic Data Partition)” drive, which has enough space. Click on “Shrink Volume”.

4. A new window will appear to shrink the drive. Here you have to enter the amount of space to shrink in MB. Basically, whatever amount of space you will enter will get subtracted from the selected drive.
Since the drive size was 886.46 GB. So, I am entering 400000 MB, which will be approx 400GB.
5. Click on Shrink.

6. A new unallocated space will get created. Wait, You will now not see the new drive in File Explorer. Because first, you have to create a New Drive from the Unallocated Space you created.
Create a New Drive using Unallocated Space
1. Right-click on the Unallocated Space and then click on “New Simple Volume”.
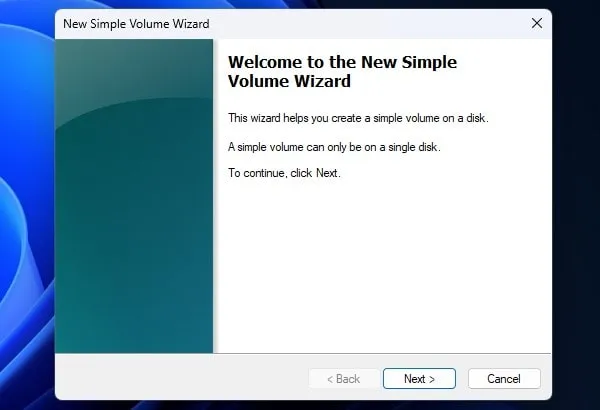
2. New Simple Volume Wizard will get open, Click on Next.
3. Specify Volume Size window will appear. Click on Next.

Note: From here you can choose how much size you want to assign to the new drive. It is useful if you want to create two drives from the unallocated space.
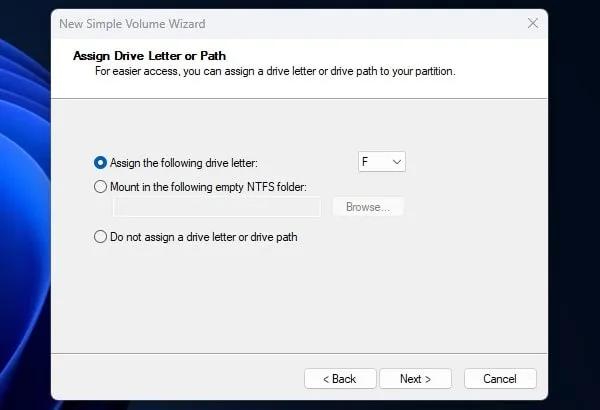
4. Assign Drive Letter or Path window will appear, you can assign a letter of your choice to the new Windows 11 drive. Or, keep it default and click on Next.
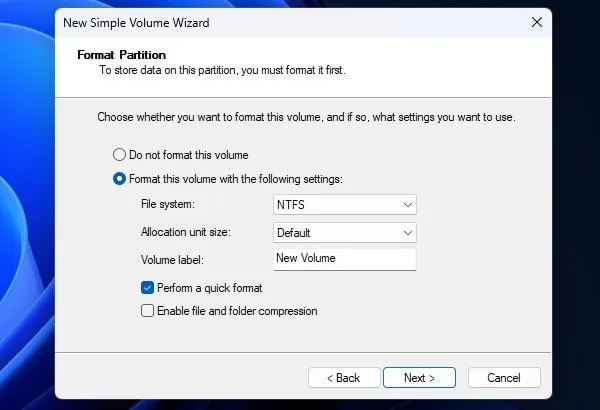
5. On the Format partition window make sure NTFS File System is selected and click on Next.

6. Final window will appear, which will show you all the selected settings by you, click on Finish.
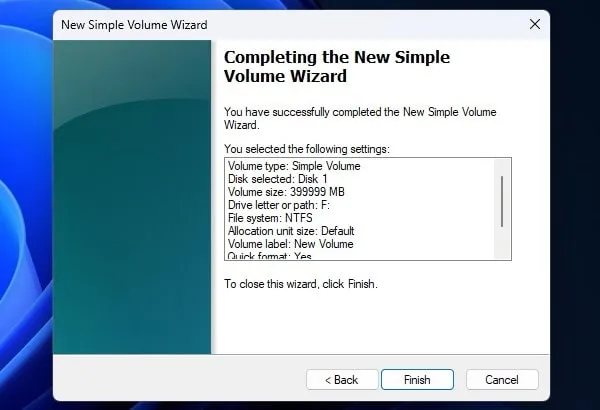
7. Wait for a few seconds. Once, a new drive gets created the File Explorer will get open automatically.
That’s how you can create a new Drive using Disk Management.
Rename New Drive Windows 11
The new Drive will be shown as New Volume. So, if you want to rename it or label it for managing multiple drives. Then, do follow these steps:
1. Open File Explorer, and click on “This PC” from the left pane.
2. Right-Click on the newly created drive and then click on Rename Icon.

3. Now, enter a new name for the drive and press enter.

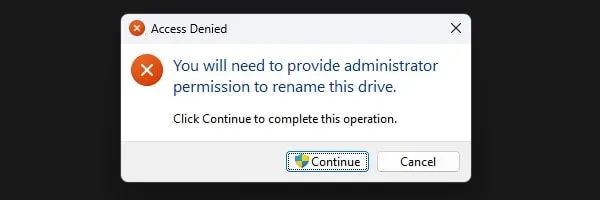
4. Access Denied Window will appear, click on Continue.
So, that’s how you can rename the drive name in Windows 11.