Is your CPU Turning On and Off Repeatedly, after you press the power button to turn it on? And, nothing appears on the computer screen. And, even the keyboard mouse doesn’t show any light. Then, no worries, this problem can be fixed. Just follow the solutions mentioned in this article to boot your computer normally.
Usually, the CPU Turns ON and then OFF, when the hardware isn’t connected properly, especially RAM. Mainly, this issue is faced by PC users. But, laptop users also can face such issues due to improper BIOS settings, memory, or OS-based issues. In some cases, the high temperature of hardware parts like CPU/GPU also can be the cause of this problem. However, whichever are the causes, here are the solutions that can fix your CPU.
SOLUTIONS: CPU Turning ON and OFF Repeatedly
1. Connect the RAM Stick Properly
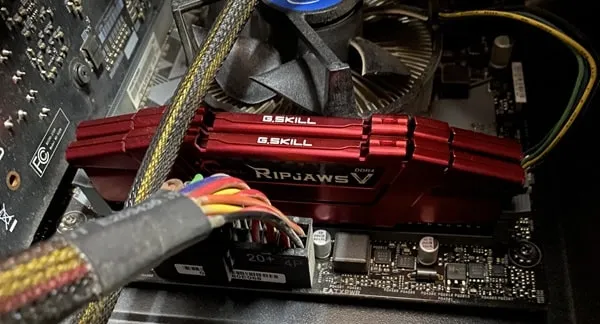
To boot a Computer Properly, all hardware needs to be connected properly to the motherboard. And, if any hardware is loose, then the CPU gets stuck in an on-and-off loop. Mainly, when the RAM Stick is loosely attached to the Motherboard. Then, the CPU turns on for a second and gets turned off with a beep sound. And, this process keeps going into an infinite loop. To fix it, you just need to open your CPU cabinet and attach the RAM Stick properly.
1. Do turn off your computer completely and disconnect the power source. Remove all cables like CPU, Keyboard, Ethernet, HDMI, and Power.
2. Now, open your CPU cabinet and lie it down on the floor.
3. Unlock the RAM Stick lock from the side and remove the RAM Stick.
4. Now, clean the RAM Stick with a brush gently. (Don’t use the brush on the RAM port. Else, the bristle gets stuck inside the port.)
5. After clearing the dust, reconnect the RAM stick properly. And, make sure RAM Stick is locked. (You can also check whether all other hardware parts are properly connected or not. Don’t put intense pressure on cables and hardware.)
6. That’s it, now close the CPU Cabinet and Reconnect all cables.
Turn on your PC and it should boot normally. If not then, the issue is something else, try the next solutions. However, in my case, connecting the RAM stick properly to the motherboard fixed the issue.
2. Check the Power Supply Cable
If you’re using an extension board and your CPU Cable is not connected properly to it. Then, a loose cable can trigger the CPU turn-on and off issue. In addition, a faulty power supply unit (PSU) also can cause a such issue with your PC.
So, first, check whether the CPU Power cable is properly connected or not from both sides. And, if possible do replace your PSU.
3. Check Motherboard and Other Hardware
If Removing and attaching RAM again doesn’t fix the problem. Then, it could be other hardware or the motherboard itself.
1. Turn off your Computer. And, do remove the power supply cable.
2. Open your CPU Cabinet. And, disassemble all hardware parts one by one. Remove all cables as well.
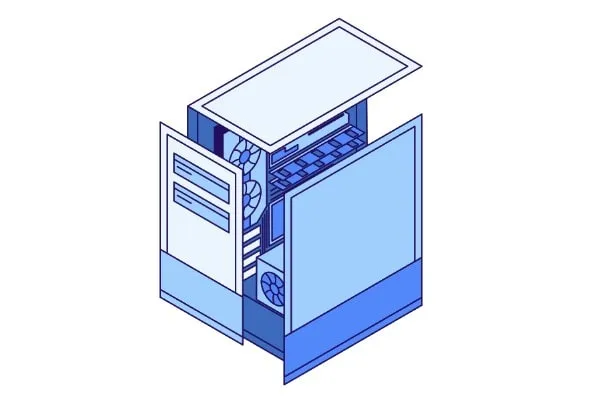
Note: If you’ve not built your PC. Then, better take it to some local computer technician. And, ask them to disassemble and clean your PC and assemble it again. Or, if you want to do it by yourself, then take a picture before you remove parts.
3. Clean dust using a soft brush. And, assemble your CPU again. Connect power, HDMI/VGA, and other cables.
4. That’s it, turn on your computer and it will boot without any issue. Hopefully, this will fix the CPU turns on and off immediately issue.
4. Check CPU Temperature
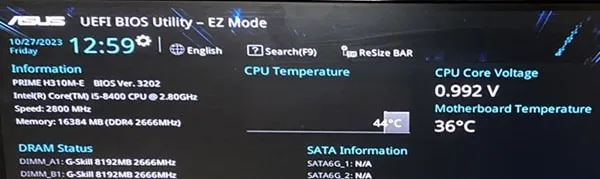
Proper ventilation is required to work a Computer normally. Otherwise, CPU Temperature will go high, and it will not get turned on. You can check your CPU temperature by entering into BIOS Settings. However, if nothing appears on the monitor screen. Then, it’s a hardware issue. But, if you see your PC Manufacturer name on your Monitor, then follow these instructions to enter into the BIOS setup utility.
Enter into ASUS BIOS Settings

1. Turn off your computer completely first.
2. After that, turn the computer back on, and keep pressing F2, Esc, or Delete to enter into the BIOS. (Check your manufacturer’s website to find the correct key. Or, pay attention to the screen you will see key details.)
3. You can now see your CPU temperature. An ideal CPU temperature should be between 35-45°C. And, if you run some heavy task it can go up to around 55-65°C.
4. Some BIOS utility allows you to control fan speed. So, you can change the CPU Fan Speed if you want.
5. Once, you are into BIOS settings, you can also see whether all hardware are working properly or not.
TIP: There are various CPU temp monitor software available. You can use it later on Windows, to actively monitor your CPU/GPU and other hardware temperatures.
5. Clean the Heatsink/CPU Fan and Change the Thermal Paste
If you see a rise in CPU temperature in BIOS. Then, it’s time to clean the Heatsink/CPU Fan. If you haven’t cleaned the CPU fan since you built your PC. Then, dust clogged between the heatsink and processor can cause a temperature rise. Since hot air doesn’t pass away properly. Doesn’t matter if you’re using a stock CPU fan or a cooling system. You should clean it at least twice a year.
Also, if required do change the thermal paste. By changing the thermal paste you can reduce CPU temperature a few more degrees. Hopefully, it will fix the CPU automatically turning on and off issue.
Summing-up
So, these are the solutions that you can apply when your CPU turns on and off every few seconds. Mainly, this issue occurs due to a loose RAM Stick. If the RAM stick isn’t connected to the motherboard properly. Then, the CPU will stuck into a loop. If your PC does show BIOS setup and nothing after that, then change the CMOS Battery. Also, do check your CPU temperature. And, if required clean the heatsink and change the thermal paste. If your CPU shuts down automatically after booting into Windows. Then, a clean windows installation can fix this problem.