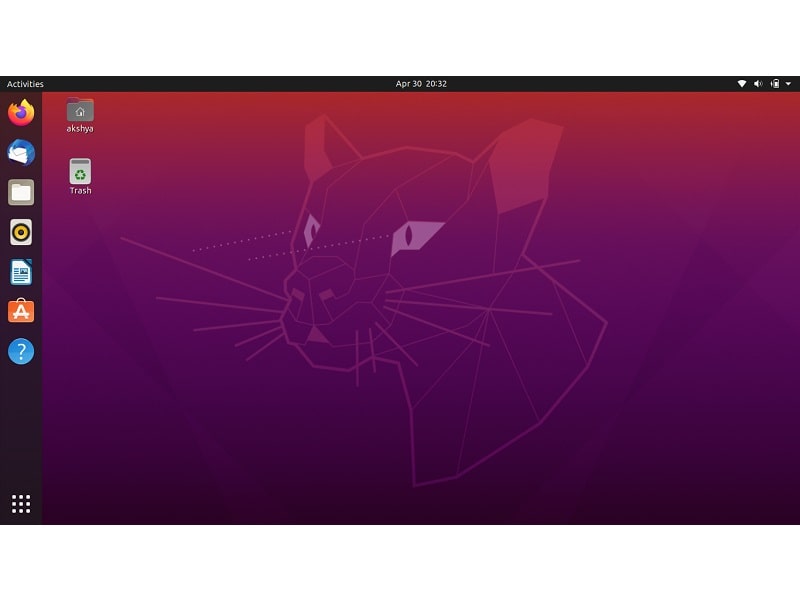
Want to Dual Boot Ubuntu 20.04 LTS (Focal Fossa) along with Windows 10?. Then, this article is for you. There are so many Linux distributions available for beginners. And, if you’re searching one to install, then the first suggestion you might have come across is Ubuntu. Well, it is the perfect path to begin your Linux journey, if you’re Windows user. Recently, Ubuntu 20.04 LTS Focal Fossa (Long Term Support) was released on April 23, 2020. And, it comes with 5 years of support, by Canonical. This means, if you install and use 20.04 now, you can use it till April 2025. Without needing to upgrade your Computer to a new Ubuntu release.
The installation of Ubuntu is very convenient, not so much technicality needed for it. You can even try Ubuntu, before actually getting into the installation process. Though, If you want to install Ubuntu 20.04 alongside Windows 10. Then, this article helps you to dual boot Ubuntu 20.04 with Windows 10 by creating a bootable USB.
Methods to Install Ubuntu 20.04 on a Windows 10 PC or Laptop.
If you’re using Windows 10 for so long, and don’t want to give it up completely. Then, you have a couple of options. One option is to install Ubuntu 20.04 LTS on VMware or VirtualBox. Means, you can run Ubuntu virtually inside the Windows 10. (Like an Android Emulator.) I will write a separate article for it. And, the other option is to create a dual boot system of Windows and Linux. In a dual boot system, both OS gets direct access to Computer hardware. (No virtualized hardware.)
What is a Dual Boot Setup?.
A dual boot setup basically allows the user to run two operating systems from a single hard drive. And, during the startup or booting process, the user can select the operating system they’d like to boot. A reboot is required to load a different OS each time.
Dual Boot Ubuntu 20.04 LTS with Windows 10.
Minimum system requirements for Ubuntu 20.04 LTS desktop.
- 4 GB of RAM.
- Dual-Core Processor. (2Ghz)
- 25 GB of free disk space. (SSD/HDD)
- An installation bootable media. (DVD/USB)
- Stable Internet Connection to download ISO file and Ubuntu updates.
Note: We are going through the default installation process of Ubuntu 20.04 LTS. So, the steps mentioned in this article will work for both UEFI Mode or Legacy BIOS mode. You can check your BIOS mode from the system information App. Though, to be more specific, my computer has UEFI BIOS mode.
Download Ubuntu 20.04 Desktop ISO.
Ubuntu officially gets released in three editions: Desktop, Server, and core (For the IoT devices and robots.) For Windows 10 PC, you have to download a desktop image. And, with the help of Rufus, we will create a bootable USB drive.
Ubuntu 20.04 Desktop Image Download.
Create Ubuntu 20.04 LTS Bootable USB Drive.
1. Download the latest version of Rufus. (Utility to format and create bootable USB flash drive.)
2. Connect USB Drive (Pendrive) to your Windows 10 PC/Laptop. Run Rufus.exe setup file with administrator privileges.
3. Make sure in device your USB drive is selected. After that click on “SELECT”, select downloaded Ubuntu 20.04 LTS desktop image, and click on Open.
4. That’s it, now, don’t make unnecessary changes in Rufus. Just hit the “Start” button.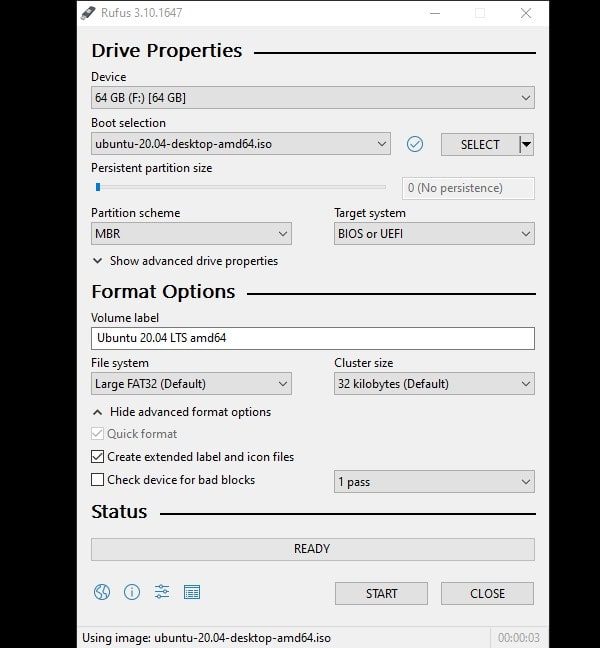
Next, Make sure, “Write in ISO Image Mode” is selected and click on ok.
After that, Data erase warning will appear. Make sure there is not any important data stored in the USB drive. And, click on ok.
5. Now, a “download required” window will appear. To create Ubuntu 20.04 bootable drive, Rufus needs to download two files “ldlinux.sys” and “ldlinux.bss”. Make sure the Internet is connected and click on yes.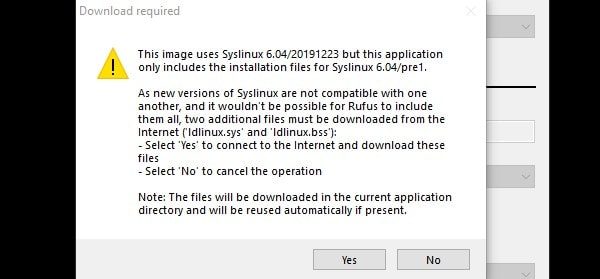
6. Files will get downloaded within a span of seconds. And, the writing process will get started. In the status section “READY” will turn into green, when creating a bootable USB process gets completed.
Dual Boot Ubuntu 20.04 LTS Along with Windows 10.
Boot from the installation media. (USB/DVD)
This step is gonna be different for every Computer. Once you pass through it, the installation process will be pretty much simple after it. Ok, so normally, when you turn on the PC, Windows does boot from hard disk or SSD. So you just have to pause that startup process and boot from USB Drive. So that you can install Ubuntu. And, you can do that from BIOS settings.
In my PC, I am using an Asus motherboard. By pressing F2 and Delete key I can enter into BIOS settings. And, can set the boot priority.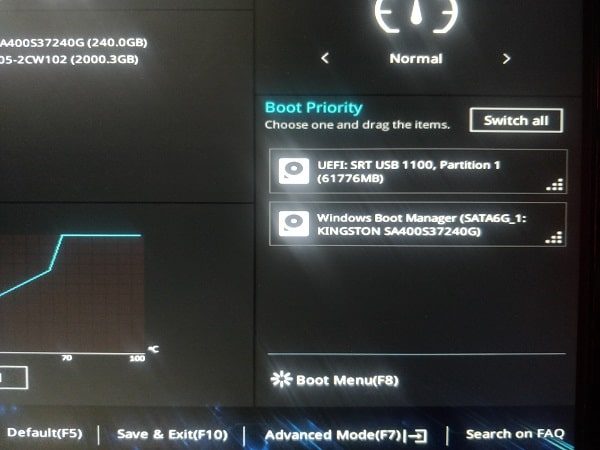
In my HP laptop, by pressing Esc key I can pause the startup process. And, with the F9 key, I can enter into the boot manager. And, from there I can select the USB Hard drive.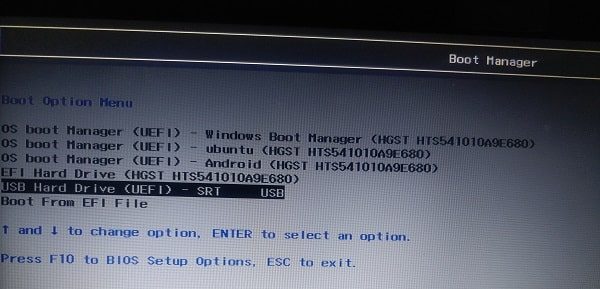
So, what you have to do is, enter into your BIOS settings. And, set USB drive as first boot priority. You have to turn off your computer, and, press the power key. Before it gets starts, press the certain key (Esc, Delete, F11 or F12, but it varies by manufacturer.) to load boot menu. And, select installation media from the list. (Do google it about opening boot manager of your manufacturer. Or, comment down the details of your laptop or PC, I will help you out.)
Installation Process.
1. Once you start booting from bootable Ubuntu USB Drive. GNU GRUB (boot loader) will appear, press enter to select Ubuntu.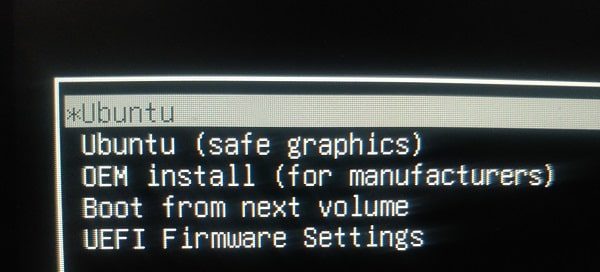
2. The disk check process will get started. It won’t take much time. Though, with Ctrl + C hotkey, you can skip it.
3. Ubuntu Installation screen will appear. You will get two options, try or install Ubuntu. Yes, you can try Ubuntu from USB drive, without installing it on your system. We are dual-booting Ubuntu 20.04 and Windows 10, so here you have to choose the “Install Ubuntu” option.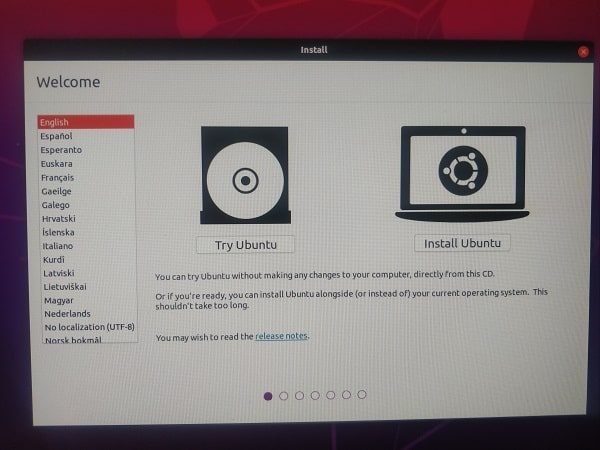
4. On the next screen, select the keyboard layout and click on continue.
5. You will get two options, minimal or normal installation. A normal installation will offer you a Graphical User Interface and web browser, utilities, office software, games, and media players. This means a complete package.
But, the minimal installation offers a desktop environment (GUI) but a limited number of software like a web browser (Mozilla) and other basic tools. Also, on the same page, you can select options to install the update and other third-party software during the installation. In my case, I selected the normal installation and both update options. You can select the same options.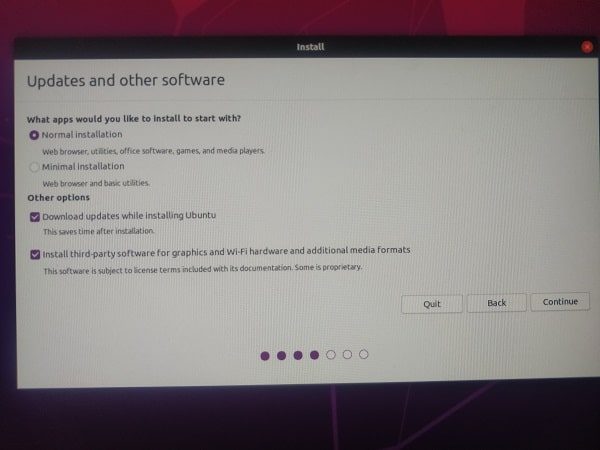
6. Installation Type – You will get three options to install Ubuntu 20.04 LTS on your hard disk.
Install Ubuntu alongside Windows Boot Manager – The first option will take care of everything. This means it will not delete any of your personal data. Will shrink drive (auto partitioning) by itself to make space for Ubuntu. Yes, you can select how much space you want to give. And, we are going to choose this option.
Erase disk and Install Ubuntu – With this option, you can format any disk and install Ubuntu in it. That is not recommended. Because it can wipe out Windows 10. And, we want to dual-boot.
Something else – This option is for advanced users. With this, you can manually configure partition. Which is not so easy to do. I had to face certain issues while doing that.
So, If you don’t want to make the installation complicated. Select “Install Ubuntu alongside Windows Boot Manager” option. Click on “Install Now”.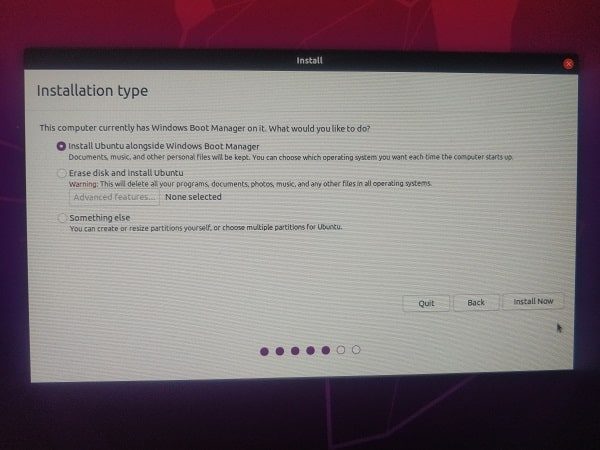
7. Next, select the hard drive in which you want to install Ubuntu. (If you’re using multiple drives.)
And, you can allocate the space for Ubuntu by dragging the slider. Personally, I am using 1 TB hard disk in my laptop. So, I gave default space (180.9 GB), which you can see in the below photo.
Click on “Install Now”.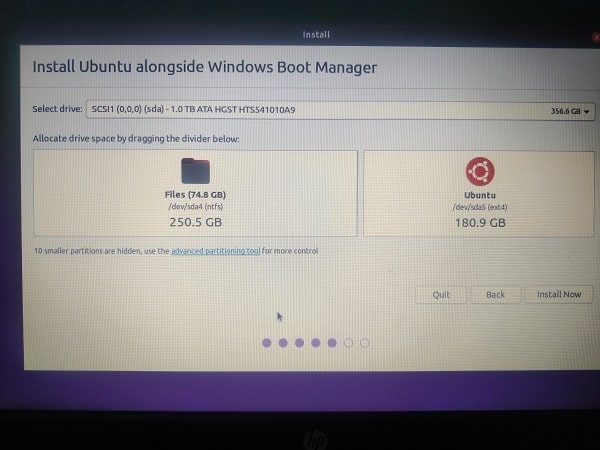
8. Two small screens will appear to ask for your confirmation to write. Click on continue on both.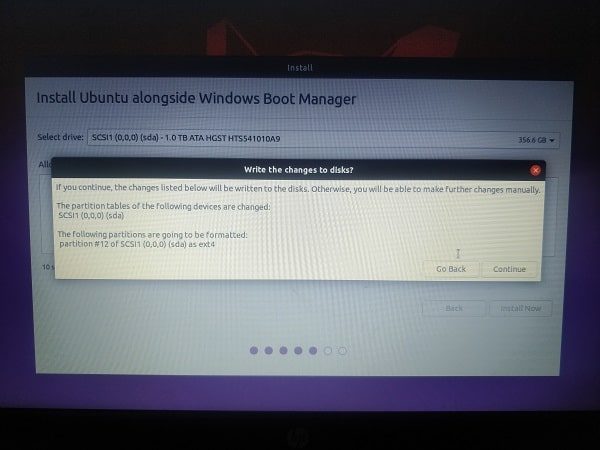
9. A Window will now appear to ask to select the preferred time zone. Select and click on continue.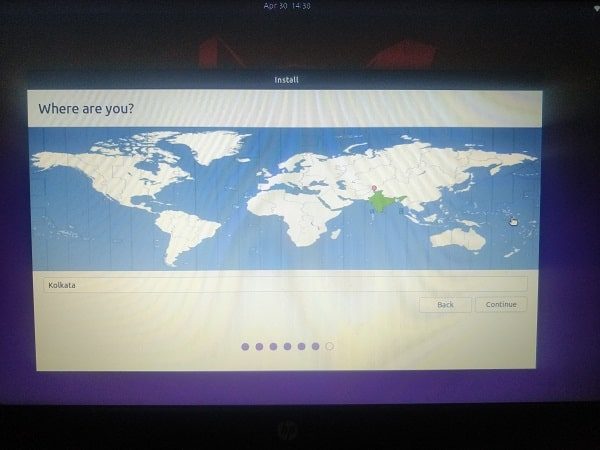
10. Next, it will ask you to enter Hostname & your username credentials. Enter all and click on Continue.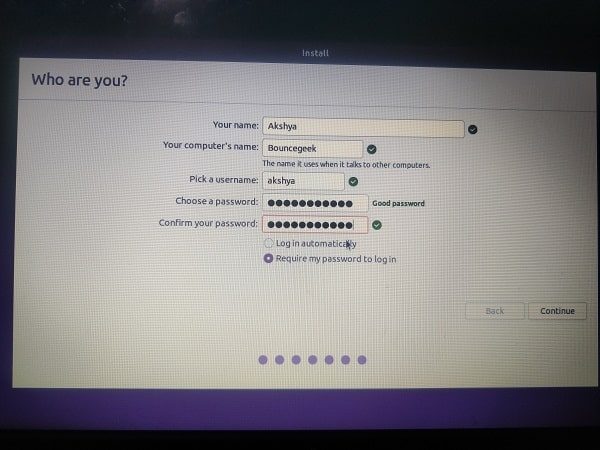
11. That’s it, the installation process will get started. Setup will start copying files, installing all software packages, and required dependencies. For me, it took less than half-hour.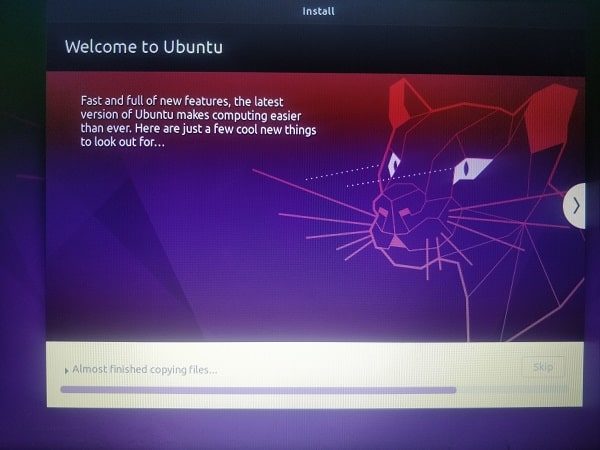
12. Once, the installation gets complete, you will get the option to restart the computer to boot into Ubuntu 20.04 LTS (Focal Fossa.) Click on restart now.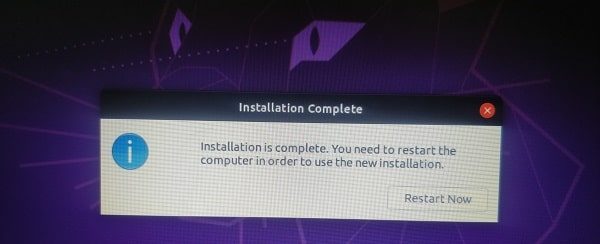
13. You have to remove the installation medium, which is USB, and press enter key.
14. You will now get a dual boot option. If you want to boot into Windows, select “Windows Boot Manager”. Else, select the first option to boot into Ubuntu.
15. Once, OS gets started, it will ask for the password to log in. Click on profile, type password, and press enter key.
That’s it, you have successfully installed Ubuntu 20.04 LTS on a Windows 10 Computer. You have to now go through some initial setup process. Like connecting Google Accounts, setup Livepatch. That you can easily do it.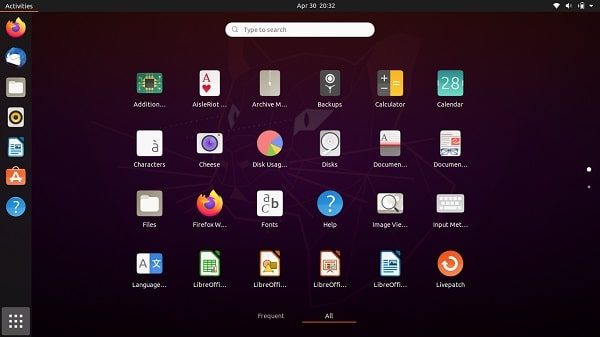
If you’re facing any issue during the process to dual boot Ubuntu 20.04 LTS and Windows 10. Then, feel free to comment.
