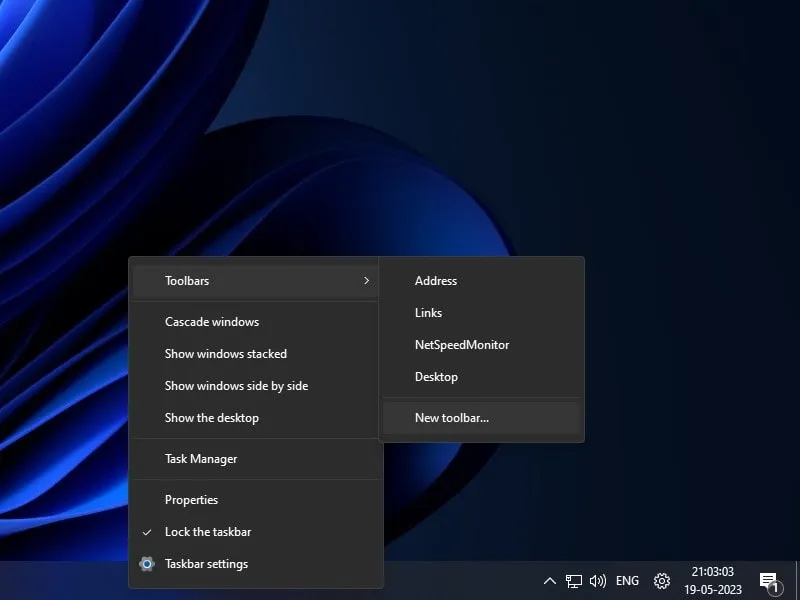
If you’ve recently updated to Windows 11 and are worried about Toolbars missing from Taskbar. Then, this article will help you to enable and add Toolbars on the Windows 11 Taskbar.
Undoubtedly, Microsoft has completly redesigned Windows 11 and introduced some new features. But, Microsoft also removed some useful features, which was earlier available on Windows 10. Like, now in Windows 11, you cannot add Toolbars on the Taskbar. You now only get TaskBar settings and Task Manager options when you right-click on the Taskbar.

Earlier, there was an option to add new Toolbars. With Toolbars, you can add frequently used Programs, Files, Folders, Desktop, links, etc. Yes, in Windows 11, you can manage Taskbar and system tray icons. However, some Internet Speed Meter programs still require a Toolbars option. So, here’s how to quickly enable Toolbars on Windows 11.
Enable Toolbars on Windows 11 Taskbar
1. ExplorerPatcher
ExplorerPatcher is a free and open-source program designed to enhance the working environment on Windows 11. It allows you to enable/disable File Explorer features. It adds all features to the Explorer, which is removed on the latest Windows. Yes, it also does add a Toolbars option. You can access it by right-clicking on the Windows Taskbar. So that, you can easily add Toolbars on the Windows 11 Taskbar. However, it moves taskbar items to the left, just like Windows 10 Taskbar. With Explorer Patcher, you can also Change the Weather Widget Position on Windows 11 Taskbar.
1. First, do download the latest version of Explorer Patcher from GitHub.
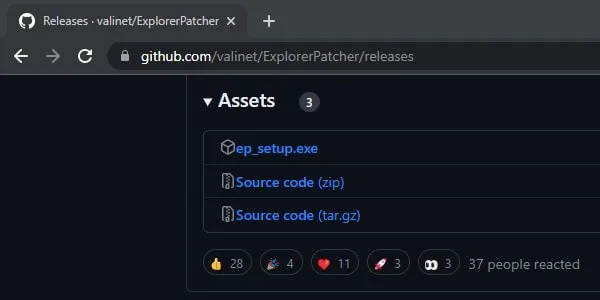
2. Once the Explorer Patcher gets set up gets downloaded. Do right-click on the “ep_setup” and after that click on Open.
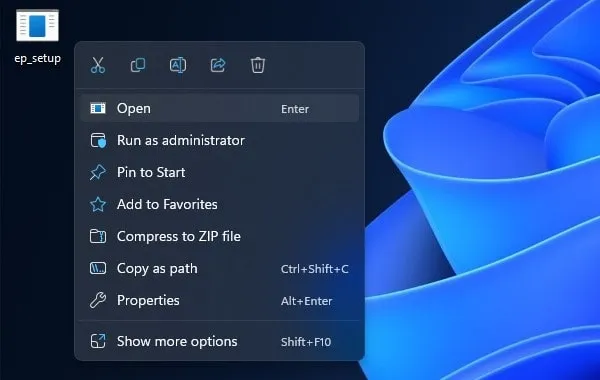
3. Windows Protected your PC window might appear, click on More info > Run anyway.
4. UAC window might appear, click on Yes.
5. Gray/Black screen might appear for a few seconds or a minute.
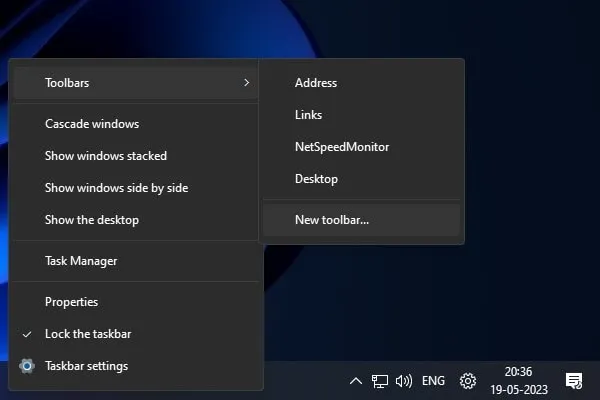
6. After that, the Desktop will appear. Now, right-click on the Taskbar anywhere, and you will find the Toolbars option.
7. Go to Toolbars > New Toolbar.
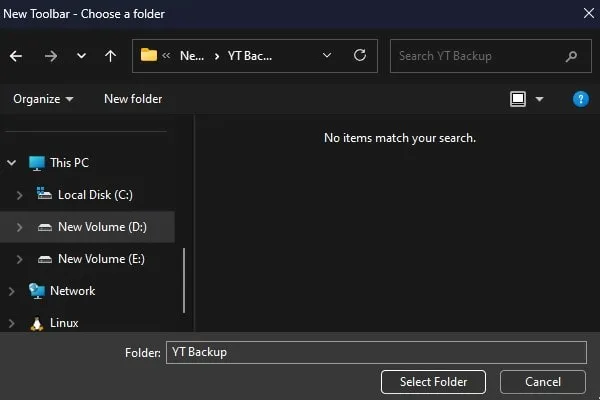
8. New Toolbar – Choose a folder screen will appear. Do select any folder that you want to add to Taskbar. Click on Select Folder.
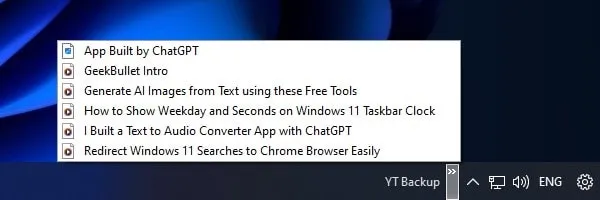
9. That’s it, a new toolbar will get added to the selected folder.
10. You will see a >> icon next to the folder name. Click on it and you will find all folder items. From it, you can quickly open any file.
11. Yes, you can also add custom programs to Windows 11 Taskbar using Toolbars Feature.
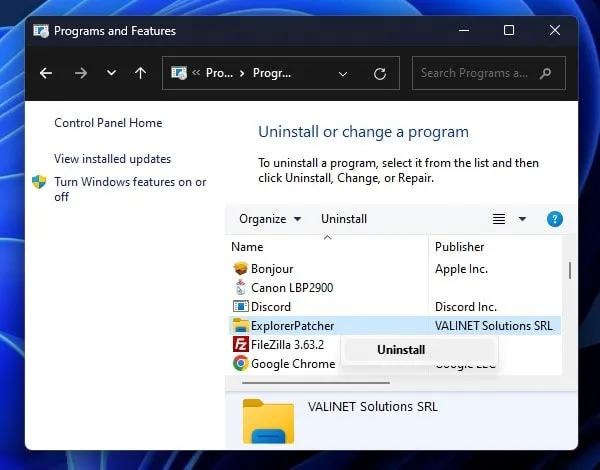
12. And, if you want to get back your old Windows 11 Taskbar. Then from Control Panel, you can uninstall Explorer Patcher. Yes, your screen will go black again for a few seconds. And, you will get uninstall complete message.
13. Do right-click on the Windows 11 Taskbar and then Click on Properties, to open Explorer Patcher Settings.
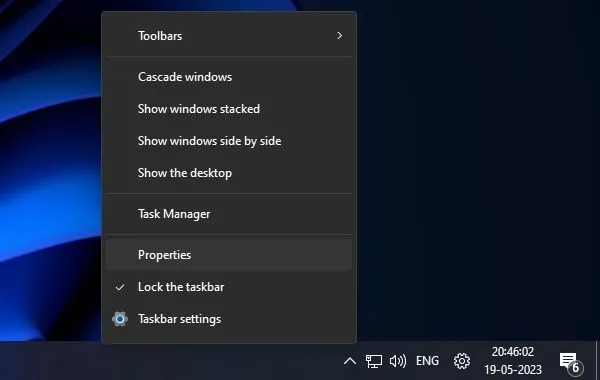
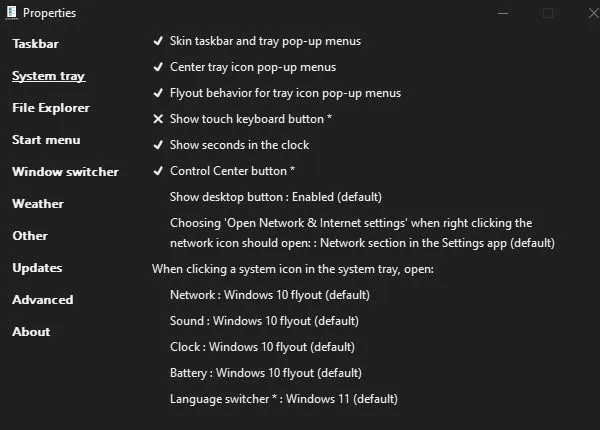
14. Since Explorer Patcher is an advanced version of File Explorer. And, it adds more features. So, you can enable/disable explorer features using App Properties.
2. Tray Toolbar
The TrayToolbar app allows adding any folder to the custom menu. However, it doesn’t add options to Right-Click Taskbar menu. The app adds a folder icon to Windows 11 system tray. You can add a path to the Tray Toolbar App icon. And, the app icon will show you all items in that folder. So that, you can quickly access all items.
1. First, go to the following link and do download Tray Toolbar and Windows Desktop Runtime Setup.
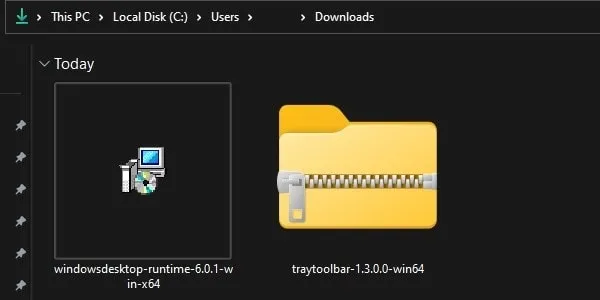
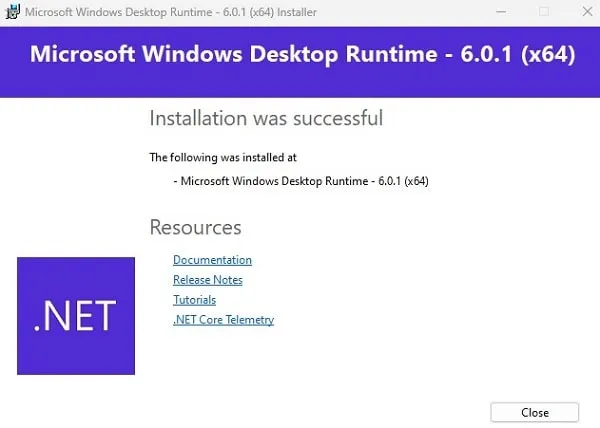
2. First, do run the “windowsdesktop-runtime-6.0.1-win-x64” setup file and install it on your Windows 11 Computer.
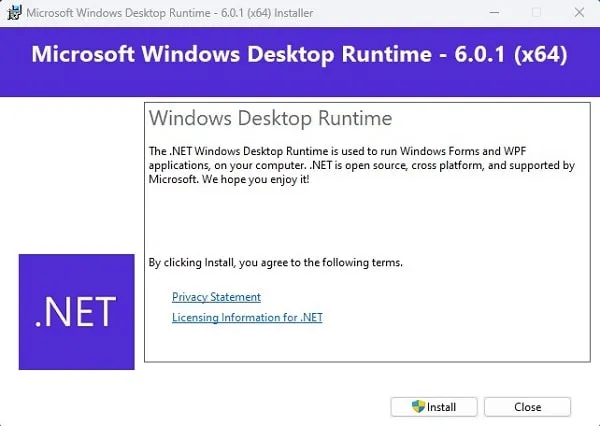
3. Once, Windows Desktop runtime gets installed. You will get the installation successful message.
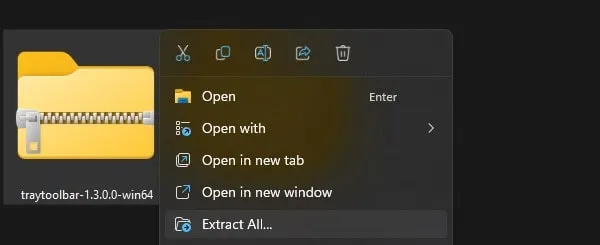
4. After that, do right-click on the TrayToolbar Compressed folder and then click on Extract All > Extract.
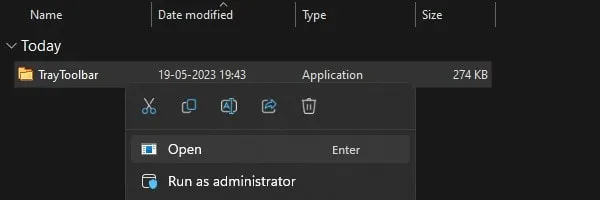
5. Open the Extracted Folder and you will find the TrayToolbar application.
6. Right-click on it and then click on Open.
7. “Windows protected your PC” screen will appear. Click on More info > Run anyway.
8. Now, in System Tray, you will find a folder icon. Do right-click on it and then click on Options.

9. An options window will get open.
- Path: Enter the path of the folder, to which you want to be a menu.
- Depth: You can enter 5 in it.
- Icon: Keep it enable.
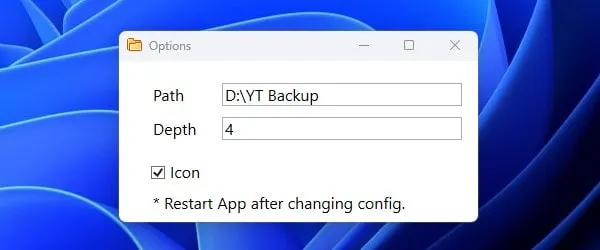
10. After entering all details, simply close the Options window. And, after that, do right-click on the Tray Toolbar icon and then click on Refresh.

11. That’s it, now click on the TrayToolbar icon. And, you will see all items in the added folder.
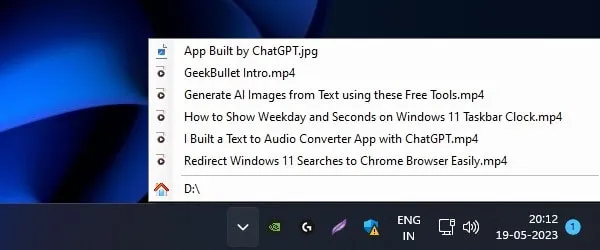
12. Now, you can quickly launch any item by clicking on it.
