
If you want to know your Motherboard Model Number quickly, you’re at the right place. Throughout this article, you will learn multiple methods to find out motherboard model numbers, manufacturer details, and other important information.
The motherboard is the very first piece of hardware that we place inside the Cabinet. And, it is the most important hardware, because it allows communication between other components. Like, Processor, GPU, RAM, SSD/HDD, and all other physical I/O ports of a Computer. If you want to update BIOS, then knowing Motherboard Model is quite important. Or, if you’re planning to upgrade your computer hardware. Then, the motherboard details will help you to check whether the new hardware component is compatible or not.
Yes, PC users can easily check the model number by opening the CPU cabinet. But, if you own a laptop, then you don’t need to disassemble your laptop. You can run some commands or use Microsoft built-in utilities to check all hardware component details. After knowing about motherboard details, you can get information about the CPU socket, available RAM slots, supported RAM frequency, and NVMe drive support. So, without further delay, let’s get started.
Methods to Check Motherboard Model Number
Method 1: Check Motherboard Details using Windows Terminal
Since all hardware components communicate through the Motherboard. So, by using a command on your Windows 11 Computer, you can know your motherboard model number.
1. Right-click on the Windows icon to open the WinX (Windows + X) menu. After that, click on “Terminal (Admin)”.
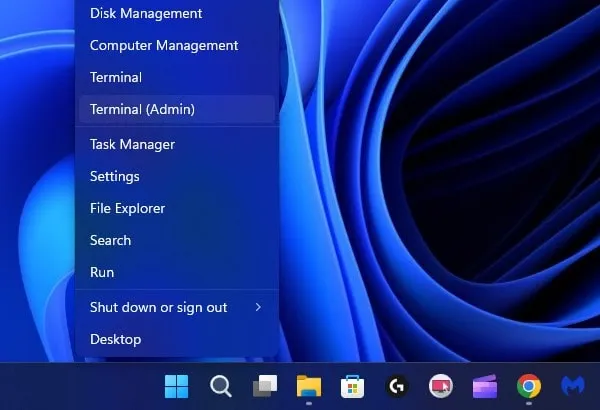
2. A UAC window will appear, click on Yes.
3. Now, do copy the following command and paste it inside the Terminal (aka Windows PowerShell) Window.
wmic baseboard get product,Manufacturer,version,serialnumber
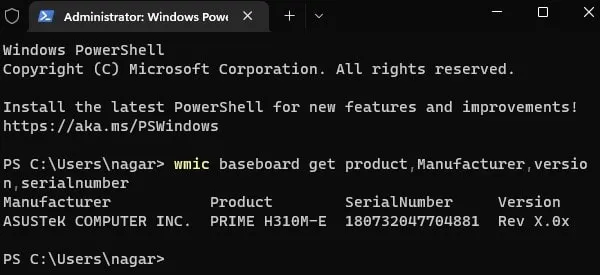
4. You will now see your Motherboard manufacturer name, model number (Product section), serial number, and Version.
As you can see in the screenshot my motherboard model number is ASUS Prime H310M-E.
Method 2: Use the Windows System Information Tool
Like macOS, Windows also has a hidden tool that is capable of showing complete System Information. So if the Command method isn’t working for you, then you can use this GUI tool. Once you run this tool, it will gather all your system resource information, and, it will show you a system summary. Apart from hardware, it also can show components and software information.
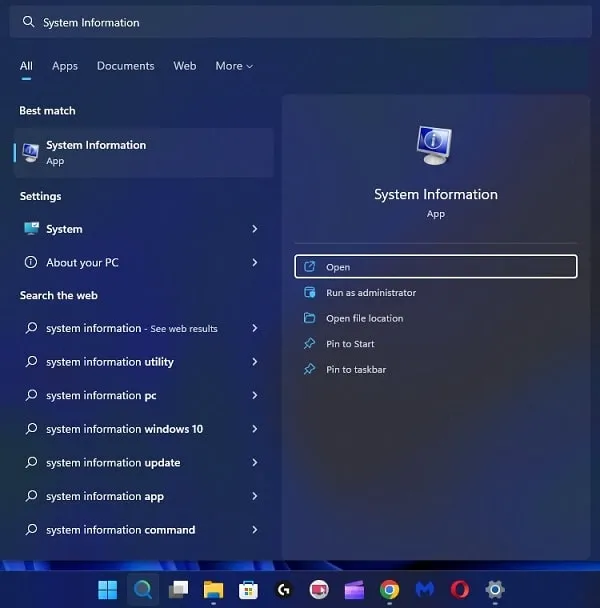
1. Click on the search (magnifier) icon on Windows 11, and search for “System Information”.
2. System Information App will appear, click on “Run as administrator”.
3. UAC window will appear, click on Yes.
Alternatively, press the Windows + R keyboard Shortcut. Now, in the Run window type msinfo32 and press enter key.
4. Once, the System Information app gets opened, look for the following data.
- BaseBoard Manufacturer
- BaseBoard Product
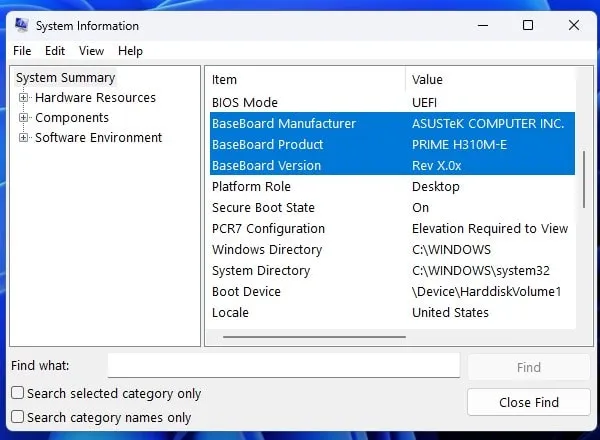
5. Since Motherboard is also known as Baseboard. So, it is your Motherboard Model Number. Yes, you can also find the BaseBoard Version.
Method 3: Use CPU-Z App to check Advanced Motherboard Details
Although, the System Information app is enough to find out Motherboard’s basic details. But, if you want to check some extra details like BIOS Version, Chipset, CPU, Memory, and Graphics details. Then, you should install the CPU-Z app. It is a very lightweight app to detects the hardware features of any desktop PC and Laptop.
1. Do download the CPU-Z Portable Zip file from its official website. It’s around 2MB.
2. Right-click on the 7-Zip file and then click on Extract All > Extract.
3. Open the Extracted Zip file and you will find two CPU-Z applications. One for 32-bit and the second for 64-bit.
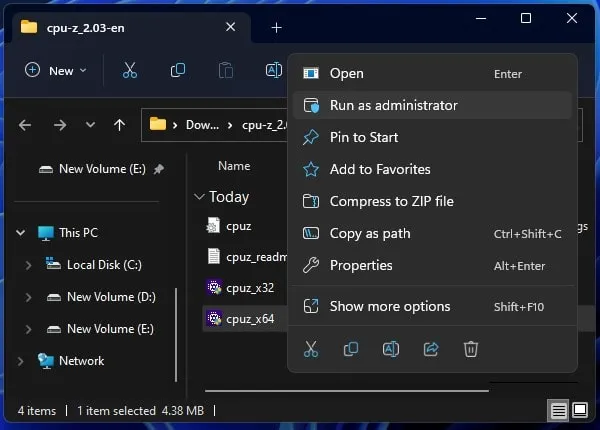
Go to Windows 11 Settings App > About > Check System Type.

4. CPU-Z App will now load all system information, click on Mainboard.
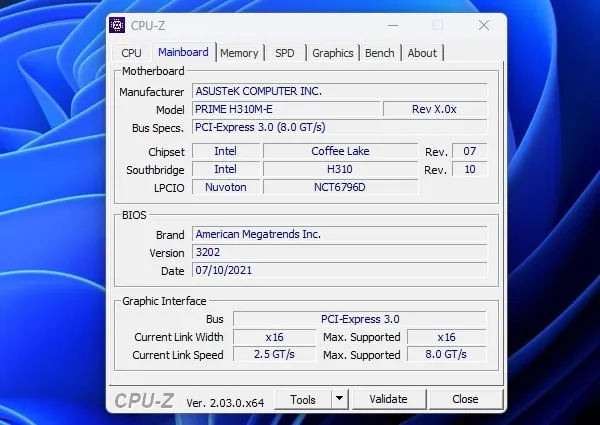
5. That’s it, here you can find the Motherboard Manufacturer and model number.
Method 4: Use the HwinfO64 Portable App
Apart from CPU-Z, there is another App to check complete hardware information. It also comes with a Free CPU Temp Monitor. With it you can access it through the sensor monitoring section. HwinfO64 shows CPU, Motherboard, and GPU details.
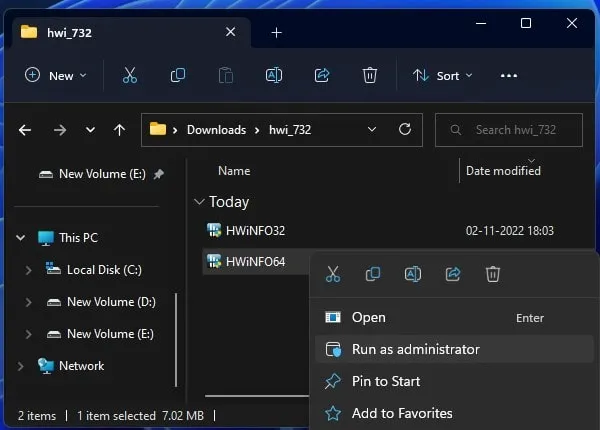
1. Do download the HwinfO64 Portable version. So that you don’t need to install it in your system.
2. Once, the ZIp file gets downloaded, Right-Click on it and then click on Extract All > Extract.
3. Open the Extracted Zip file and you will find HWiNFO32 and HWiNFO64 files. If you’re using a 64-bit system then run the HWiNFO64 file. Or, if using a 32-bit file, then run the HWiNFO32 File.
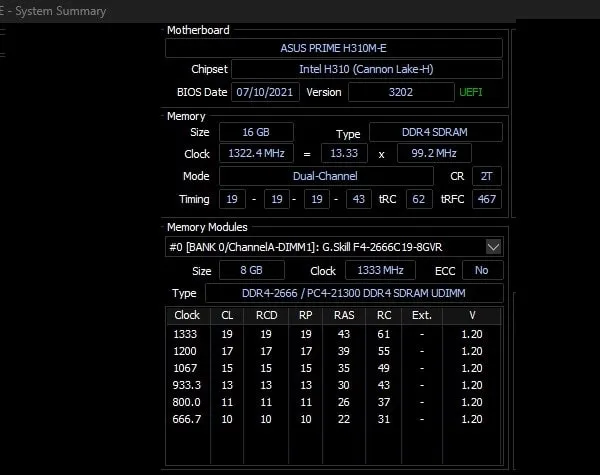
4. Once, the HWiNFO64 window gets open, click on Start.

5. That’s it, now you can find your Motherboard Model Number and Chipset Details.
Okay, so these were the methods that you can use to find out the Motherboard Model Number on Windows 11. You can use the Windows 11 built-in System Information App. Or, can run a command in Windows Terminal. Moreover, you can install CPU-Z and HWiNFO64 App. If you know any other easiest method, then let me know in the Comment Section.