By downloading all Photos from Google Photos on your Computer. You can easily Transfer Google Photos to iCloud by uploading manually. Read the article to know more.
A decade ago, We used to take pictures to create memories, so that, we could peek into the past later. But, now we take pictures just to post on social media platforms. Smartphone cameras now have gotten closer to DSLR. That’s why we take photos more often. In the ’90s, the only way to store Photos was a physical album. Now, we can store photos digitally also. But, Photos stored on hard drives or memory cards can get corrupted. That’s why it’s always better to store photos on Cloud Storage Services.
If you have recently shifted from an Android Phone to an iPhone. And, want to transfer Google Photos to iCloud. Then, in this article, you will know two methods, that will help you immensely. If you were happy with Google Photos Service. And, the only reason to transfer is that you purchased a new Apple device. Then you don’t need to transfer. You can use the Google Photos App on iPhone too. Even, Google Photos will sync new photos that you will take from the iPhone.
However, if you have some other reasons to transfer. Maybe you don’t want to use two cloud services. Then, You can transfer photos using an iPhone/iPad and PC.
Transfer Google Photos to iCloud.
Google Photos and iCloud Photos.
Google Photos App is available for Android and iPhone both. It’s a gallery App by Google. That also lets you create a backup of Photos and Videos. On the other side, iCloud is a cloud storage service by Apple. And, one part of iCloud service lets you create a backup of images too. iCloud does it with the Photos App on iPhone or iPad. In both iCloud Photos and Google Photos, the Sync or backup feature is optional. So, if in Google Photos, the Sync option is disabled. Then, Photos are stored in your local storage. In that case, connect Android to PC and transfer Photos. After that, you can upload Photos on iCloud.
Method 1: Move Google Photos to iCloud using a PC.
Well, there isn’t any feature to transfer photos directly. Because both cloud services are from different platforms. That’s why First we will download Photos from Google Photos. After that, we will upload it to iCloud. And, doing it is quite easy, just follow given steps for each part.
Download Photos from Google Photos.
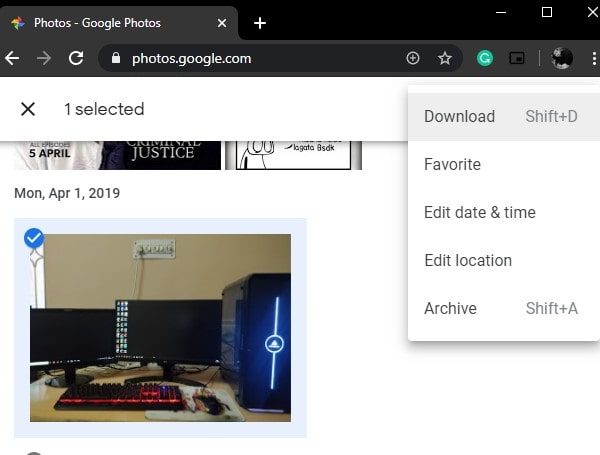
Step 1: Do Open photos.google.com in your favorite browser. And login using Google Account which is linked to Google Photos.
Step 2: All Synced Photos with Google Photos will appear. Hover the mouse pointer over a photo that you want to select. And, Click on the checkmark icon to select the Photo. Do repeat the steps with all the photos that you want to download.
Alternatively, you can click on the three dots icon on the right side of the screen. And, by clicking on the “Download All” option you can download all photos.

How to select multiple Photos?
First, select a photo and then press the Shift key, and select the last photo. All Photos between the first and the last photo will be selected.
Step 3: Once Photos get Selected, click on the three-dot icon from the top right. And, click on “Download”.
Alternatively, by pressing Shift + D, you can start the download process.
Step 4: A Photos Zip file will now start downloading. When the download gets completed, you just have to Unzip the File. You can use 7Zip software to extract. Or, just Right-Click on the Zip file and click on Extract All > Extract.
Upload Photos on iCloud Photos.
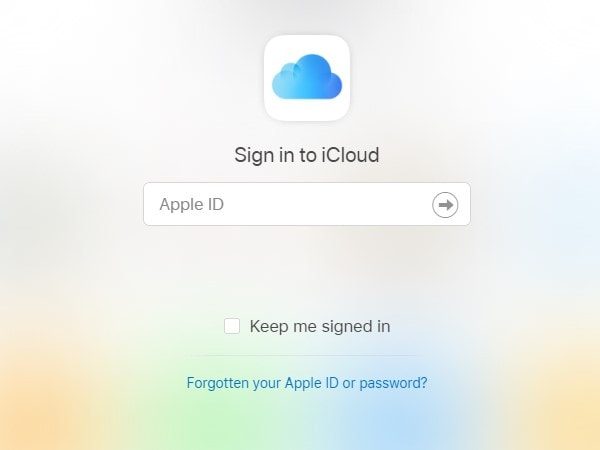
Step 1: Open iCloud.com on the web browser of your Computer. And, Sign in to iCloud using Apple ID.
Step 2: After successful login into iCloud. Click on Photos from the iCloud Homepage.

Step 3: iCloud Photos will open and you can see all Photos stored on your iPhone/iPad. Click on the cloud icon from the top right corner to upload photos.

Step 4: A photo selection window will appear. Navigate to the unzipped Google Photos folder. Select the Photos that you want to upload and then click on “Open”.
That’s it. Now just wait for the Photos to get uploaded. So that’s the way to transfer Photos.
Method 2: Sync/Transfer Google Photos to iCloud on the iPhone/iPad.
This method is kind of similar to the first one. But, In this method, you just have to download Photos from Google Photos. After that, the iPhone Photos App will automatically sync Photos to the Cloud.

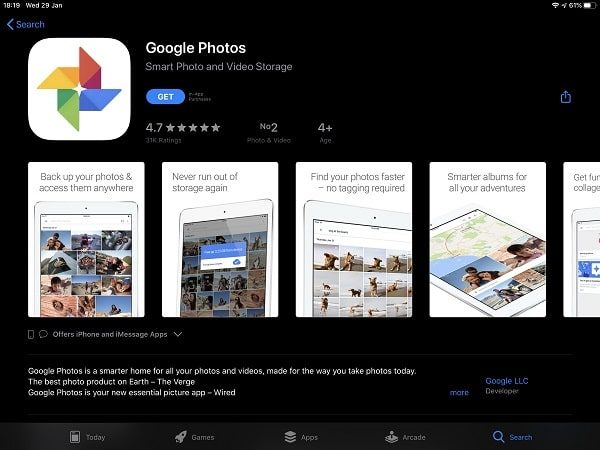
Step 1: Open the App Store on your iPhone/iPad. And, do download and Install Google Photos App.
Allow basic permission, but don’t allow backup permission. Tap on the “Do not back up” option. Otherwise, Photos stored on your iPhone will start getting synced with Google Photos.
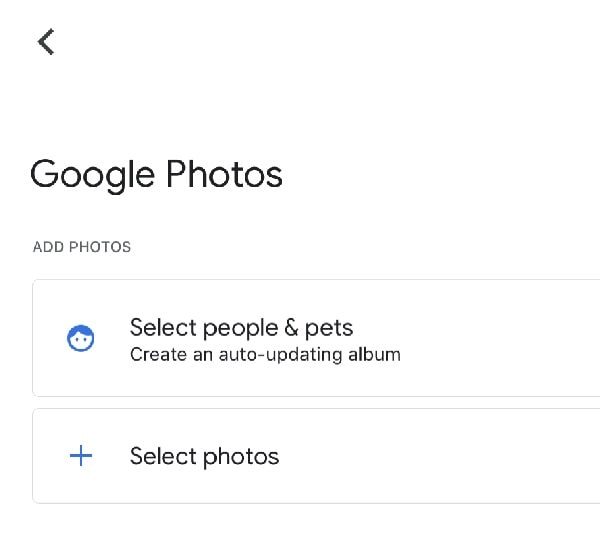
Step 2: After that, Tap on to the Library > Albums option in the Google Photos App. And, you can find all the Google Photos there.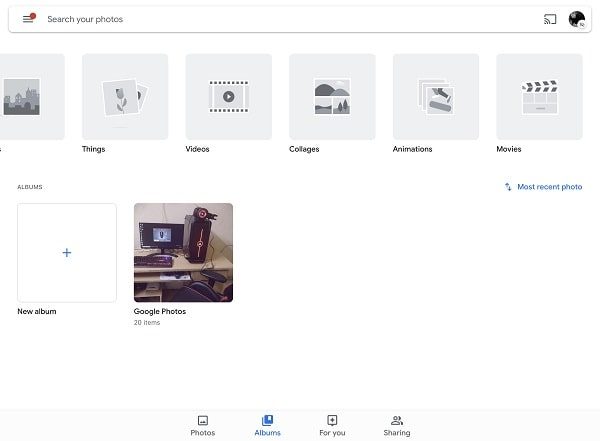
No Photos in Albums? Then, Create an Album and Add Photos.
- Tap on the ‘New Album’.
- Add a title > Tap on Select Photos.
- Select the Photos that you want to add and then tap on “Add”. (Google Photos are below your iPhone Photos. So keep scrolling.)
Step 3: Long tap on the Photo to select. If you want to select all the Photos. Then Don’t lift the finger and drag it over photos to select them all.
Step 4: After selecting pictures, tap on the share icon. And then, tap on “Save to device”.
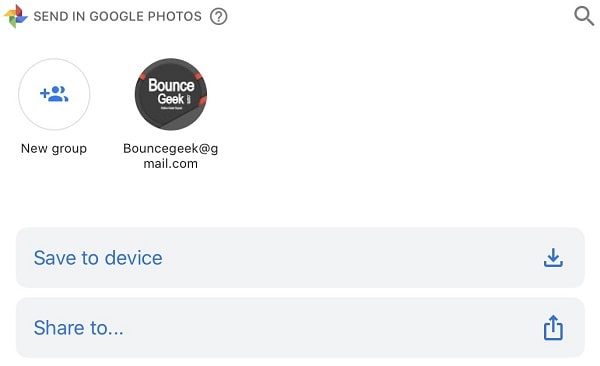
That’s it, The Image will now get saved in Camera Roll.
Step 5: Open the pre-installed iOS Photos App. And, you can see all saved Google Photos in it.
Step 6: That’s it. Now to make downloaded Google Photos appear on iCloud. You just have to enable the “iCloud Photos” option. That you can do by going into Settings > Photos. If it’s already enabled, then don’t make changes.
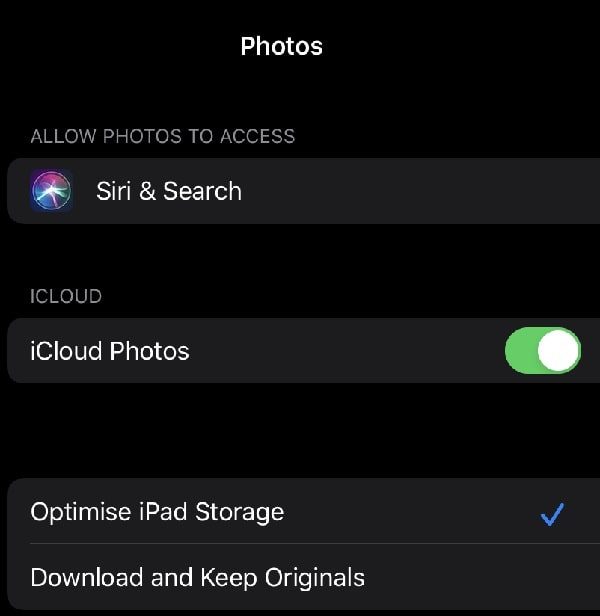
There are two more options you will get in the Photos App Settings.
- Automatic – This option will keep images in lower resolution. And, will keep the original image available on iCloud. (Save Device Storage.)
- Keep Originals. – If you have enough storage in your iOS device. Then, this option is for you.