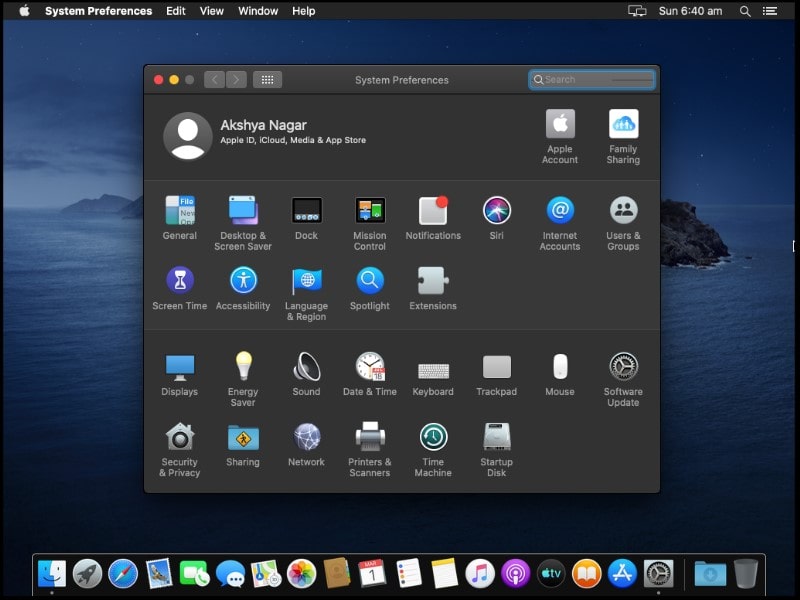
Every Year, Apple does release a new version of macOS. And, this year in 2020, Apple is planning to release macOS 10.16. Well, we can make a prediction based on the release date of previous versions. Like, macOS 10.14 (Mojave) released in September 2018, and, macOS 10.15 (Catalina) in October 2019. And, if you’re Windows user and planning to get a new MacBook. Then, it would be better, if you try macOS in Windows first. Sounds amusing, right? With the help of a VMware workstation player, you can now install Install macOS 10.15 Catalina on Windows PC.
Important: Officially Apple won’t allow installing macOS in the non-apple hardware. So, I would not suggest using your main Apple ID to test macOS 10.15 on Windows. And, this article is just for information purpose. We don’t promote piracy of OS.
There are two methods to use macOS in non-apple hardware. And, in this article, we are going to use the macOS Virtual machine image in VMware. In another method, you will need to build a Hackintosh. But for that, you need to use the UniBeast tool. Which is designed for macOS, to create a bootable USB drive from any purchased copy of OS X. (Means, an Apple Computer or MacBook is required.)
The VMware tool method is the easiest one. You don’t even have to replace your current OS. If you aren’t aware, a virtual machine is something that physically doesn’t exist. But, uses physical resources of a computer to act virtually.
Install macOS 10.15 Catalina on VMware. (Windows PC.)
In order to install macOS 10.15 Catalina on VirtualBox on Windows. You need to download some required files and prepare VirtualBox. By that means, you have to unlock the macOS X option in it with a tool. Just do follow this step by step guide, and, you will be able to run macOS on Windows.
Required files and tools to download.
- VMware Workstation Player.
- VMware macOS X Unlocker tool.
- macOS Catalina Virtual Disk Image. (I will upload tool and disk image somewhere, and update link soon. Bookmark this article.)
Step by Step Guide to Install macOS 10.15 in VMware.
Install VMware Workstation Player.
1. First Download and Install the latest version of VMware Workstation Player on your PC. (Available for Windows & Linux.)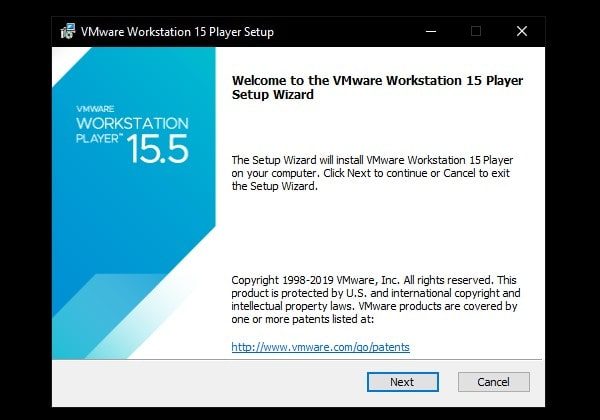
During the installation process make sure, you have selected the “Enhanced Keyboard Driver” option. (Restart required for it.)
2. After completing the installation process, do open VMware Workstation Player.
3. Click on “Create a new virtual machine“.
A new virtual machine creation wizard will get open. Select “I will install the operating system later” in it. Click on ‘Next’.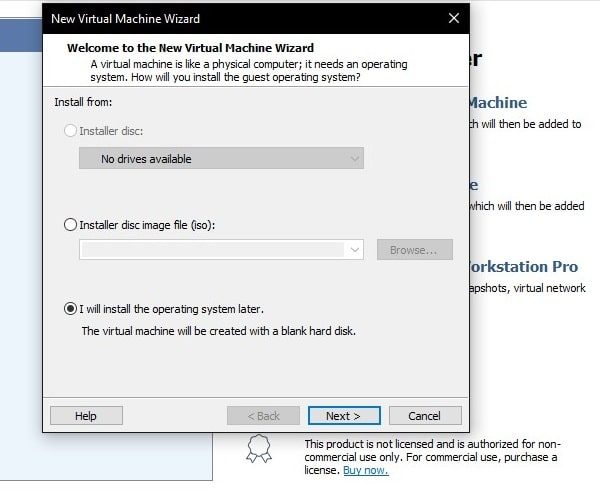
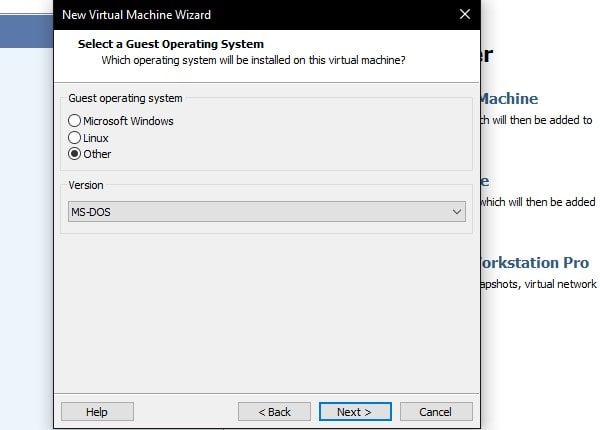
4. Now, It will ask you to select a guest operating system. And, you have to select “Apple Mac OS X” in the guest operating system, and, in version “macOS 10.15”.
Enable Mac OS X option in VMware using Unlocker Tool.
Apple Mac OS X option is not appearing?. (FIX)
By default, the latest version of the VMware workstation player doesn’t support macOS. And, restricts the installation of macOS. In this case, to remove restrictions, here comes the unlocker tool into work.
1. If the macOS option isn’t showing, then, you have to use the “Unlocker for VMware” tool. Download the tool and extract the file.
2. First, close VMware completely, and, run the “win-install” file as administrator.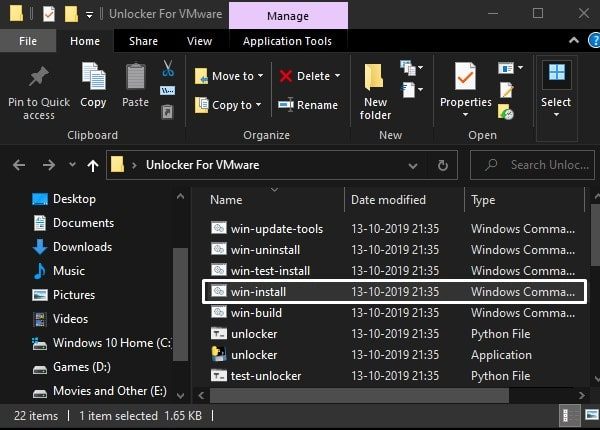
3. CMD window will get open, and, it will download a file to enable the Mac OS X option. (Don’t close in middle, wait for the process completion.)
4. Open, VMware Workstation Player and open virtual machine wizard. This time, you will get the Mac OS X option, do select it. And, we are going to install the macOS 10.15 version. So, select it.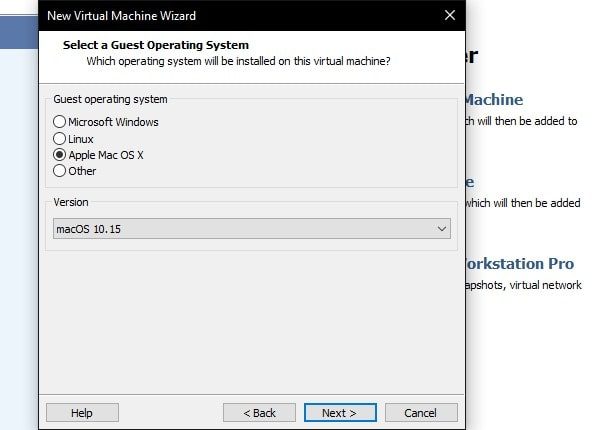
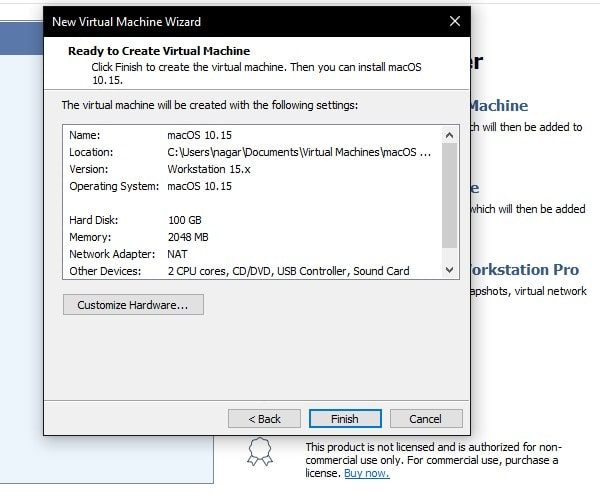
5. Virtual Machine name window will appear, leave it as it is. Click on Next.
6. In Disk Capacity, Enter 100 in maximum disk size. And, select “Store virtual disk as a single file“.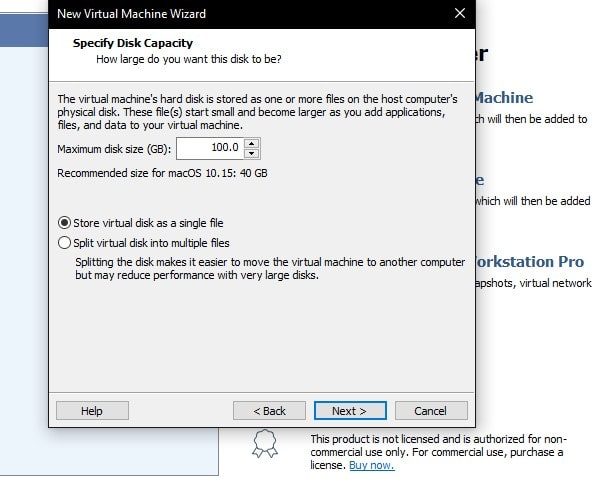
Click on “Next“, after that, click on “Finish“.
Change Virtual Machine Settings.
7. Don’t run virtual machine now, click on “Edit virtual machine settings“.
Under hardware, click on memory and assign 4 GB of RAM. (Move the slider to select.)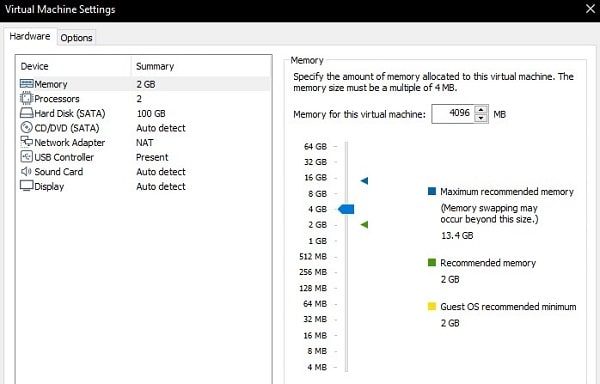
8. After that, click on “Hard Disk” and click on remove.
9. Now, we are going to create a virtual hard disk by selecting the macOS Catalina Virtual Disk Image file.
10. Click on Add > Select ‘Hard Disk’ > Next.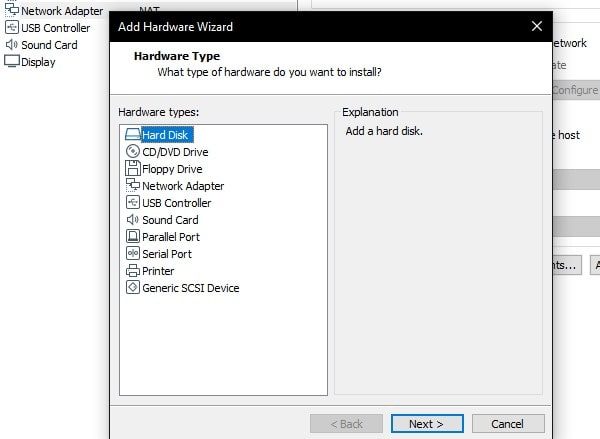
11. Select “SATA” in the virtual disk type. And, click on next.
12. On the next screen, select “Use an existing virtual disk image” option & hit the next.
13. After that, click on browse and locate the downloaded disk image of macOS. Select it and click on Open. 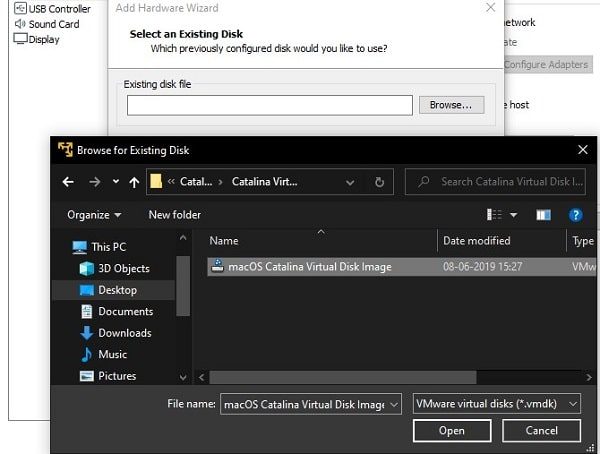
- Click on Finish > Convert.
Edit the VMX File.
1. Do open C:\Users\”your pc name folder”\Documents\Virtual Machines\macOS 10.15 Folder.

2. You can find a VMX file. Check type “VMware virtual machine configuration” will be written in it.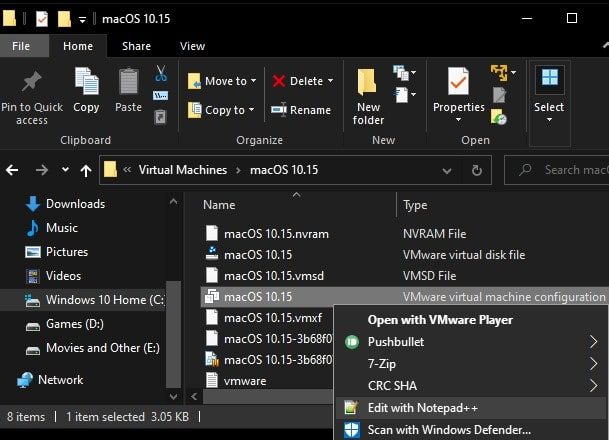
3. Right-Click on the VMX file and then click on Open with. And, then choose more apps and select Notepad App. (If you’re using Notepad++, then you can directly use “Edit with Notepad++” option.)
4. When VMX file gets open in notepad, add (smc.version = “0”) at the end and click on save from the file menu.
Start macOS 10.15 Catalina virtual machine.
1. Go back to VMware workstation player, and, click on “Play virtual machine” to start macOS.
2. When the machine gets turned on, the Apple logo will appear with a progress bar. Wait for the process to get complete.
3. After that, the macOS Catalina installation process will get started.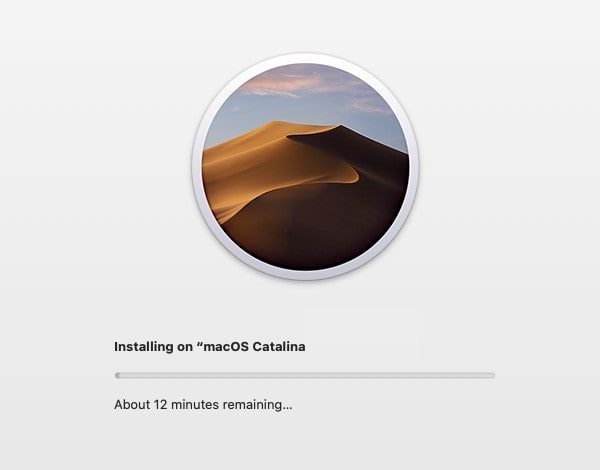
When the process gets completed. The welcome screen will appear.
- Select Country > language and go through the setup process.
You have to sign in with Apple ID also. If you don’t have, then you can create a new Apple ID.
4. After completing the signing process of Apple ID. Some personalization options will appear. Like, Screen time and theme. (Yes dark theme available.)
5. That’s it, Within a minute, macOS will get started.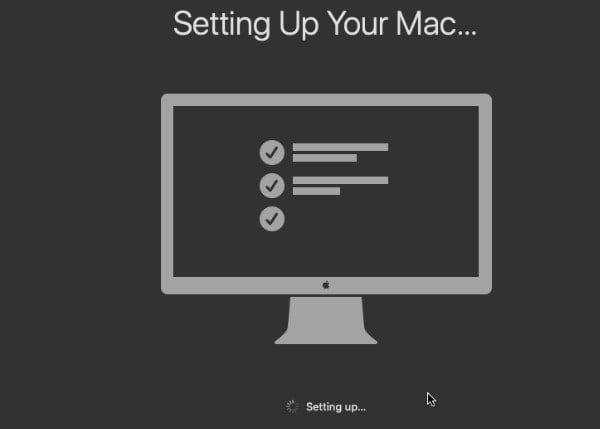
VMware Tool.
If you’re just using macOS for testing purposes. Then, you won’t need to install it. But, if you want to enhances the performance of the macOS virtual machine. And, want to improve management, then, you need to install VMware tools.
What VMware Tools does?.
It basically gives you more flexibility. Like, you can share files between host and guest systems. Can copy/paste text, files, and graphics between host and client system. Also, it does improve mouse performance.
Installation of VMware tools isn’t a quick process, so I will add a separate article for it.
So, this was the way to Install macOS 10.15 on VMware on Windows PC. And, this is the best virtualization software to run macOS out there. With this, you can run Mac on the PC, which is hosting a Windows OS. Hopefully, now you got all the information to run macOS 10.15 Cataline through VMware workstation player. If still, you face any issue, feel free to comment.