Undoubtedly, WordPress is one of the best web CMS. It allows to create all kinds of sites, blogs and forum. To make your WordPress site on live on Internet you need a domain and hosting. However, if you were using other CMS before like Ghost, Joomla, Drupal or Blogger. And, now want to try WordPress, then i would suggest to install WordPress on LocalHost.
What is LocalHost?.
If you’re beginner and learning web development then you might heard this term before. In computer networking, usually host term is used for server. By purchasing a hosting plan, we host our website on a server. Here, in localhost, we do turn our computer into a local server. And, local term is here used since the website will establishes a connection with the local machine (your computer) using the loopback address network.
Localhost (127.0.0.1) is usually used by developer to test their website, like for Django project we do create and run local server. Similarly, by using localhost you can test WordPress on your computer. With Localhost, you can test new plugins and themes on your website, without deteriorating user experience. To create and manage a local server we will use XAMPP.
What is XAMPP?.
XAMPP is a free and open-source cross-platform web server solution. It allows to install Apache distribution containing MariaDB, PHP and Perl. XAMPP will allow you to transform your computer into a local web server, enabling you to establish a local database for WordPress. So that, you can test and develop websites before deploying them to a live server.
Install WordPress on LocalHost on Windows 11
Install XAMPP Control Panel on Windows 11.
- First, do download latest version of XAMPP. It is available for Windows, OS X and Linux.
- Once, the “Xampp Installer.exe” setup gets downloaded, do right-click on it and run as administrator.
- XAMPP Setup window will get open. Click on Next.
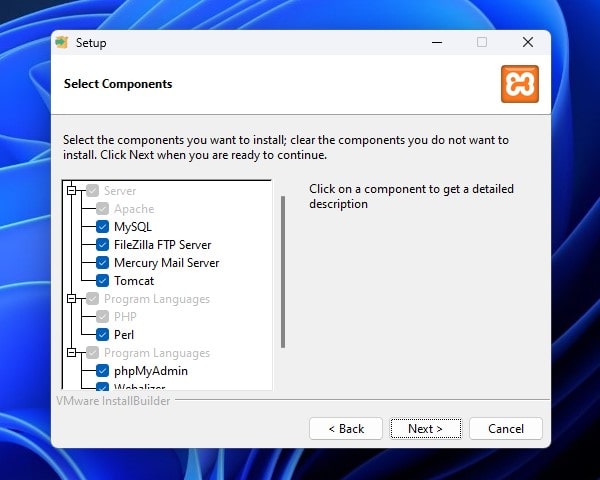
- Setup will ask to select components. However, for WordPress, you only need MySQL and phpMyAdmin. But, surely you can install all additional components and test other features as well.
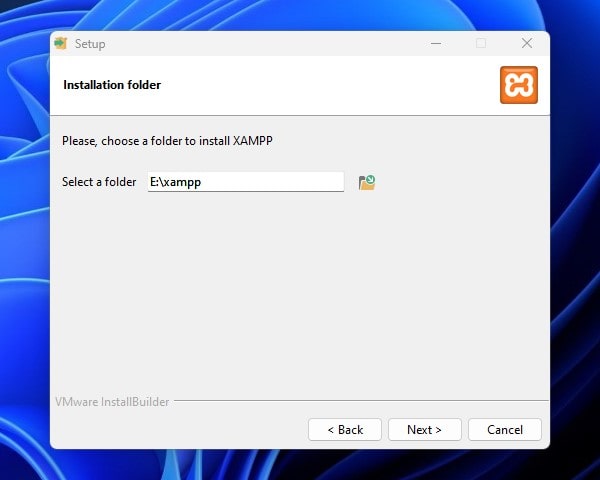
- Next, Setup will ask you to select installation folder. By default XAMPP will gets installed in C Drive. However, you can change the drive. Before changing drive make sure to create xampp folder in that drive.
- Select Language, click on next > next.
- XAMPP installation will now get started.
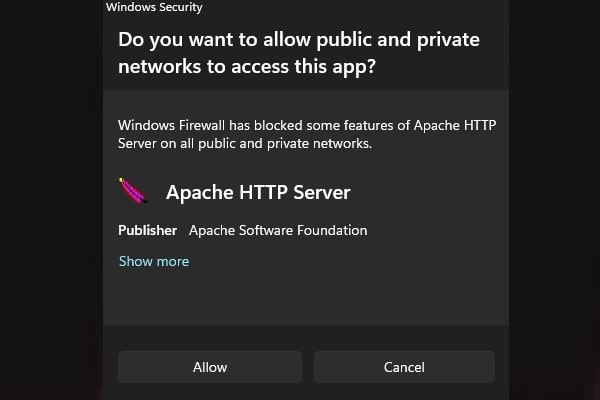
- During the XAMPP installation, Apache HTTP Server will ask for firewall permission, click on Allow.
- XAMPP will now get installed. Click on Finish.
- Now, do search for XAMPP Control Panel, and open App.
Start Apache and MySQL.
- XAMPP Control Panel will get open, click on start button next to Apache and MySQL.
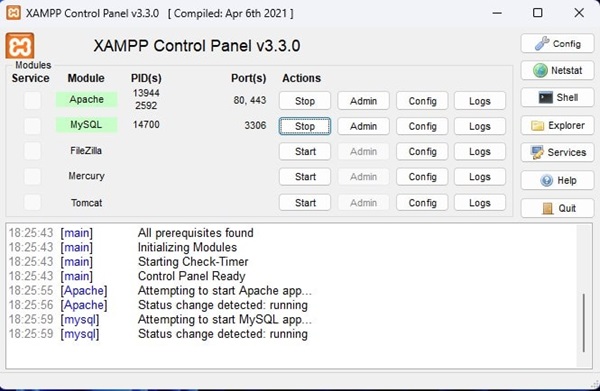
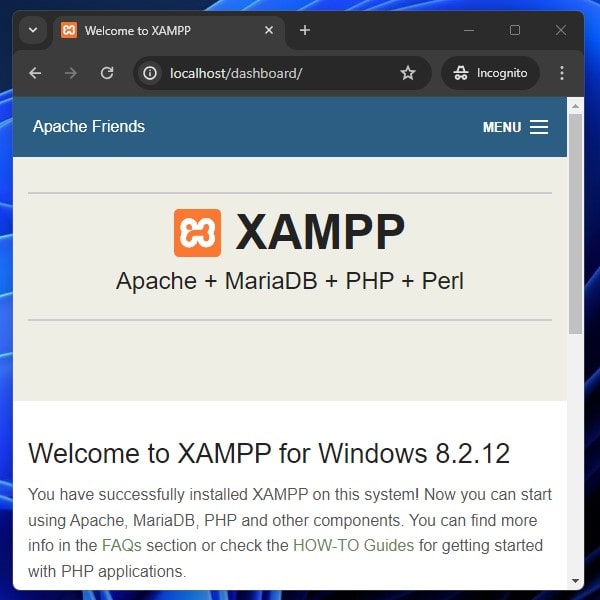
- Once, you see both service gets started, you will see green bar. Now, open the following URL in a browser.
http://localhost/dashboard/XAMPP Welcome screen will appear. You have successfully set up a local server on your computer.
Download and Extract WordPress and Move it into XAMPP.
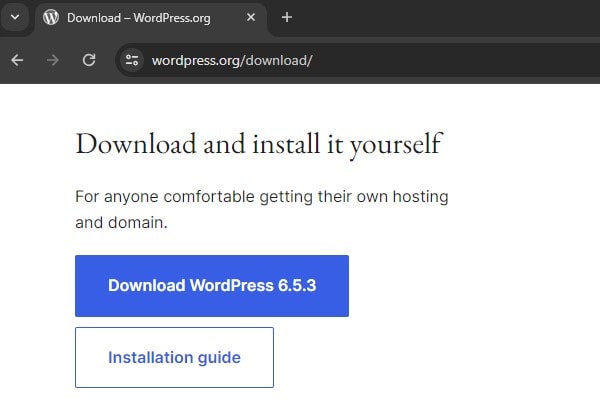
- Do visit WordPress Download page and do download latest version of WordPress.
- Once, zip file gets downloaded, do extract it.
- Now, open file explorer and the drive in which you have install XAMPP. Go to XAMPP > htdocs.
- Do create a new folder inside htdocs folder and give it a new name. You can enter your website name of which you’re making offline copy.
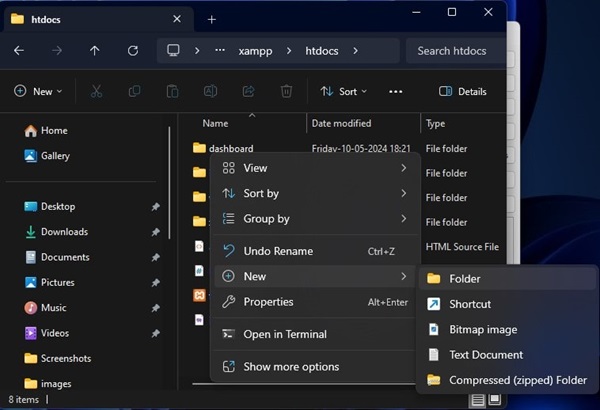
- Now, move extracted WordPress folder inside the folder you’ve created.
Create a Local Database for your WordPress Site/Blog.
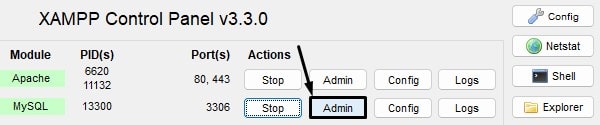
- From XAMPP Control Panel, click on Admin, next to MySQL.
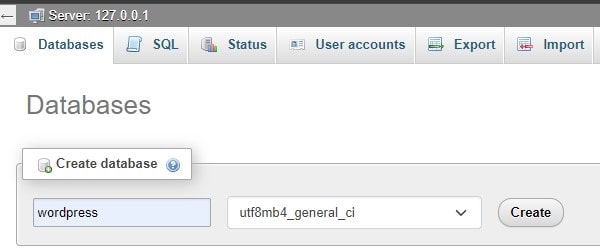
- phpMyAdmin page will get open in localhost.
- click on database. Now, enter database name and click on create. (You can enter WordPress or anything you like, but just remember it.)
Configure WordPress.
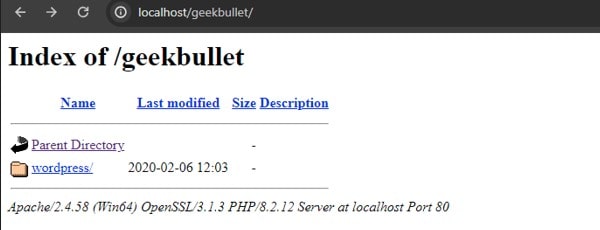
- Now, in your browser do open, the following url. Make sure to replace example with the folder name that you’ve created in XAMPP.
http://localhost/example/- You will now find wordpress folder, click on it to open.
- WordPress setup page will get open, do select the language and click on continue.
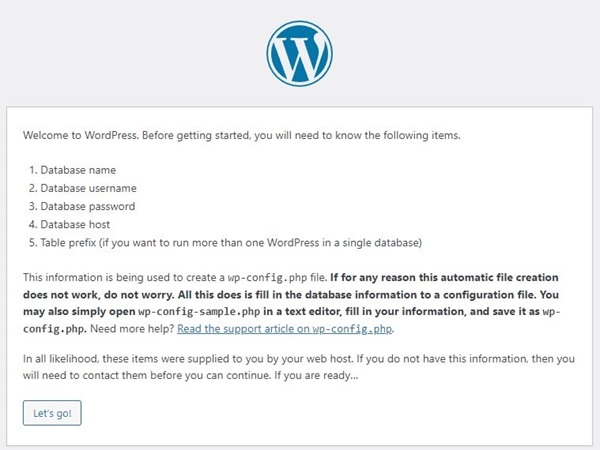
- WordPress welcome screen will appear and will show you all things that you need during setup, read it and click on Let’s go.
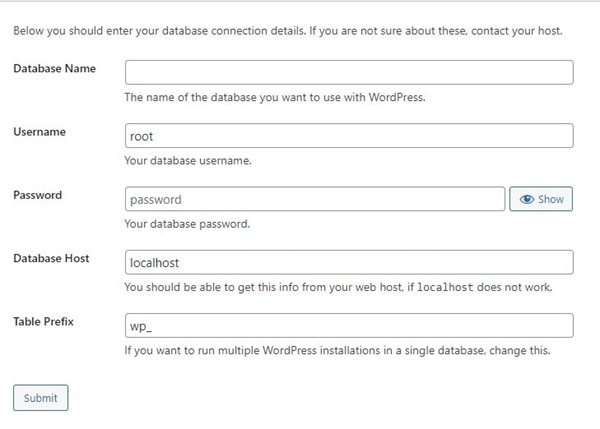
- Now, enter the database name you’ve created, in username type root. And, leave the password field empty, click on submit.
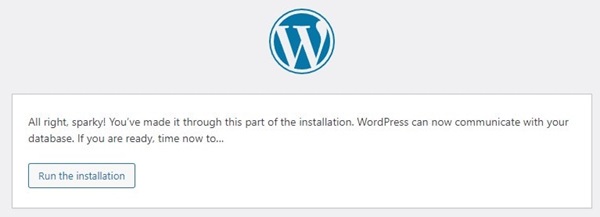
Complete WordPress Installation.
- Next, click on Run the installation.
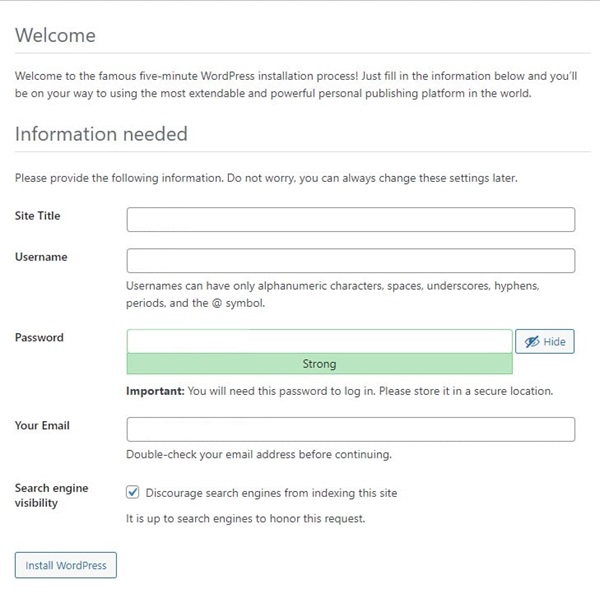
- Once, WordPress gets installed, you will see signup page. Enter site title, username, password and email. All these details you can use later to access WordPress dashboard. Click on install WordPress.
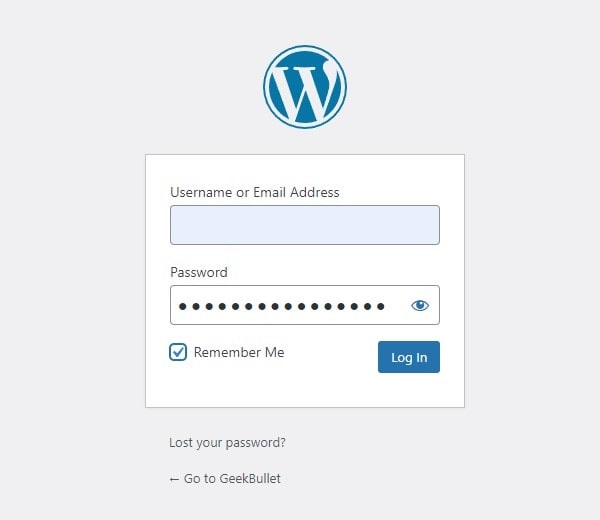
- Once, WordPress gets installed, login page will get open. Enter the username and password to login.
- That’s it, now you can import content or test WordPress features that you want. So, that’s how you can Install WordPress on LocalHost on Windows 11.
Export WordPress Content from Live Website/Blog.
Go to Tools > Export, select all content or the content you want to import in localhost. After that, click on “Download Export File”.

Import Content to LocalHost WordPress.
If you have exported content from your live website. Then, follow these steps.
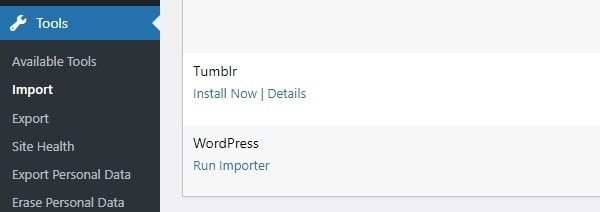
- In WordPress, Go to Tools > Import. You will now see WordPress option, click on Install Now.
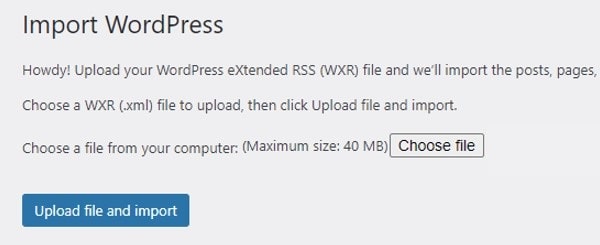
- After that, click on Run Importer.
- Click on Choose File and do select the WordPress Export File. Click on “Upload File and Export”.
- Assign Authors screen window will appear, select a user and click on Submit.
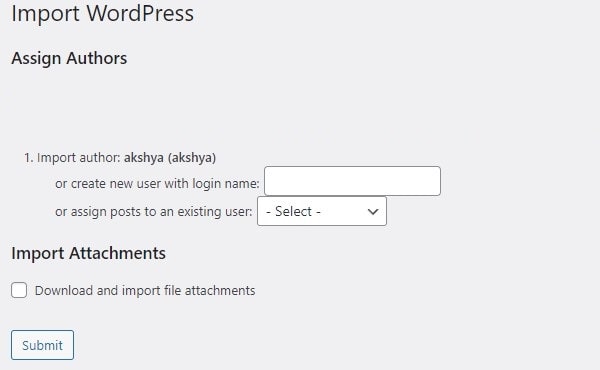
If you’ve not selected the “Download and import file attachments” then images will not get downloaded. In that case, you can simply download images zip file using FTP. And, move it to localhost’s wp-content folder. Yes, you have to change URL, do use better search replace plugin. If you face any trouble during Install WordPress on LocalHost on Windows 11 setup, let us know in comment section.