Are you facing a bad pool header error on your Windows 10 PC? Well, no worries, we’re here to help. I am using Windows OS since Windows 7 releases. And, from then to now, I’ve seen many users are facing BSOD errors. Even, I faced many times “blue screen of death” errors. These errors are quite annoying. Because when this kind of error occurs, Computer gets stuck into a boot loop.
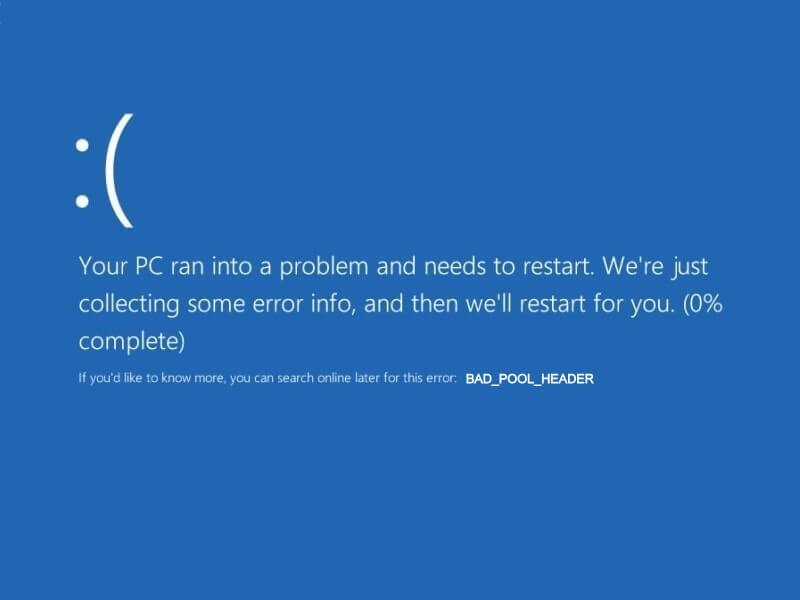
Though, if by any chance, you’re able to boot into Windows after the BSOD error, then it’s easy for you to fix these errors. Recently, many Windows 10 users are facing a BAD_POOL_HEADER (error code 0x00000019) error. And, this error is related to Windows memory allocation. Though this error can be fixed, just do follow all solutions mentioned in this article.
What is a bad pool header?
As I mentioned, this error occurs due to a memory allocation issue in Windows. Let’s understand this error message better. Pool in this error denotes a memory pool, that Windows uses to allocate and manage memory. In memory allocation, the header makes sure that the Windows application programming interface properly addresses. Overall, the error message tells that Windows is having some serious memory management issues. Generally, RAM problems lead to memory pool issues. Also, a bad sector on a hard drive, or, other disk writes issues might be responsible for this BSOD error.
What causes the BAD_POOL_HEADER (0x00000019) error?.
This BSOD error does not occur only due to some software issues. This error can also occur due to some faulty hardware. So, we can’t determine the actual cause behind this error. But, here are a few causes, which users have mentioned on Windows forums.
- Outdated or faulty device drivers issue.
- Antivirus Program or due to recently installed software.
- External devices.
- Due to recently added hardware. (Specifically RAM)
- Overclocking.
- Memory allocation issues.
- Damaged RAM or HDD/SSD.
Boot Windows 10 into Safe Mode
Is after this BSOD error, your PC is stuck into the boot loop? If the computer is showing you the same error again and again. Then, you need to start Windows in safe mode. Safe mode does start Windows 10 into a basic state, using default device drivers and a limited set of files and services. So, if the error doesn’t occur in safe mode, then it means some third-party software or drivers are causing the error.
Well, there are a few ways to boot Windows into safe mode. Since Windows is stuck into the boot loop then, by using the Windows 10 installation drive and the Command Prompt, you can easily start the PC into safe mode. Or, if you don’t have an installation drive, then you can interrupt the Windows boot process three times and get repair options.
Well, it is not possible to add all methods in this article, so, I suggest searching about it. Or, I will link an article to boot into Windows 10 Safe Mode soon.
Solutions to fix BAD POOL HEADER error in Windows 10
Disconnect all external devices
Let’s start this list with some basic solutions. Because, sometimes problems are small, we make it big by messing up with things. If you have connected an external hard drive or SSD or any device through an HDMI or USB port. Then, it might be causing memory issues in your system.
So, first turn off the Computer, by holding the power key. Now, disconnect all unnecessary external devices. If using a laptop then, remove the power cable as well. After that, start your Computer normally, hopefully, the error will get resolved. If not, then try out the next solution from this list.
Remove recently added hardware (RAM/HDD/SSD)
Bad pool header Windows 10 error is related to memory. And, the error can occur when you’re using a faulty RAM stick. Have you added an extra RAM stick to Your Computer? Then remove it to fix this error permanently. If you’re using a different frequency and latency RAM, then getting a bad pool header error in Windows 10 is normal. Always, check the frequency and latency of your existing RAM, before purchasing a new one. CPU-Z software will be helpful to check.
 And, if you have added any other hardware like SSD/HDD then also remove it. Also, if you haven’t added RAM or any other hardware component. Then, still, I suggest you remove the RAM stick, clean dust particles, and then fit it back. If the issue is with the PC, then check for loose hardware components. Mainly check drives and RAM.
Uninstall Antivirus/VPN Program
Antivirus and VPN programs are equally useful in Windows for privacy and security. But, certain antivirus programs or VPN programs such as Dell Sonic Global VPN create trouble with Windows 10. So, do uninstall or disable any VPN or antivirus program that you’ve installed recently. Windows security app is more than enough to keep your Windows secure. If Windows is not starting, just boot into safe mode to uninstall.
Uninstall Unsigned Drivers
In computers, device drivers do play an important role. Drivers software controls specific devices, that are attached to the Computer. Driver Verifier Manager quite useful in Windows 10 to fix Windows freezes and BSOD errors occur due to faulty drivers. It identifies problematic drivers.
In most cases, unsigned drivers create problems. Though, by default, Windows won’t allow you to install unsigned/unverified drivers. But, if you’ve installed any, and after that, you’re facing the bad_pool_header error. Then, Windows built-in Driver Verifier Manager and Device Manager can help you.
Driver Verifier Manager
1. To open the Driver Verifier Manager, search for the verifier, and open it.
2. Keep “Create standard settings” selected, and then click on next.
Next, select “Automatically select unsigned drivers” and then click on next.
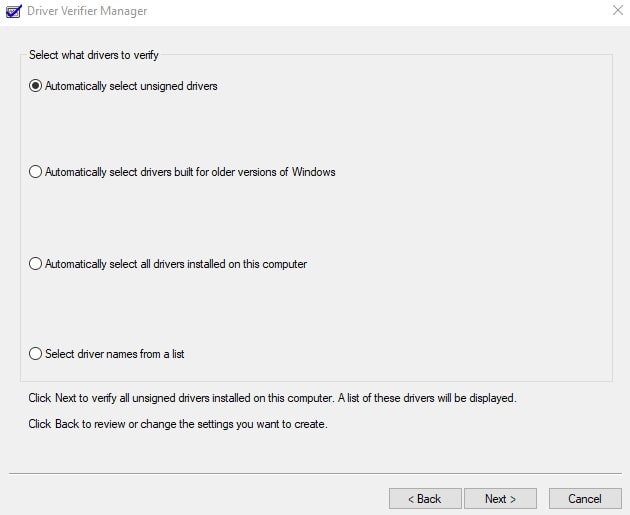
3. Windows will now search for unsigned drivers. That’s the way you can find if any unsigned drivers are installed.
To rollback, update, disable, or uninstall drivers you can use device manager.
Device Manager (Conventional method.)
1. In order to fix driver-related problems. First, boot Windows 10 into safe mode.
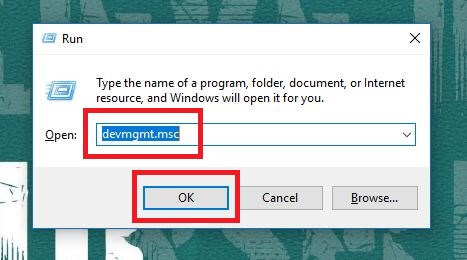
2. In Safe mode, open device manager. (Press Windows + R key and then type devmgmt.msc and press enter.)
3. In the device manager, first, check if there is a yellow mark on any device driver.
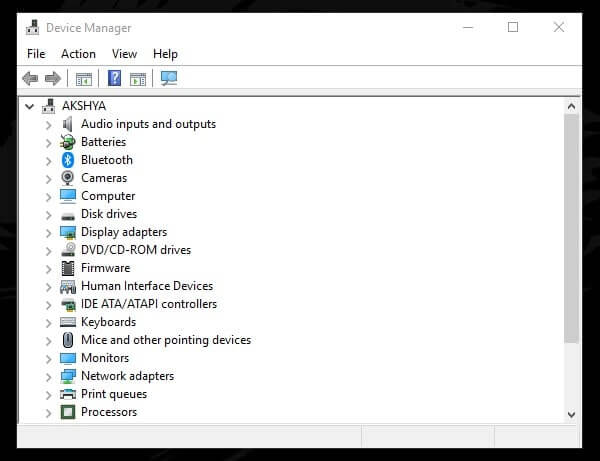
Note: A small yellow icon on a device driver indicated that the driver is outdated or driver software is not installed for that device.
4. Right-click on that device, and then click on update driver > search automatically for drivers. (Don’t forget to expand and check each device in the device manager.)
Well, if you think you have installed a faulty driver, then, right-click on it and then click on “Uninstall device”.
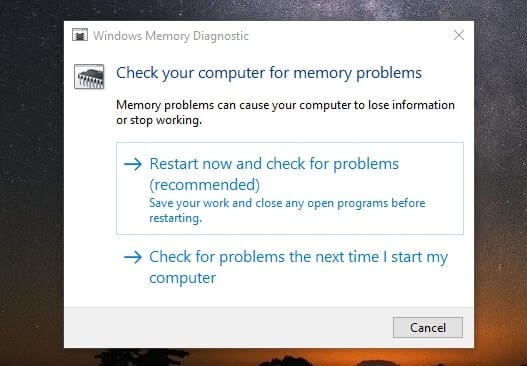
Windows Memory Diagnostic Tool
Though, It is a basic tool by Microsoft, to check RAM is working properly or not. But still, it is quite helpful to detect bad and faulty RAM or some memory problems.
To use this tool by Microsoft follows these instructions.
1. Boot your Computer into safe mode.
2. Press Windows + R key then type mdsched and then press enter.
3. Now, a small window will get open. Click on “Restart now and check for problems”.
4. After the restart, select the memory test option by pressing F1. Or, do nothing, the test will start automatically.
After the test gets complete you can see the result Window. Also, you can use event viewer to see test results. And, hopefully, this solution will fix the bad pool header error in Windows 10.
Disable fast Startup
The hybrid boot is known as a fast startup. In Windows, by default, this option comes enabled. So, if you’re facing Bad_pool_header Windows 10 error at startup. Then by disabling this option, you can get rid of this BSOD error.
1. Open Control Panel and then select the “Large Icons” option in View by section. (Check the right side of Control Panel)
2. After that click on Power Options, then click on “Choose what the power button does”.
3. Now, you can find a fast startup option, but you can’t able to make changes to it. To do that, first, click on “Change settings that are currently unavailable”.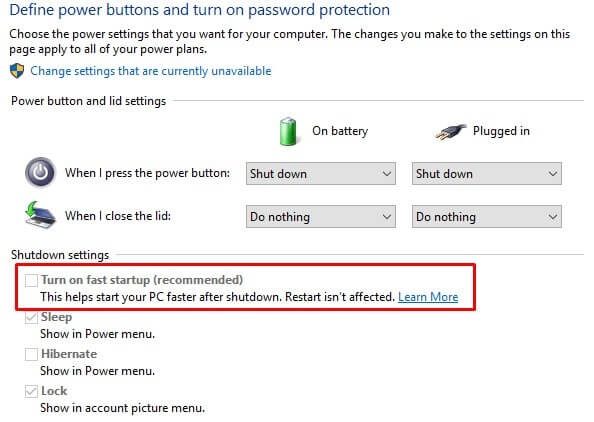
After that, you can unmark the fast startup option to disable it. And, then click on save changes.
Note: If a BSOD error is stopping you to access Windows. And, error screen coming repeatedly, then use safe mode.
Run BSOD Troubleshooter by Microsoft
Well, Microsoft has added different-different troubleshooters to fix all kinds of errors and issues in Windows 10. And, for BSOD errors like BAD_POOL_HEADER, there is a distinguish troubleshooter available.
1. To run the BSOD troubleshooter, press the Windows + I key to open the Settings App.
2. Click on update & security, from left-pane click on troubleshoot.
3. Click on the additional troubleshooter.
From here, run Blue Screen troubleshooter. It could be possible that you won’t find Blue Screen troubleshooter here. In that case, run an SFC scan.
Run SFC and DISM Scan
Well, BAD_POOL_HEADER is related to memory allocation. So the issue might be with the connected hard disk or SSD. So, I suggest running an SFC and DISM scan.
If the issue is because of corrupted system files, then SFC scan will scan all system files and replace corrupted files with the cache copy of Windows located in %WinDir%\System32\dllcache.
Similarly, the Deployment Image Servicing and Management (DISM) tool is used to repair potential issues with Windows. So, running these two scans will fix your Windows and disk errors.
SFC Scan
1. To run an SFC scan, right-click on the start button in Windows 10 and then click on Windows PowerShell (Admin). Yes, you can use the command prompt.
2. In Windows PS, type the following command and press the enter key to run SFC scan.

sfc/scannow
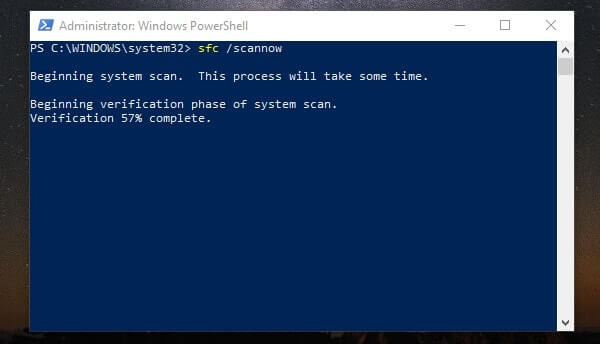
3. Now, wait for the scan to get complete. If System File Checker finds out any corrupted files, it will fix itself.
DISM Scan
DISM tool is quite a good utility to fight against BSOD errors.
1. Open Windows PowerShell (Admin) again. And, type the following command to run DISM.
DISM /Online /Cleanup-Image /RestoreHealth
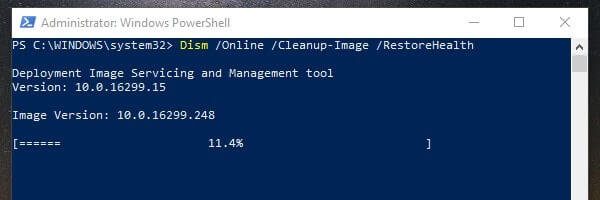
2. Wait until the scan gets finished.
Perform a Clean boot
If the error screen is coming after a few minutes of startup. Then, there is a startup service that is responsible for this error. So, open task manager and then disable all startup services. Though, there are many guides available on the internet to perform a clean boot. But, still, I am telling you it in a few steps.
1. Press Windows + R key and then type msconfig and press enter.
2. In the system configuration window, select the “Selective startup” option. Then unmark the “load startup items” option.
3. Go to the service tab, select the “Hide all Microsoft services” option. Then click on the “disable all” option. After that click on OK.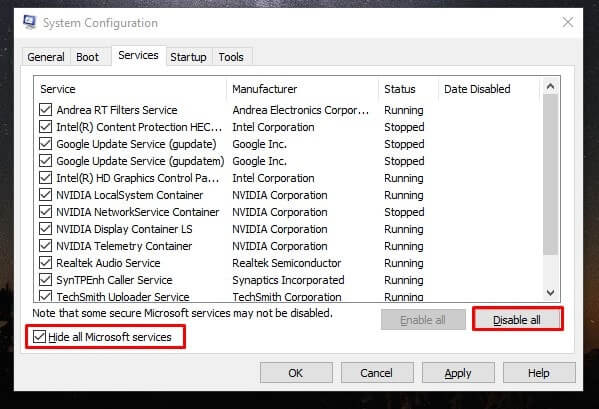
So, if apart from Microsoft services, if any other service is responsible for this error. Then after restarting the computer, the error will get resolved.
Perform Hardware Clean Boot
Clean boot only eliminates third-party apps and services from Windows boot. Though, this error can be related to driver software or hardware, so I suggest performing a hardware clean boot. Not all hardware components are necessary to run a PC to start. So, you can disable these drivers and try to start Windows normally. This solution will help you to find out the real culprit behind the bad pool error.
First open Windows 10 in safe mode. If Windows is getting open normally, then also, you can follow clean hardware boot steps.
1. Open Device Manager.
2. Now, to disable a driver software right-click on it and then click on disable the device.
These are the hardware components that you can disable.
- Display adapters
- Network adapters
- DVD/CD-ROM drives (If you’re using.)
- Sound, video, and game controllers driver
- USB/Wireless Mouse or Keyboard (Do disconnect external wireless devices, use wired.)
After that, restart the system. If an error doesn’t occur again, then clearly the issue was with any of the above-mentioned hardware components. Yes, you need to perform the trial and error method to find out the culprit hardware component. Do not forget to enable the device driver again.
Disable Nvidia Streamer Service in Windows 10
Recently, lots of NVIDIA graphics card users reported the same bad pool header error in their Windows 10. And, according to a forum, the main culprit was Nvidia Streamer Service. So, you also can try to disable this service to fix this Blue Screen error.
1. Press Windows + R key to open the Run dialog box, type services.msc in it, and press enter.
2. Services window will get open, now look for Nvidia Streamer Service.
Right-click on it and then click on properties.
3. In startup type select disable and then click on ok. (No worries, if you won’t find this service, just skip this solution.)
After that, restart windows, to find out error occurs again or not.
Remove Hardware Overclock Settings
Are you using any kind of overclocking software to get the most out of your hardware? Then, you should immediately stop using it. First, disable all overclocking settings that you’ve done. And, after that, uninstall that software from your system.
Summing-up
So, these were the solutions to fix BAD_POOL_HEADER blue screen error in Windows 10. First, disconnect all external and recently added hardware, especially RAM. Replace RAM and SSD if possible. After that, boot windows into safe mode if required. Disable fast startup and run SFC and DISM scan. Perform a clean boot as well. If nothing works, then reinstall Windows using Windows 10 installation media. Feel free to comment, if you’re facing any issue while trying out any solution.