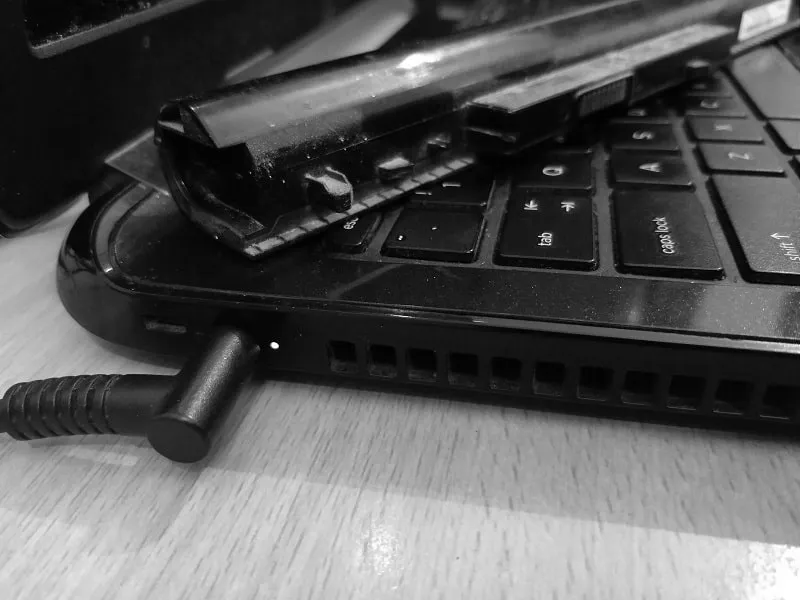
Is your laptop connected to the charger, but the laptop battery not charging? Then, don’t worry, every old laptop user has faced this problem. And, yes there are solutions available to fix it. Which you will get to know in this article. When this problem occurs, the laptop prevents electricity from flowing to reach the battery. And, when you hover your mouse pointer over the battery icon. A small message does appear, plugged in, not charging. (Also, battery charge animation also gets stopped.)
This problem can occur due to a software issue. Maybe, battery preservation software is saving the battery. If you’re charging for a long time and using a laptop continually. (Lenovo laptop manufacturer provides this kind of feature. This feature prevents charging when the battery level reaches 90-95%.) Or, maybe it’s due to an incompatible and outdated battery driver issue. Also, laptop battery not charging, problems, can occur due to damaged or faulty hardware. like, due to an Old battery and faulty laptop AC Adapter.
Well, this problem can occur due to multiple reasons. And to fix this problem you need to try out many solutions. So, here are some solutions, which you can try. These solutions helped me to find out the real reason and fix the laptop charging problem.
Laptop Not Charging – Here are solutions.
NOTE: It doesn’t matter which manufacturer laptop and model, you’re using. This guide will work for all Windows laptops. So, don’t worry about it.
Solution 1: Troubleshoot Laptop Power Adapter.
This is simple troubleshooting, which you can try. When the laptop not charging. Whenever, my laptop shows, plugged in, not charging, message. I removed the AC power cable. And, then after a minute, I do reconnect it. So, you can try it. However, the problem starts after the battery level reaches 90%. Then, your system prohibits the battery from getting the charge.
Surge Protector – Most computer and laptop users use the Surge Protector. Though, it’s useful, because, it protects Computers from power surges and voltage spikes. But, if your laptop battery is showing a, plugged in, not charging, message. Then, you need to connect the power adapter directly to the wall socket.
Try another AC Adapter – If you weren’t using the surge protector. Then, it might be possible that your AC adapter got internally damaged. In that case, you can borrow your friend’s laptop charger to check. But first, read the complete article. Maybe the problem might be something else.
Solution 2: Do a power reset on your Laptop.
Trust me this solution is worth trying. In this solution, we are going to remove the primary power source. That is an AC adapter and laptop battery. And, after that, we will drain residual capacitance by holding the power key. This process will clear out corrupted stored values. Don’t worry, it will not affect the data on the drive.
How to perform a hard reset on any laptop.
1. Power off your laptop. (You can simply shut down.)
2. Disconnect the AC Adapter if it’s connected.
3. Remove the laptop battery.
4. Now, press and hold the power button several times for several seconds each time. (Do this at least 5-10 times.)
5. After that, release the power key. And, reconnect the laptop battery.
Also, reconnect the AC Power Adapter. And, then start the laptop by pressing the power button.
Check Laptop Battery Health.
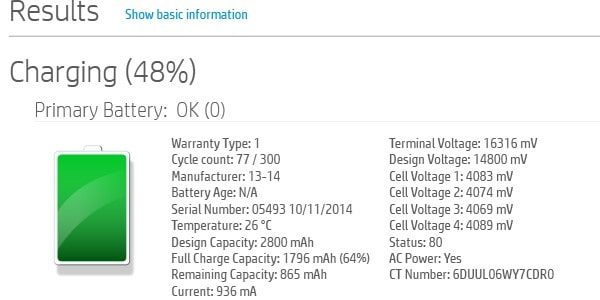
After performing the power reset and checking the AC Adapter. Now you need to check the laptop battery’s health. Because, over a period of time, battery charge capacity starts decreasing. And, because of this, laptop battery draining fast, the problem also occurs. And, It could be possible that your battery’s charge capacity got too low. So, the laptop battery is not charging. In this case, you need to replace the laptop battery.
IMPORTANT – If the “plugged in, not charging” problem occurs in the HP laptop. Then, you can use the HP support assistant to check battery health.
And, in Dell laptops, you can use a Dell Battery Meter. Though, some laptop doesn’t provide an inbuilt option to check battery health. That’s why you can try the following method.
Solution 3: Generate a Battery Health Report /Replace the Battery.
1. Press the Windows logo + X key simultaneously.
2. WinX menu will appear, click on “Windows PowerShell(Admin)”.
Alternatively, you can use the command prompt (Admin).
3. Type the following command in PowerShell and press enter.
powercfg /batteryreport
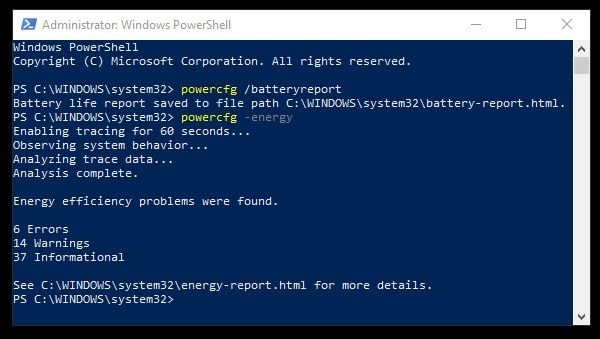
4. PS or CMD now will show you a directory. In which the battery report file was saved.
Open File Explorer, and then, open the path of the file.
5. You can open that battery-report.html file using any browser.
To find out the current charge capacity of the battery. Check the Installed batteries part of the report.
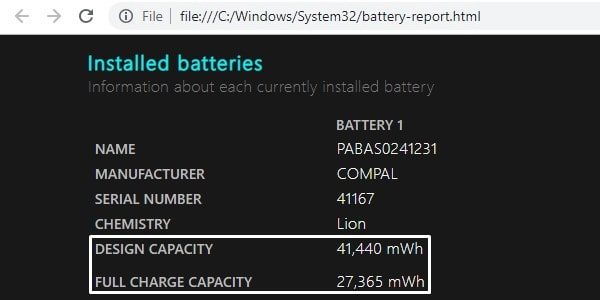
So, as you can see my battery design capacity was 41,440 mWh. And, now after five years, it remains 27,365 mWh. This means, now I can’t charge the battery more than 27,365 mWh.
If you want to calculate how much your battery capacity decreased. Then, here is an example to find out.
27,365*100 / 41,440 = 66.03
So, 34 % of battery capacity got decreased. And, now I can use only 66% of my battery. After generating the report and calculating the remaining full charge capacity of the battery. If you find out that, battery capacity is left less than 20-40%. Then, it’s high time, to replace the laptop battery.
Solution 4: Re-install the Laptop Battery Driver.
If you don’t know, the device driver is a computer program. That controls and helps to manage a particular type of device attached to the Computer. Yes, even a laptop battery has its own drivers. And, to fix the Windows 10/11 laptop plugged in but not charging problem. You need to re-install the battery driver.
Uninstall the Battery Driver.
1. First, open the device manager. (Press the Windows + X key, and then, click on ‘device manager.)
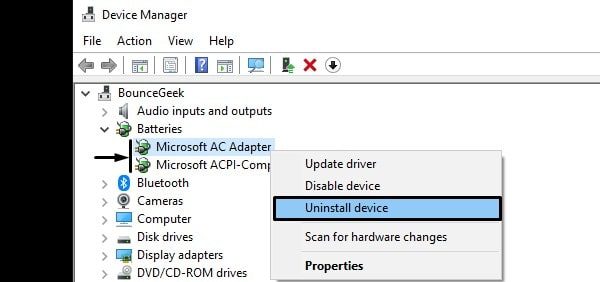
2. In the device manager, expand the “Batteries” section to see all battery-related drivers.
Mainly you will able to see two drivers.
- Microsoft AC Adapter.
- Microsoft ACPI-Compliant Control Method Battery.
3. Right-click on the first battery driver (Microsoft AC Adapter) and then choose the “Uninstall device” option. A warning window will appear now. Click on “uninstall” to confirm. Now, do the same with the second ACPI driver. Uninstall it.
4. After uninstalling both drivers, restart Windows.
During the restart process, Windows will automatically install both drivers. And, stay connected with the AC Adapter.
Solution 5: Update Battery Driver.
1. To update the driver, open the device manager, and expand the batteries section.
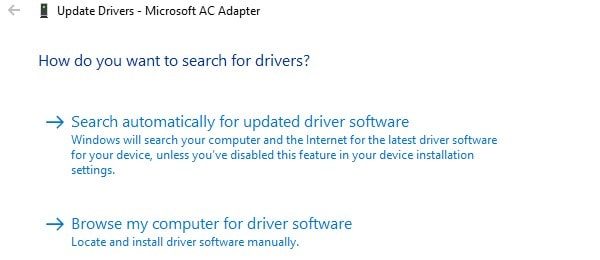
2. Now, right-click on the battery driver and choose the “Update driver” option.
3. Click on “Search automatically for updated driver software”. And, windows will automatically install the latest driver for you.
4. Do the same thing for both battery drivers.
If the device driver isn’t able to find out the latest battery driver. Then, you can install the latest pre-installed driver.
1. Again right-click on the battery driver and choose the “Update Driver” option.
2. Click on “Browse my computer for driver software”. And, after that, click on “Let me pick from a list”.
3. Now, select the latest battery driver and then click on OK. Windows will now install that selected driver for you.
That’s it. I hope, by reinstalling and updating the driver. Your problem was resolved. If not then try the next solution.
Solution 6: Update / Reset BIOS.
BIOS manages data flow between the computer’s OS and attached devices. It is basically a program that the microprocessor uses to get the system started. After you press the power key to turn it on. And, BIOS can be responsible for the laptop plugged-in not charging, problem. So, if your BIOS is outdated then you need to update it.
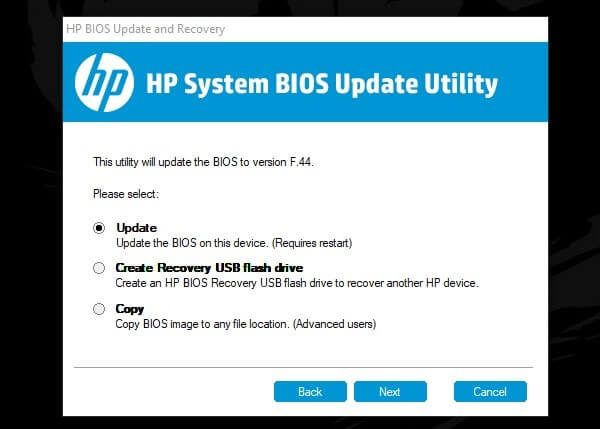
Updating BIOS is very simple. You just need to download the BIOS file from your manufacturer’s site. And, then you can install it like any other Windows software. But during the BIOS installation process, you need to stay connected with the AC Adapter. If you’re using an HP laptop then, read my article on – Install HP BIOS Update.
Reset your BIOS configuration to default.
If your BIOS is already updated, then you need to reset its configuration.
1. First, turn off your laptop.
2. Now, press the power key. Now, keep pressing the ESC key, to stop OS to boot.
3. The Startup menu will appear. Press the appropriate key to enter into the BIOS setup. (On my laptop it’s F8)
Note: This process might not work for your laptop. So, you need to find the right key to access BIOS settings. Search for it, or you can comment, on your laptop model and manufacturer details.
4. Now, check the bottom of the BIOS settings. You will able to see a dedicated key to “setup defaults”. (In my HP laptop, it’s F9. ) Press that key and then select Yes to confirm.

After that, you need to save the default settings. For that also BIOS provides a specific key. As you can see in the screenshot, for my laptop it’s F10.
Note: In some laptops, there isn’t any specific key to reset the BIOS configuration. So, you need to manually find out the “setup defaults” option.
That’s it. After resetting the BIOS configuration and saving changes. Your laptop will get started and the charging problem might get resolved.
Solution 7: Take the laptop to the service center.
So, that’s all you can do when the battery shows a “plugged in, not charging” message. And, if nothing works for you. Then, the only thing you can do is – take the laptop to the nearest service center. Or, you can contact your manufacturer’s customer care. They can assist you better in fixing the charging problem. However, these solutions are enough. Because many users were able to solve this problem with these solutions.