There are various photo editors and online tools available to resize photos. But, Microsoft PowerToys offers a better way to resize pictures in bulk in Windows 10. Yes, It integrates the “Resize Pictures” option in your Windows File Explorer context menu. And, with a few clicks, you can resize the image into preset sizes or can add custom size that you’d like. It also offers some encoding options. Which will let you compress photos. Well, It might be possible that you have never heard about PowerToys. So, let’s get to know about it first.
What is, the PowerToys?.
Microsoft PowerToys is a set of freeware Windows system utility to maximize productivity. It is currently under beta development, the first preview of it was released for Windows 10 on April 29, 2020.
Recently, Microsoft has released a new version of it, in which macOS’s spotlight like utility is added, named “PowerToys Run launcher“. Which is designed to modernize and replace the existing Win + R shortcut. It includes a quick search of Apps and Files across Windows OS. It does support all commands that we use in Run Window. Well, Microsoft is gonna make it more powerful.
But, for now, let’s concentrate on Image Resizer. Which is a very useful feature by PowerToys. PowerToys also offers few more utilities like PowerRename, File Explorer (Preview Panes), Fancy Zones (You can set custom desktop layout with it.), Keyboard Manager, and many others.
Resize Pictures using PowerToys in Windows 10.
Download and Install PowerToys.
As of now, PowerToys is in beta state and freely available on GitHub.
1. Go to the PowerToys Release page and download the latest version of PowerToys Setup file. In the Assets section, you will get the download link of the setup file. (For example – PowerToysSetup-0.18.0-x64.msi)
2. After downloading the setup file, double-click on it and run the PowerToys Setup.
Installation is quite simple like any other Windows Program.
3. Once, Installation of PowerToys gets completed. Setup will ask you to download and install ASP.NET Core Framework and SDK as well.
If by mistake you close that ASP.NET window. No need to worry, try to launch PowerKeys, and it will lead you to the download page. (Download and install the stable version of ASP.NET Core SDK and ASP.NET Core shared framework.)
4. Once, all installation processes get completed. You can launch PowerKeys from a startup menu or shortcut. Just make sure to run it as an administrator.
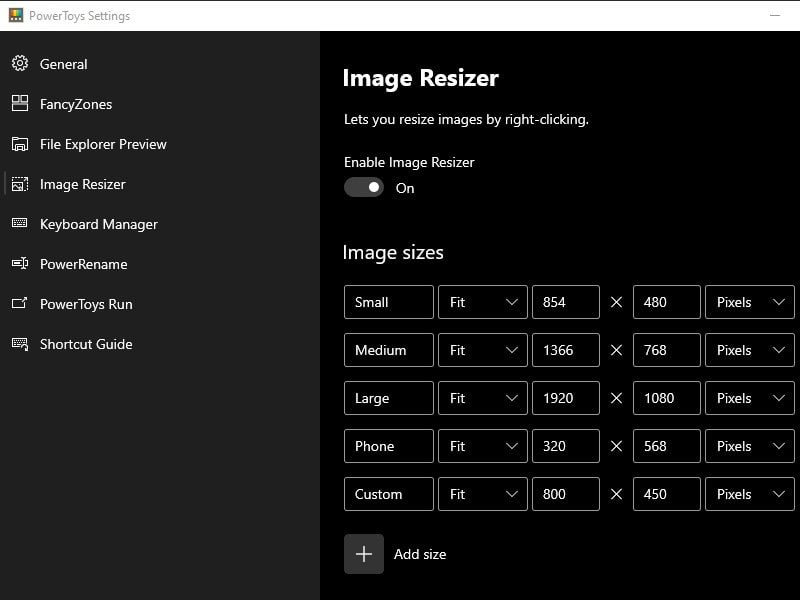
PowerKeys Image Resizer Settings.
PowerKeys settings page will get open. You will now see many utilities that I mentioned before. Click on the image resizer.
By default, it will show you four preset Image size small, medium, large, and phone. You can delete any if you want to.
Custom Picture Size.
To add a custom picture size. Click on “Add size”. A new field will appear immediately to add custom size.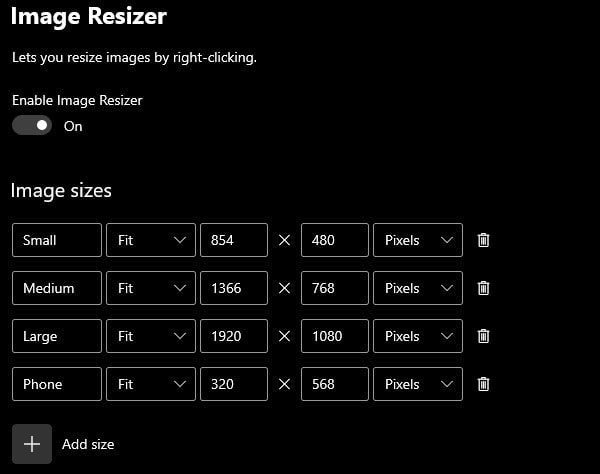
Enter a name, and after that, enter the width and height of the picture.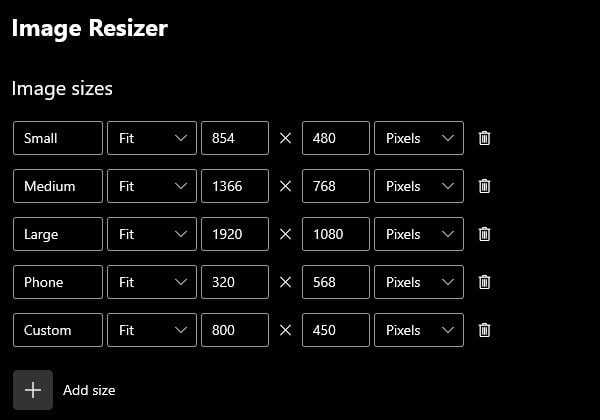
Compress Image.
Scroll down and you will see some encoding option. If you don’t know much about image compression. Leave it as it is.
Or, you can set the JPEG quality level to 100%. (That will cause 0% or no loss to your picture.) And, In TIFF compression, you can choose LZW or ZIP. Both are lossless compression methods. This means, no data will be lost during the compression process, unlike a lossy JPG format. (Other compression methods also good you can give it a try.)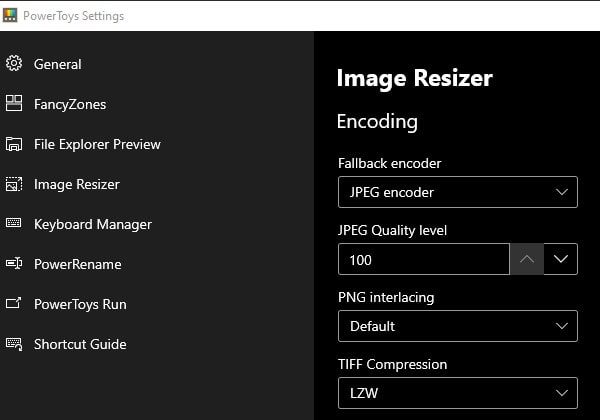
Resize Pictures using PowerToys.
After Installing PowerToys, the “Resize pictures” option will automatically get added in the File Explorer context menu. And, you have already set up a custom size to resize your image. So, It’s quite easy now.
1. Open File Explorer, open the folder in which the image is stored. (It will even work images stored on the desktop.)
2. Right-Click on the image that you want to resize. From the context menu, click on the “Resize Pictures” option.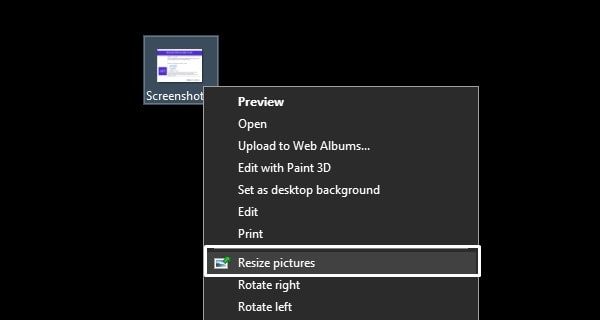
3. Image Resizer will appear. You will see your custom image size is selected.
If you don’t want to make a copy of the images after resizing. Then, mark “Resize the original picture” option. It will replace your original picture. Though, it is not recommended. That’s it, click on Resize. 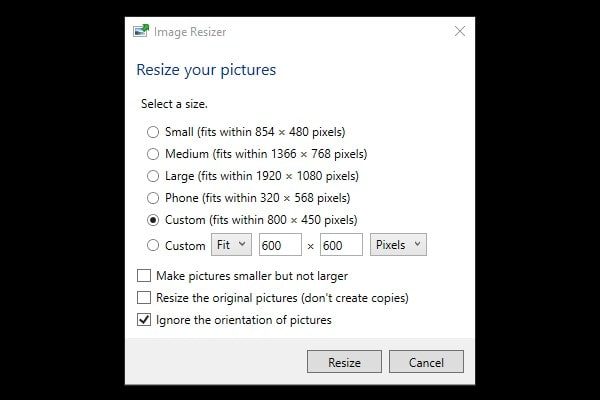
Note: You have to enter the correct width and height in pixels of the custom picture. Otherwise, the utility will set the height accordingly what suitable.
That’s it, I hope you find this Microsoft PowerToys helpful to resize pictures. So, now no more need to open a photo editor to resize or compress the image. You can do it within the file explorer. And, PowerToys offer other utilities also, so it is worth to install it.