Are you not able to increase and decrease the brightness of your Windows Laptop? No worries, you can easily fix it by applying certain solutions mentioned in this article.
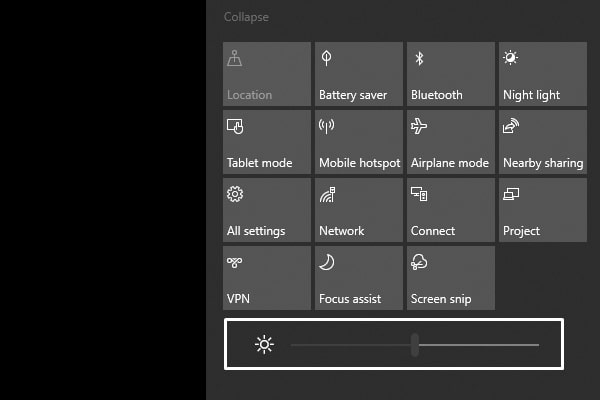
Apple recently released its M1 chip MacBook air & pro with up to 20 hours of battery life. But still, a Windows laptop comes with only 2-5 hours maximum battery life. Though, screen brightness plays an important role in battery life. If you keep the display brightness to a lower level, it will not only reduce eye strain but also will increase your laptop’s battery life. Almost every laptop comes with dedicated brightness keys. Even, Windows 10/11 Laptop itself offers a brightness slider under quick actions. (Click on the notification icon.) But sometimes, the brightness level fails to change. If you’re also not able to increase or decrease the brightness levels, then this guide will definitely help you.
What causes the “Windows brightness not working” Issue?
Undoubtedly, the brightness issue in Windows laptops is clearly associated with display drivers and some other power settings. Display adapters driver issue mostly occurs after Windows big update. And, recently, Microsoft released a big update for Windows 10 and 11. After the Windows update, you should always reinstall display drivers.
So, If Windows 11/10 laptop won’t let you adjust the brightness level from the keyboard keys or brightness slider. Then, there are a couple of ways to fix this issue. Yes, some common fixes like restarting Windows, and updating Windows, are also fairly important. Ok, so here are the solutions to try, when the Windows brightness slider and laptop brightness keys not working.
Solutions: Windows Laptop Brightness Not Working
Solution 1: Update/Re-install existing display adapter drivers
Personally, I was experiencing the same screen brightness issue on my HP laptop, after the Windows update. But after just reinstalling existing display drivers from the device manager, the issue got resolved. Though, if you haven’t updated your integrated or discrete graphics card drivers, then you should try to update them first. All this you can do from the device manager.
Important: But first, you should check for pending Windows updates. Go to Windows 10 settings > update & security > check for update. If you find any update related to graphics card or display, do install it. (In Windows 11, open settings App. Click on Windows Update > Check for Updates. )
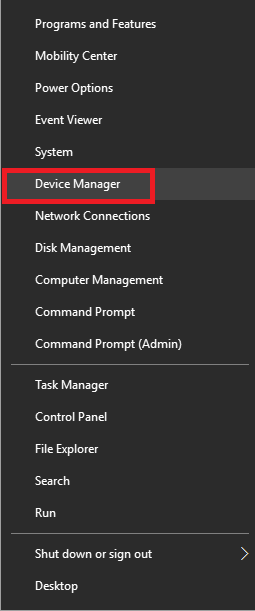
1. In Windows, simply right-click on the start button, and from the WinX Menu, click on Device Manager. (Alternatively, you can press Windows +X Keyboard Shortcut.)
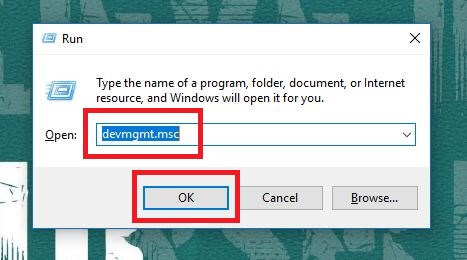
2. If you’re using an older version of Windows, then to open Device Manager – Press Windows + R key. In the run dialog box, type devmgmt.msc and press the Enter key.
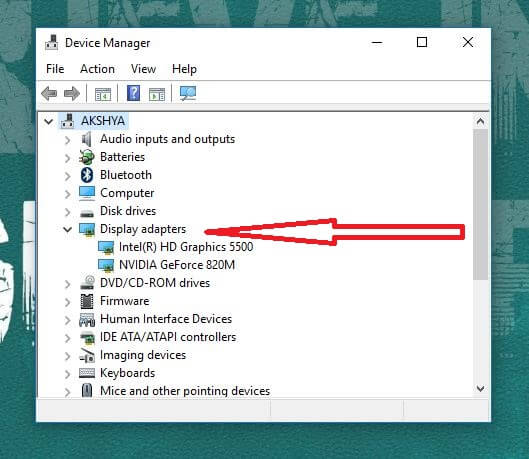
3.. Click on > to expand display adapters.
4. Here you will find two drivers integrated and discrete graphics cards. You have to update and reinstall both drivers.
5. As you can see in the below screenshot of my HP Laptop, two drivers are visible in the Display adapters section.
- Intel(R) HD Graphics 5500
- NVIDIA GeForce 820M
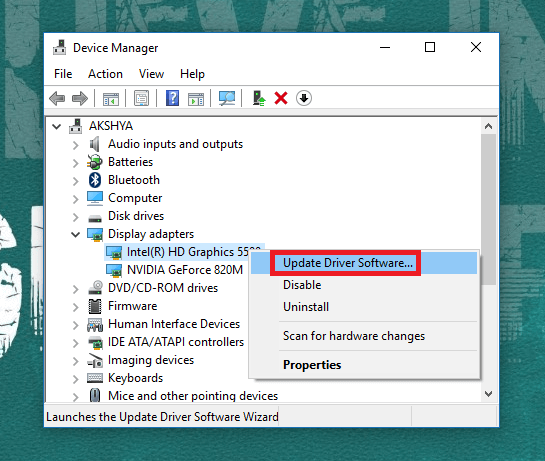
6. Right-click on the first display adapter driver and then click on “Update Driver”.
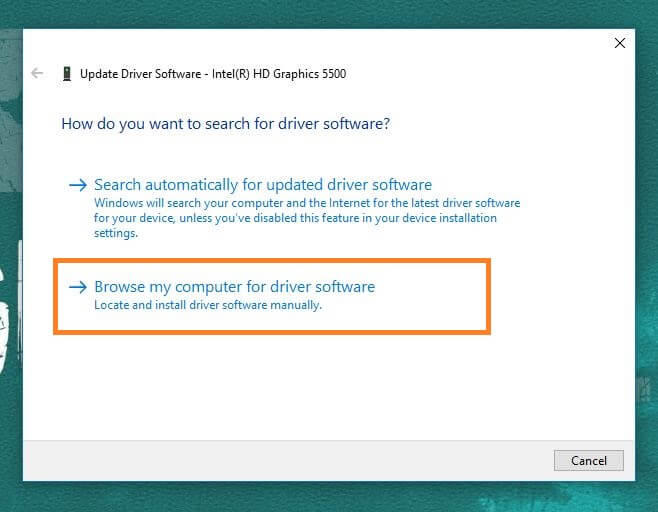
7. You can click on “search automatically for drivers”. If you want the device manager to find drivers from Windows update.
8. Though, we want to reinstall existing drivers, so click on Browse my computer for drivers.
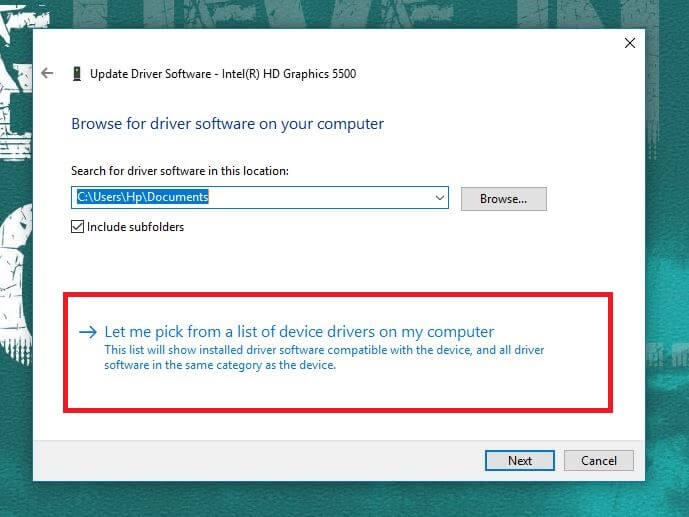
9. On the next window, click on “Let me pick from a list of available drivers on my computers”.
10. Now, select the latest driver for the display adapters. Here I am reinstalling the integrated graphics card driver, so, I am selecting the latest intel driver from the list.
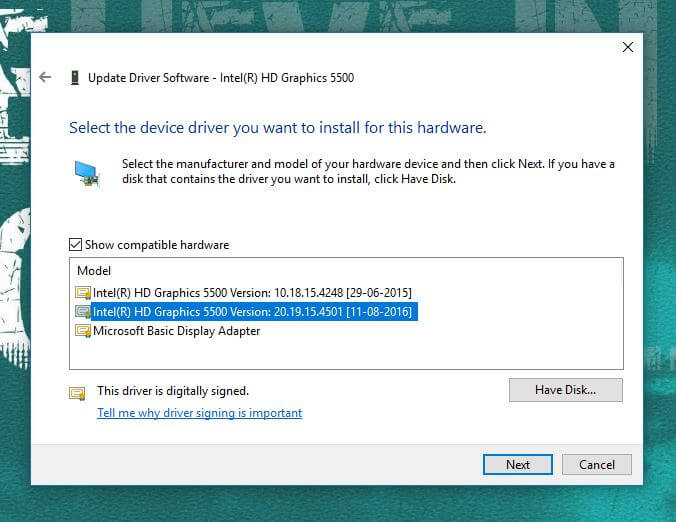
Note: If only “Microsoft Basic Display Adapter” appears here. Then, it means, you haven’t installed display drivers yet. In that case, visit the laptop manufacturer’s site. And, Enter your laptop model number and download drivers for it.
11. Click on next. Device Manager will now reinstall the driver. Your screen will go black for a few seconds. So no worries, don’t interrupt the process.
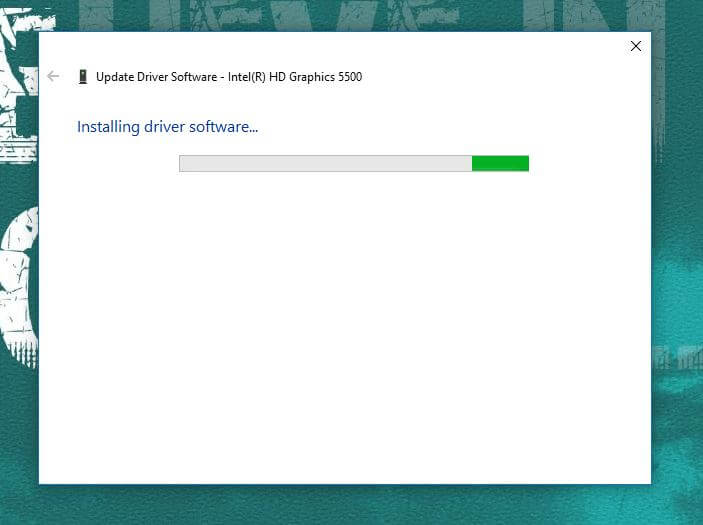
12. Once, the driver gets reinstalled, you can try to change the brightness level through keyboard keys or the Windows brightness slider. If still, it doesn’t work, then repeat the same process with the discrete NVIDIA graphics card driver, reinstall it.
Solution 2: Download Dedicated GPU Driver
It could be possible that your dedicated GPU is configured to manage the graphics operations on your Windows laptop. In that case, you should make sure that your GPU driver is up-to-date or not. Well, by following the above solution you already get to know how you can reinstall existing GPU drivers. Also, you got to know details about your GPU from the device manager.
Now, go to the GPU manufacturer site and download the latest drivers. And, install it manually.
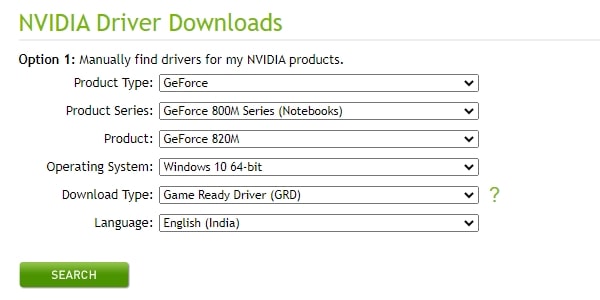
As you can see in the above screenshot, I am entering details of my NVIDIA GPU to download drivers for it. You can do the same, just select the correct model number of your GPU. And, download drivers for it. The installation process is quite simple just like installing software in Windows.
Solution 3: Reinstall Generic Monitor Driver / Update Monitor Driver
Apart from Graphics Card drivers, this issue can be related to Monitor drivers. When windows not able to find out any dedicated driver for your monitor, then, it does install Generic drivers. (Just like the Microsoft basic display adapter driver.) Though, most of the laptops don’t need dedicated monitor drivers. Generic PnP driver is enough for the basic functionality of the monitor. Well, I suggest you disable and re-enable the Generic driver to see if that helps.
1. Do open device manager.
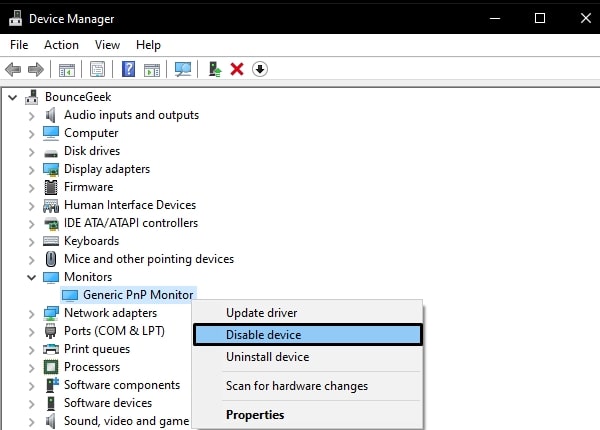
2. Click on > and expand the Monitors section.
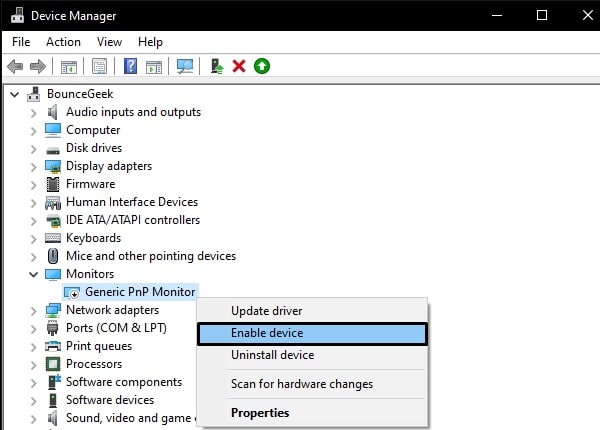
You”ll see, Generic PnP monitor, do right-click on it and then click on “Disable device”.
A window for confirmation will appear, click on Yes.
3. Again, do right-click on it and this time, click on “Enable device”.
Now, try to change the display brightness. Hopefully, Windows 10 brightness not working issue will now get resolved.
Reinstall Monitor Driver.
If, still, the problem not get resolved, then, follow the first solution and do reinstall the Generic PnP monitor driver. (Steps are same.) Also, I have written a dedicated article on the Generic PnP monitor. In that article, you will get a solution to install monitor drivers. So, do check that article.
Solution 4: Change Brightness using Integrated Graphics Card Properties
Well, if still, the brightness slider is not working in Windows 10. And, you’re using Integrated graphics only on your laptop, then this solution might work for you.
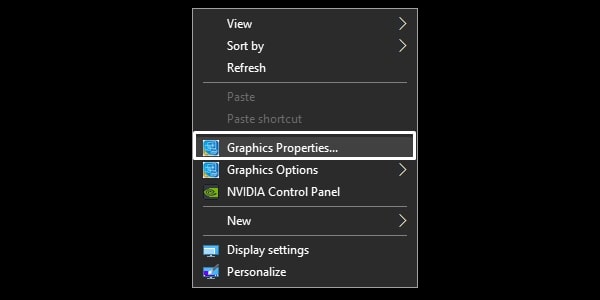
1. Right-Click anywhere on the desktop and then click on “Graphics Properties”.
2. Intel HD Graphics Control Panel will get open, click on Display.
3. In Display Settings, click on color settings.
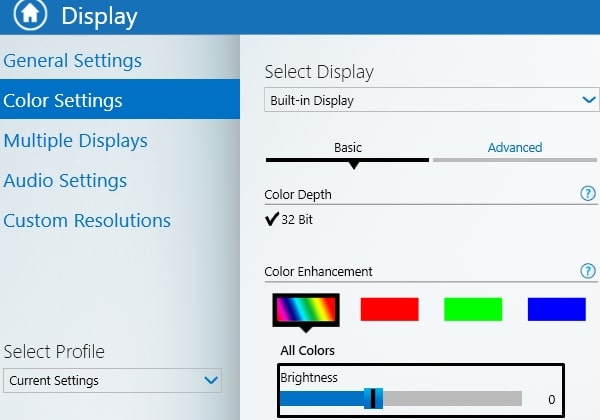
Now, from here you can control brightness. If you make a mess in these settings, then click on “Restore Defaults”.
Solution 5: Install Brightness Slider App
Windows PC doesn’t come with any brightness slider. So, if you’re trying to control the brightness on your PC through Keyboard. Then, that will won’t work. You have to install a free and open-source brightness controller App. This app will put a Monitor Brightness icon on Taskbar Tray. Although, there are two apps to change monitor brightness on Windows.
You can install any of these two apps, both apps work similarly. Personally, the “Win10_BrightnessSlider” app does work for me. Although this app is for Windows 10, this also does work with the latest Windows 11.
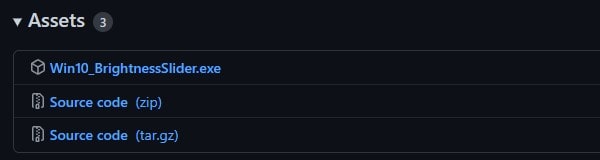
1. Do download “Win10_BrightnessSlider” from the assets section.
2. Run the setup file. And, you will immediately find a brightness icon in the taskbar. (Check the system tray if it is not visible in the taskbar.)
3. Click on it and you will see a brightness slider. Do use it to control your laptop brightness.

4. To set it as a startup app. Right-click on it and then click on “Run At Startup”.
5. That’s it, App will now get open automatically every time you start Windows. Just don’t delete the brightness slider setup file.