
Windows 10 comes with the split-screen feature, which helps us to perform multitasking easily. But still, Windows doesn’t offer an option to keep a Window always on top. And, If you work with multiple open windows, then setting up them in split-screen might be time-consuming. Yes, Alt+Tab is also a good option to switch between multiple Windows. But, what if, you want to pin a Window while doing other work. In that case, some third-party tools can be helpful.
There are a lot of tools available to make a Window stay on top. But, some tools don’t work with the latest Windows 10. Well, I have tested a variety of tools. And, in this article, I will recommend some best and most reliable. These tools will work with the keyboard shortcut or a graphical menu. So, you can decide, whatever works best for you.
Best tools to Keep a Window Always on Top.
Always on Top by Microsoft PowerToys
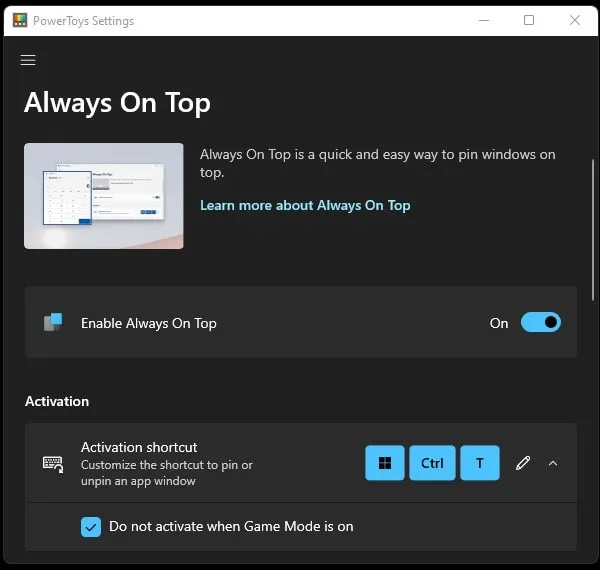
PowerToys is a set of freeware system utilities developed by Microsoft for advanced users. It provides so many useful system utilities like PowerRename, Color Picker, Awake, Keyboard Manager, Video Conference Mute, and many others. Recently, Microsoft added a new utility to PowerToys called “Always On Top”. With this utility, you can pin any Windows on top using the keyboard shortcut. Also, there are many customization options available.
1. First, download and install the latest version of PowerToys from GitHub.
2. Once it gets installed open it. And, make sure it is running in administrator mode. Check General settings.
3. After that, click on the “Always on Top” left sidebar. And, do enable the “Always on Top” utility.
Note: Click on Open Settings if you don’t find the option to enable and customize “Always on Top”.
4. You can now pin any window on top by pressing the Windows + Ctrl + T shortcut. You can also customize the shortcut by clicking on the pen icon.
5. By default, it will show a border around the active pinned window. But, you can disable it. Just disable the “show a border around the pinned window” option.
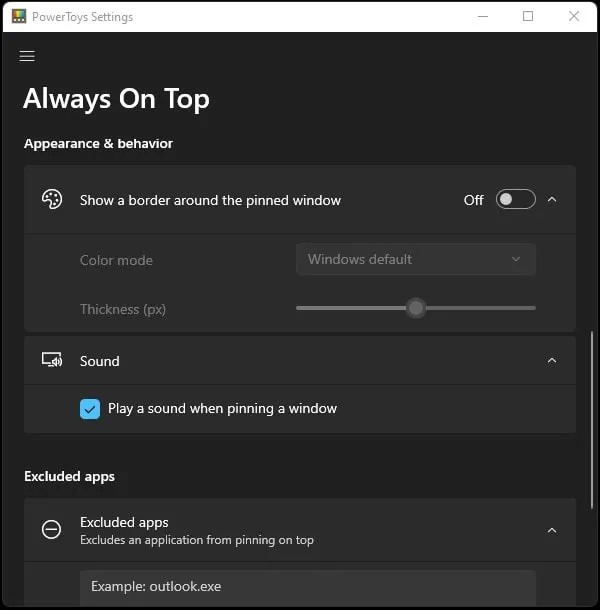
Moreover, you can also create a list of Apps on which you never want to pin on top.
Use AutoHotkey Program (Create Script)
By using the AutoHotkey program, you can create a one-line script. That will help you to set your currently active window to be always on top. The script is quite lightweight and won’t use so many system resources. And, the script will work with a key combination. Yes, I can provide you with a direct link to download the script file. But, it would be better, if you use AutoHotkey and compile the script into its own executable file.
What is AutoHotkey?
Well, to create and use the script, the AutoHotkey program is required. It is a free macro-creation and software automation tool. That does supports hotkeys for mouse, keyboard, and even joystick. Basically, the tool is designed to automate repetitive tasks of any Windows application.
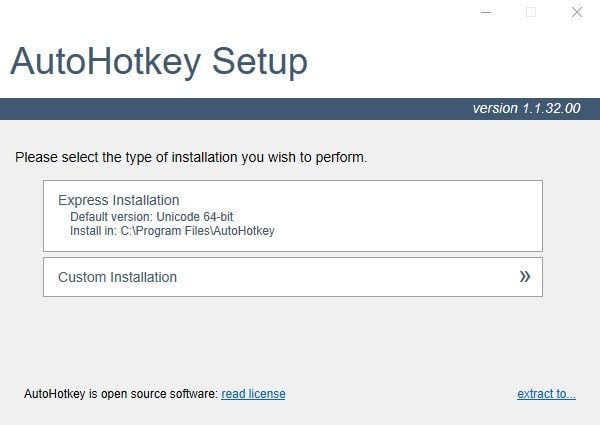
1. First, visit the AutoHotkey site, and download the current stable version of it. And, Install it on your PC. (There is alpha and deprecated (older version) available.)
2. When installation gets done, click on exit. It’s time to create an “always on top” Script.
Right-click anywhere on the desktop. Point to the “new” menu, and select the “AutoHotkey script” option.
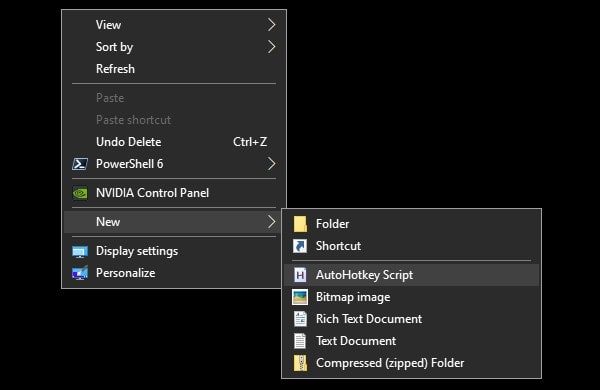
A new script file gets created on the desktop, name it “AlwaysOnTop“.
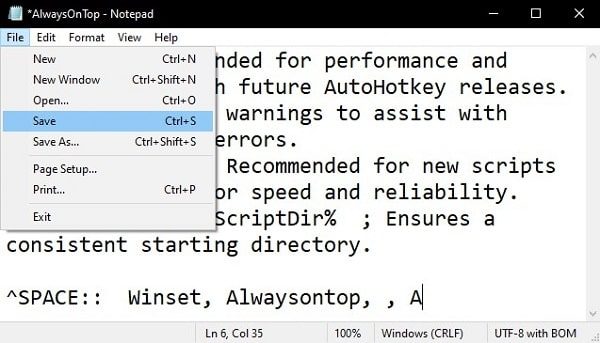
3. Now, Right-Click on the script and then choose the “edit script” option.

4. Notepad will get open. And, you will see something written. Well, it’s just comments. Or, I mean, some important information to write new script code.
^SPACE:: Winset, Alwaysontop, , A
Copy and paste the following line of code at the bottom. After that, save the script from the file menu and close it.
5. To run the script, double-click on it. You”ll know it’s running or not from the green “H” logo appears in the system tray.

How to use the script to pin a Window on top?.
With the Ctrl+Space key combination, you can set any active window to always stay on top. And, by pressing the same key combination, you can unpin the window.
If for any reason, you won’t find Ctrl+Space combination inappropriate. Then, you can change the ^SPACE part of the script. But, read Hotkey’s documentation first from AutoHotkey’s website.
Move the script to the startup folder.
If you find this script helpful and gonna use it more often. Then, put it into the startup folder. So, you will not need to run the script manually. It will get open when you start Windows. And, you will be able to use Ctrl + Space hotkey without much hassle.
1. Press Windows + R key to open the Run dialog.
Type shell:startup in the Run dialog and press enter.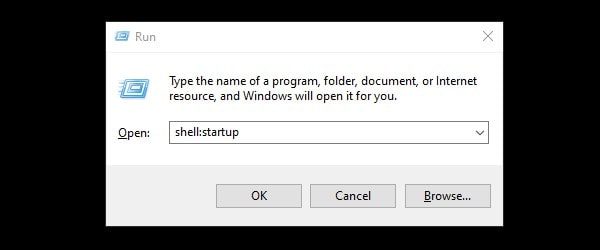
2. The startup folder will get open, move the script file into it.
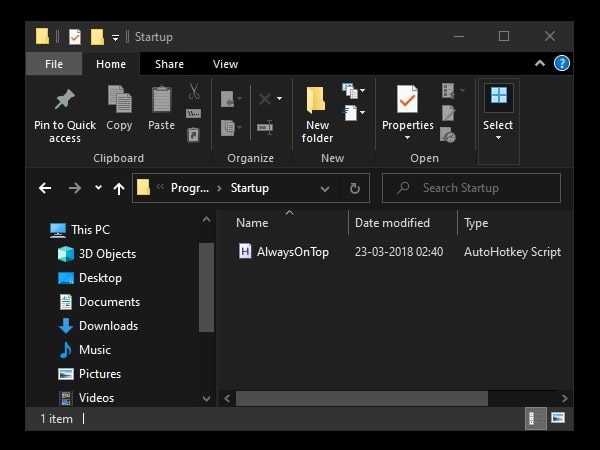

And, restart Windows, to check it’s working or not.
DeskPins
If you prefer using mouse over keyboard key combinations or hotkeys. Then, DeskPins can help you to make any application window to top-most. It’s a free and open-source application that was designed for the older version of Windows. But, it works fine in Windows 11/10.
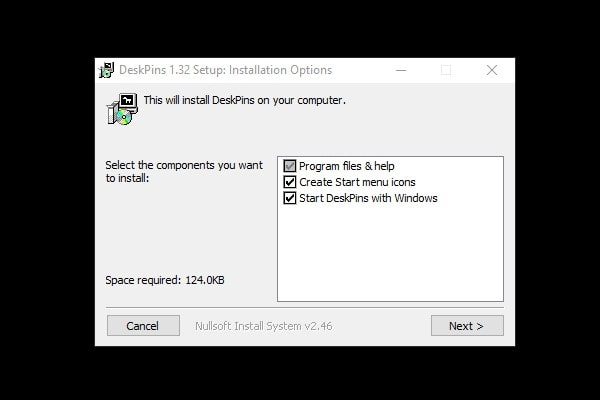
1. First, download and install the DeskPins application.
After installation, run the DeskPins application. And, you will see a “pin on the window” icon in the system tray.
2. Open the window that you want to keep on top. Click on the DeskPins icon from the system tray. And, the pointer will turn into a pin. After that, click on any window to pin it.

3. On the pinned window, you can see a red pin added in the title bar. It will help you to recognize which window is pinned.
And, to remove the pin, move the mouse pointer over the red pin icon. A small “X” icon will appear, click on it to remove the pin. Alternatively, by right-clicking on the DeskPins icon, you can remove pins from all Windows.
TurboTop
Well, if you don’t like messing around with pinning Windows. Then, TurboTop can be the right tool for you. TurboTop program sticks in the system tray. And, it shows you all the open windows. You just have to mark the Window. And, that window will always keep on top. Well, this tool is so basic and minimal. You will be amazed to know that, the program isn’t updated since 2004. But, it still works fine with Windows 10/11.
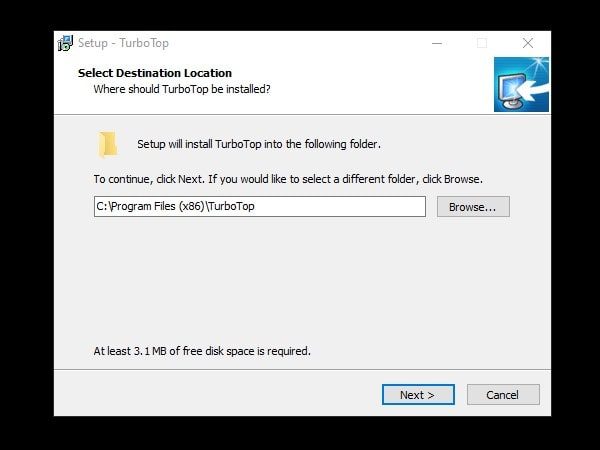
1. Download and Install the TurboTop program on your Windows PC.
2. When installation gets complete, launch the TurboTop tool.
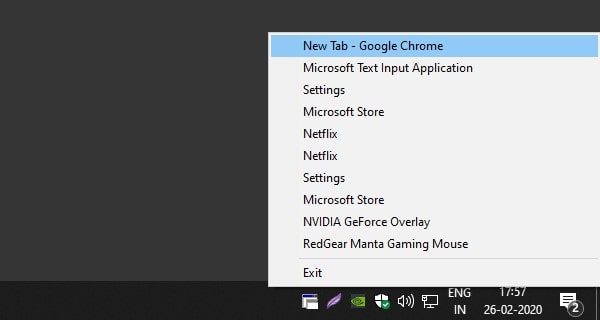
3. You will find a “two windows” icon in the system tray.
4. First, Open the window that you want to keep on top. It works only on active Windows.
5. After that, click on the Turbotap program icon. And, select the Window that you want to pin or always keep on top.
That’s it. By clicking again on the Window from Turbotap, Window will no longer stay on top. If you just want to watch a video while working. Then, read my article on Get picture-in-picture mode on Windows 10.