Want to know, how to create a Discord Server, or, want to delete your Discord Server?. Then, this article will help you in doing it. After TeamSpeak and Ventrilo, Discord is the best voice and chat server platform for Gamers and for Companies. Initially, Discord looks complicated, but, it’s very easy to use. You can create your own private server and can talk through chat, voice, and video calls. Even, now you can share Computer Screen on Discord Server.
Apart from this, there are lots of features which you can use. But, first, you have to create a Discord Server. Though, you can join anyone server through their invitation link. But, you will be able to access limited features according to your Role in that server. So, if numerous people follow you, then creating your own Discord server is a good idea. As a server admin, you will have many powers. You will be able to control what users on your server can do, how they can interact. And, you will be able to use some best Discord Bots.
So, If you want to create, manage or Delete Discord Server for your Gaming Channel or Company. Here is how you can do that.
Create, Manage and Delete Discord Server
Create a Server on Discord
You can download the Discord Client App, or, can use it within your browser. Both Client and Browser App works equally well. Before start creating a server, the first thing which you need is a Discord Account. It’s quite easy to create a Discord account.
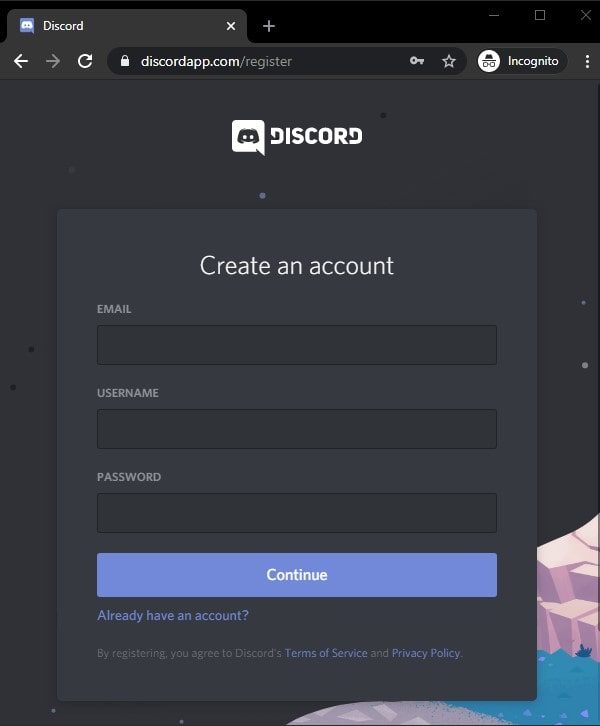
1. Do open the Discord Registration page, enter email, username, and password and click on Continue.
2. After that, open your email and complete the email verification process.
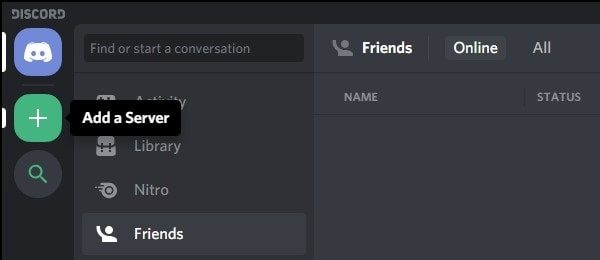
3. After completing the registration process, once you’re on the Discord homepage, click on “Add a Server” (“+” icon). (You can click on the Discord logo icon from the upper left corner to navigate to the home.)
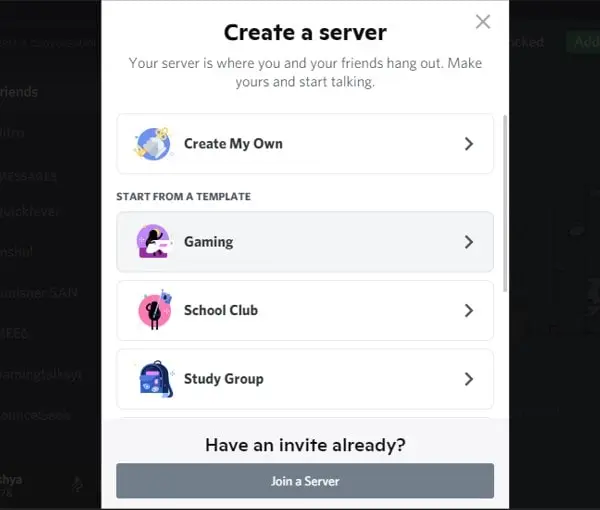
4. Once you click on “Add a server”, a “Create a Server” window will appear. You can simply click on “Create My Own”. Discord now also gives options to choose a template for the discord server.
For example, if you want to create a Discord server for gaming, then you can simply click on it.
5. Next, it will ask you for whom you want to create your server. If you want to create a server just to talk with your friends. Then, click on “For me and my friends”. Else, if you’re creating for a community then click on “For a club or community”.

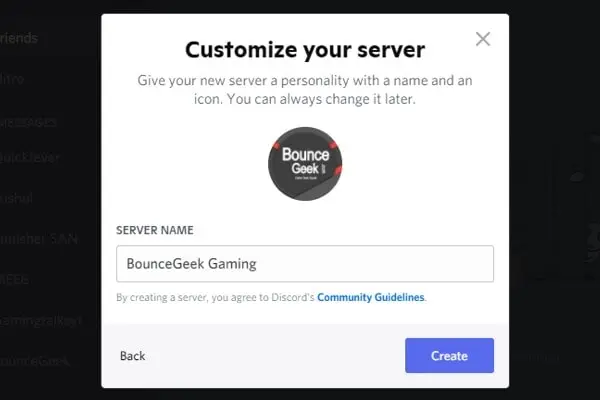
6. Now, you can enter your Discord server name, and also can personalize your Discord server with an icon. Once you do that, click on Create.
7. That’s it, you have successfully created a discord server.
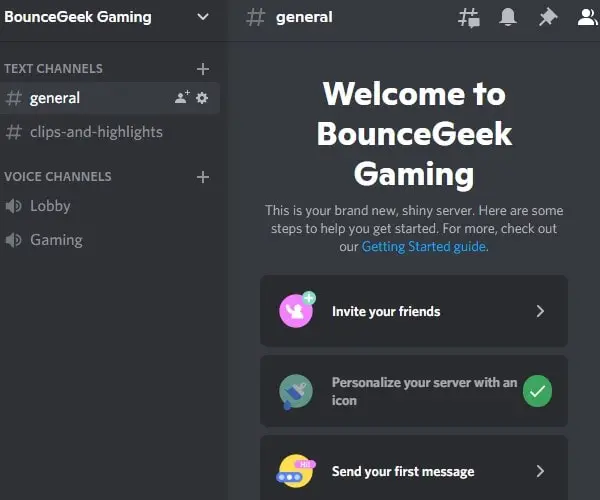
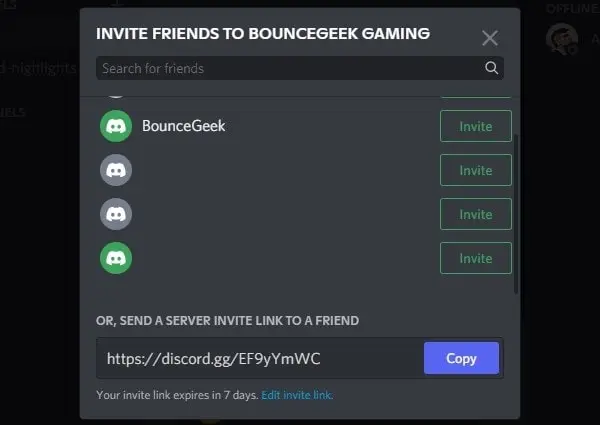
8. Now, you can click on “Invite your friends”. And, you will get an invite link, which you can share with your friends. If you have already friends on your Discord friend list, then you can invite them directly.
9. Once, the server gets created you will be able to see Text Channels and Voice Channels. In the Text Channels, you can send public messages to all friends on the server. And, in the Voice channel, you can connect with friends and talk through voice. You can add multiple voices and text channels for different purposes.
10. That’s all you need to know about creating a Server on Discord. You just need to do a few clicks and the Application will do all things by itself. After creating a server, the next thing you need to learn is managing the server. By creating and assigning roles you can manage your server easily.
Manage your Discord Server (Add Roles and Assign Roles)
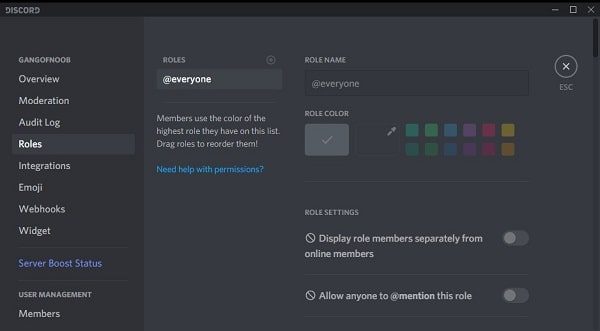
If there are too many users are on your Server. Then, you have to assign roles to other users whom you trust. So that they can help you to manage your server. Roles are nothing but just a set of permissions that you give to users. As an admin, you have the power to even delete the server. So, choose permission and assign roles wisely. Mainly you have to create Admin and Moderator Roles.
1. By going into Server Setting > Roles, you can add and delete roles in Discord. (For Complete information regarding Discord roles, read my article on it.)
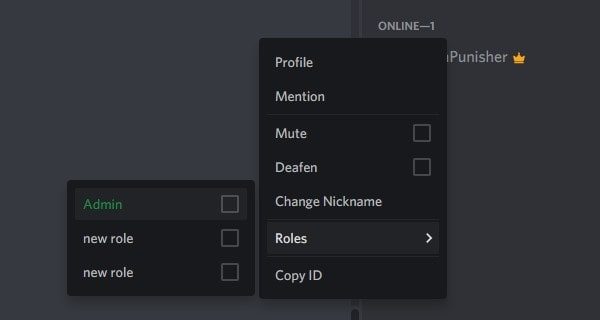
 2. And, by right-click on username > roles. You can select the role for that user.
How to Delete Discord Server?
If accidentally, you have created multiple servers. And, if you no longer want a server, then you can delete it. Though, deleting the server is not necessary. But, if you still want to do it for some reason then here are the steps.
1. First, open Discord and log in with your details.
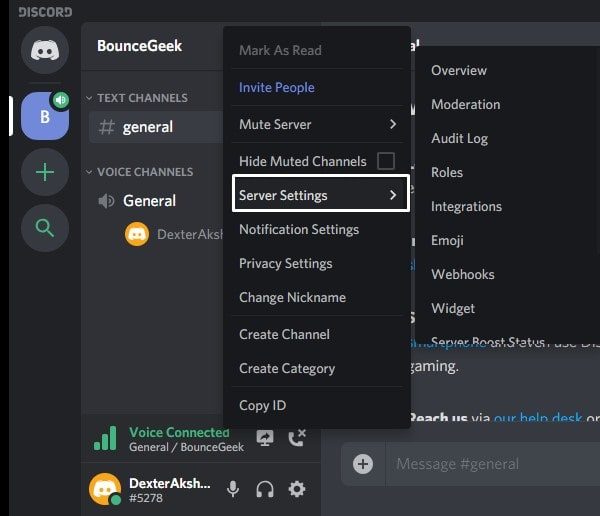
2. Select the server name that you want to delete. Right-Click on it, and, then click on Server Settings.
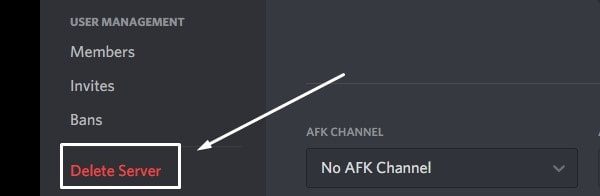
3. In Server Settings, scroll the left pane and select Delete Server.
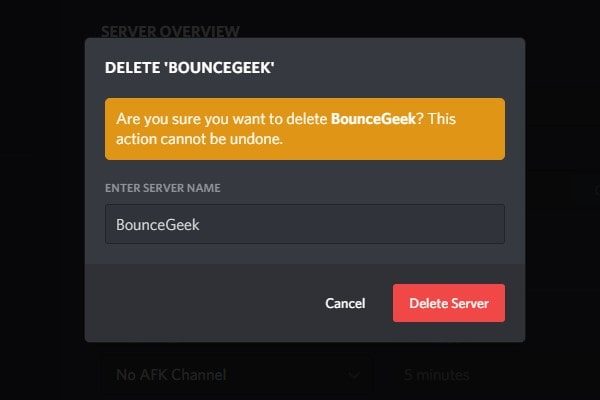
4. A Confirmation screen will now appear. Enter the server name correctly, and, then click on “Delete Server”.
That’s it. The server will get deleted and will not appear anymore in your server list. Also, users will no longer be able to access it.
So, that’s all about it, how to add, manage, and delete servers in Discord. Do you know you can format text in Discord?. Even, can write in different Colors, in Text Channels. Read my article on the Discord Text formatting guide.